Launch App Using Notebooks Hub
Using the Notebooks Hub UI, a new server can be created to launch your app.
Use the sidebar navigation panel to select Servers and select Create New to launch the server wizard.
Select “Create New” in the top right corner. Select Streamlit application type.
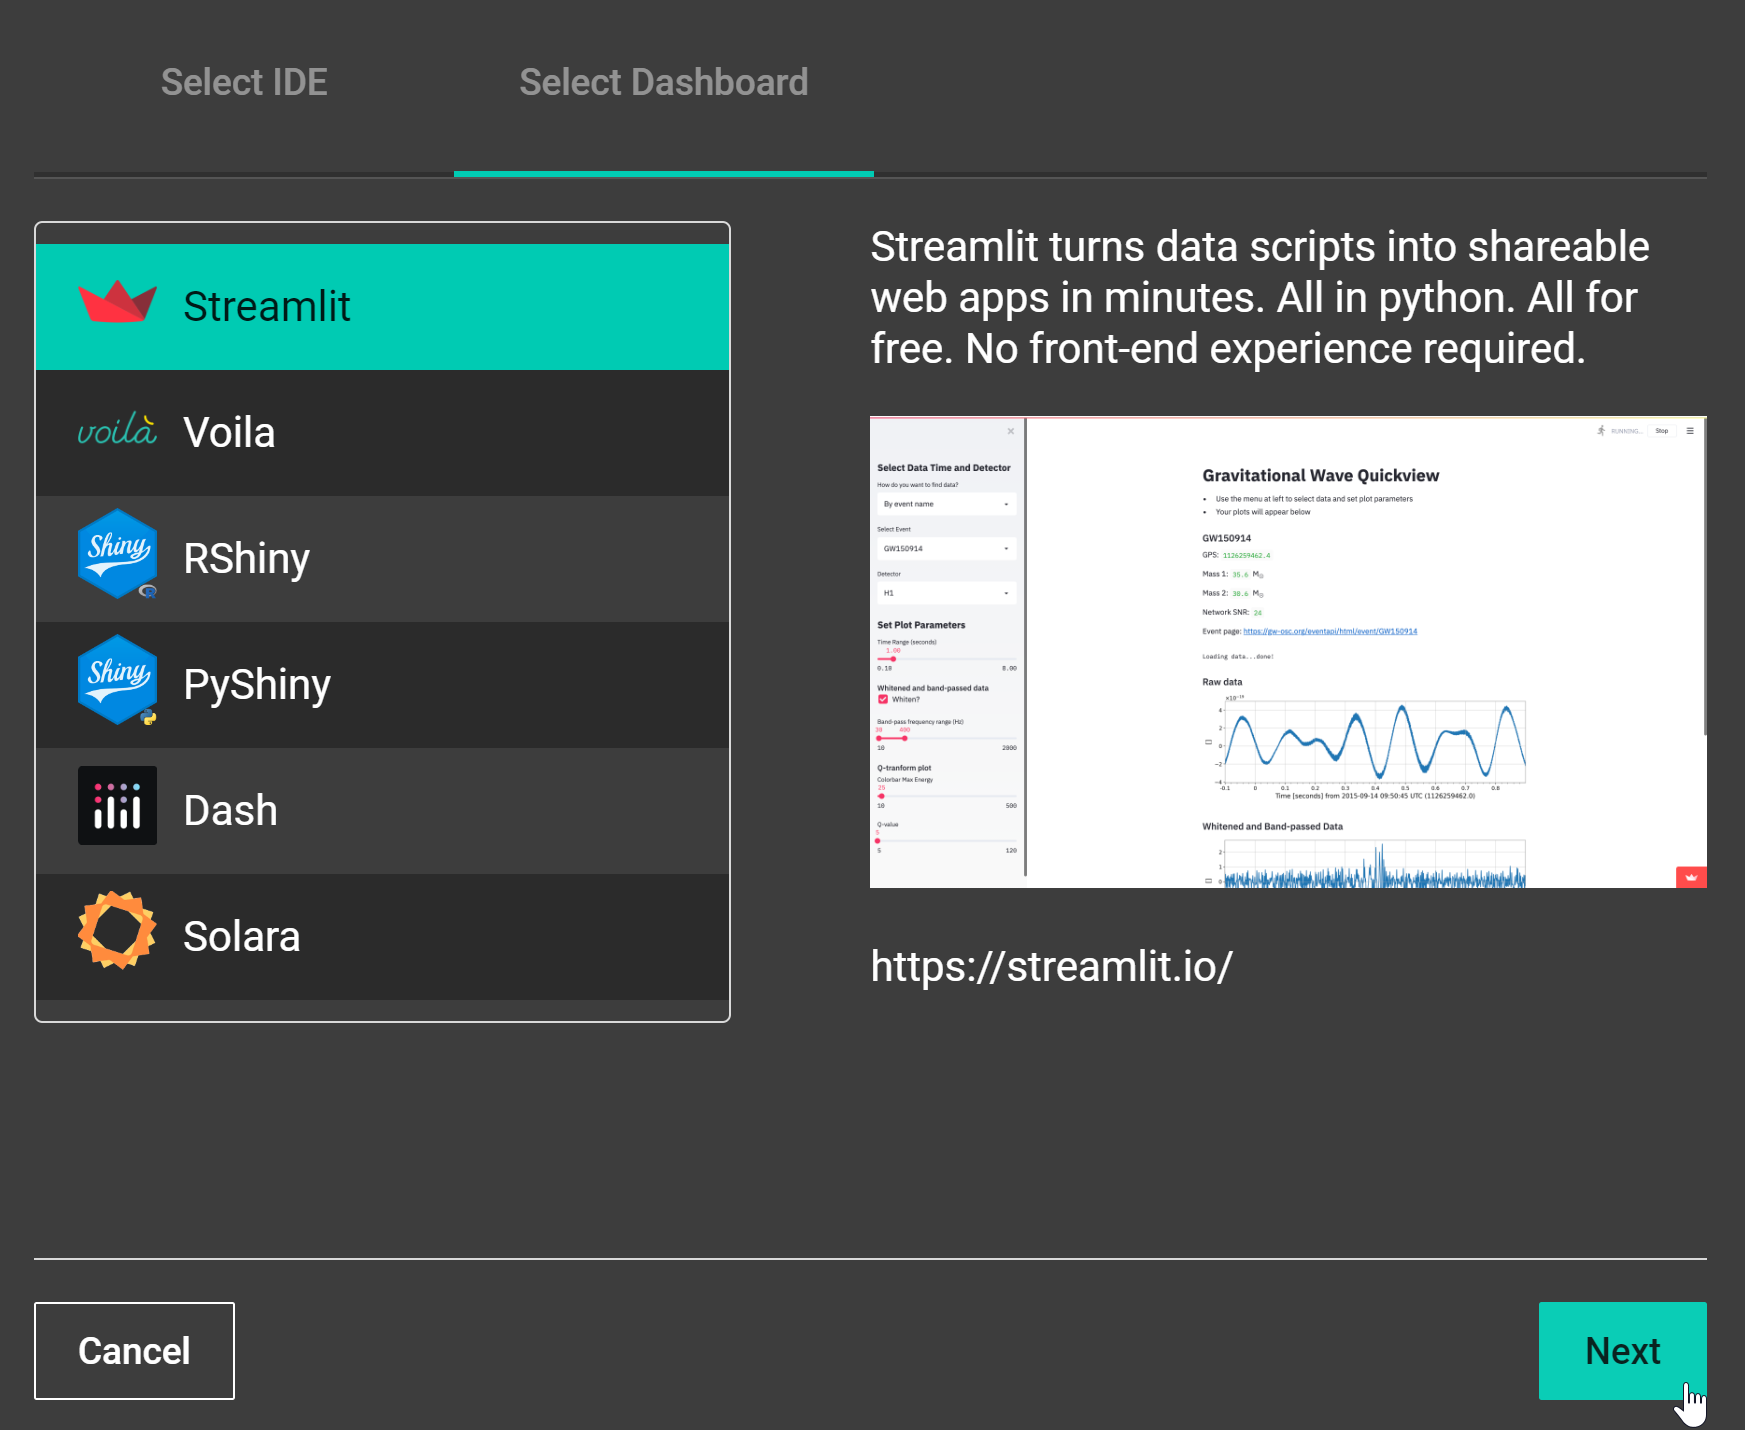
A screenshot of Notebooks Hub workflow to launch Streamlit app
Upload
<appFilename>.pyfile from local computer or select one from the file cloud (i.e., on the server).
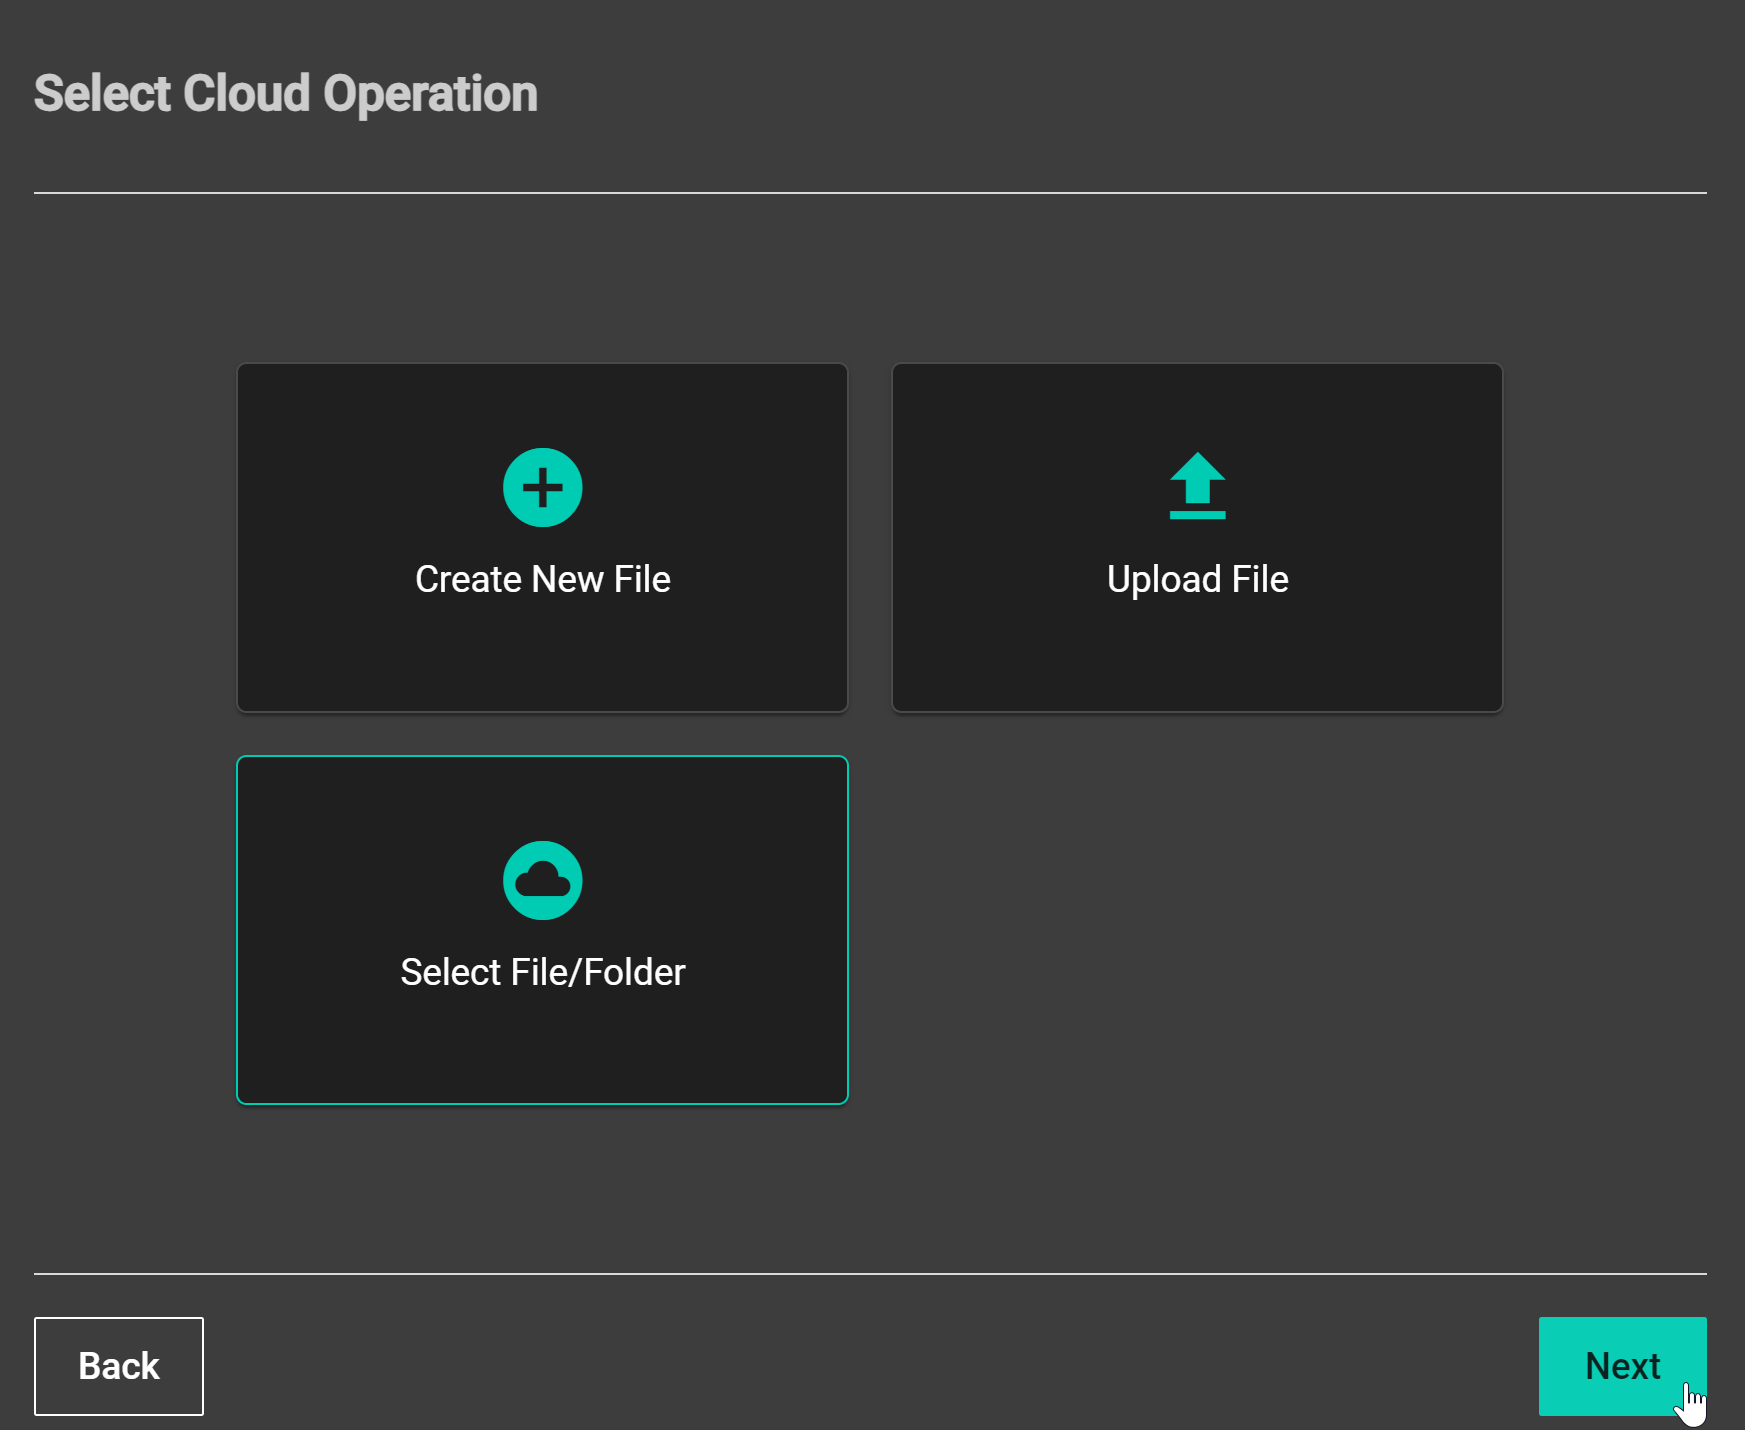
A screenshot of Notebooks Hub workflow to launch Streamlit app
If selecting from the file cloud, navigate to desired
<appFilename>.pyfile.
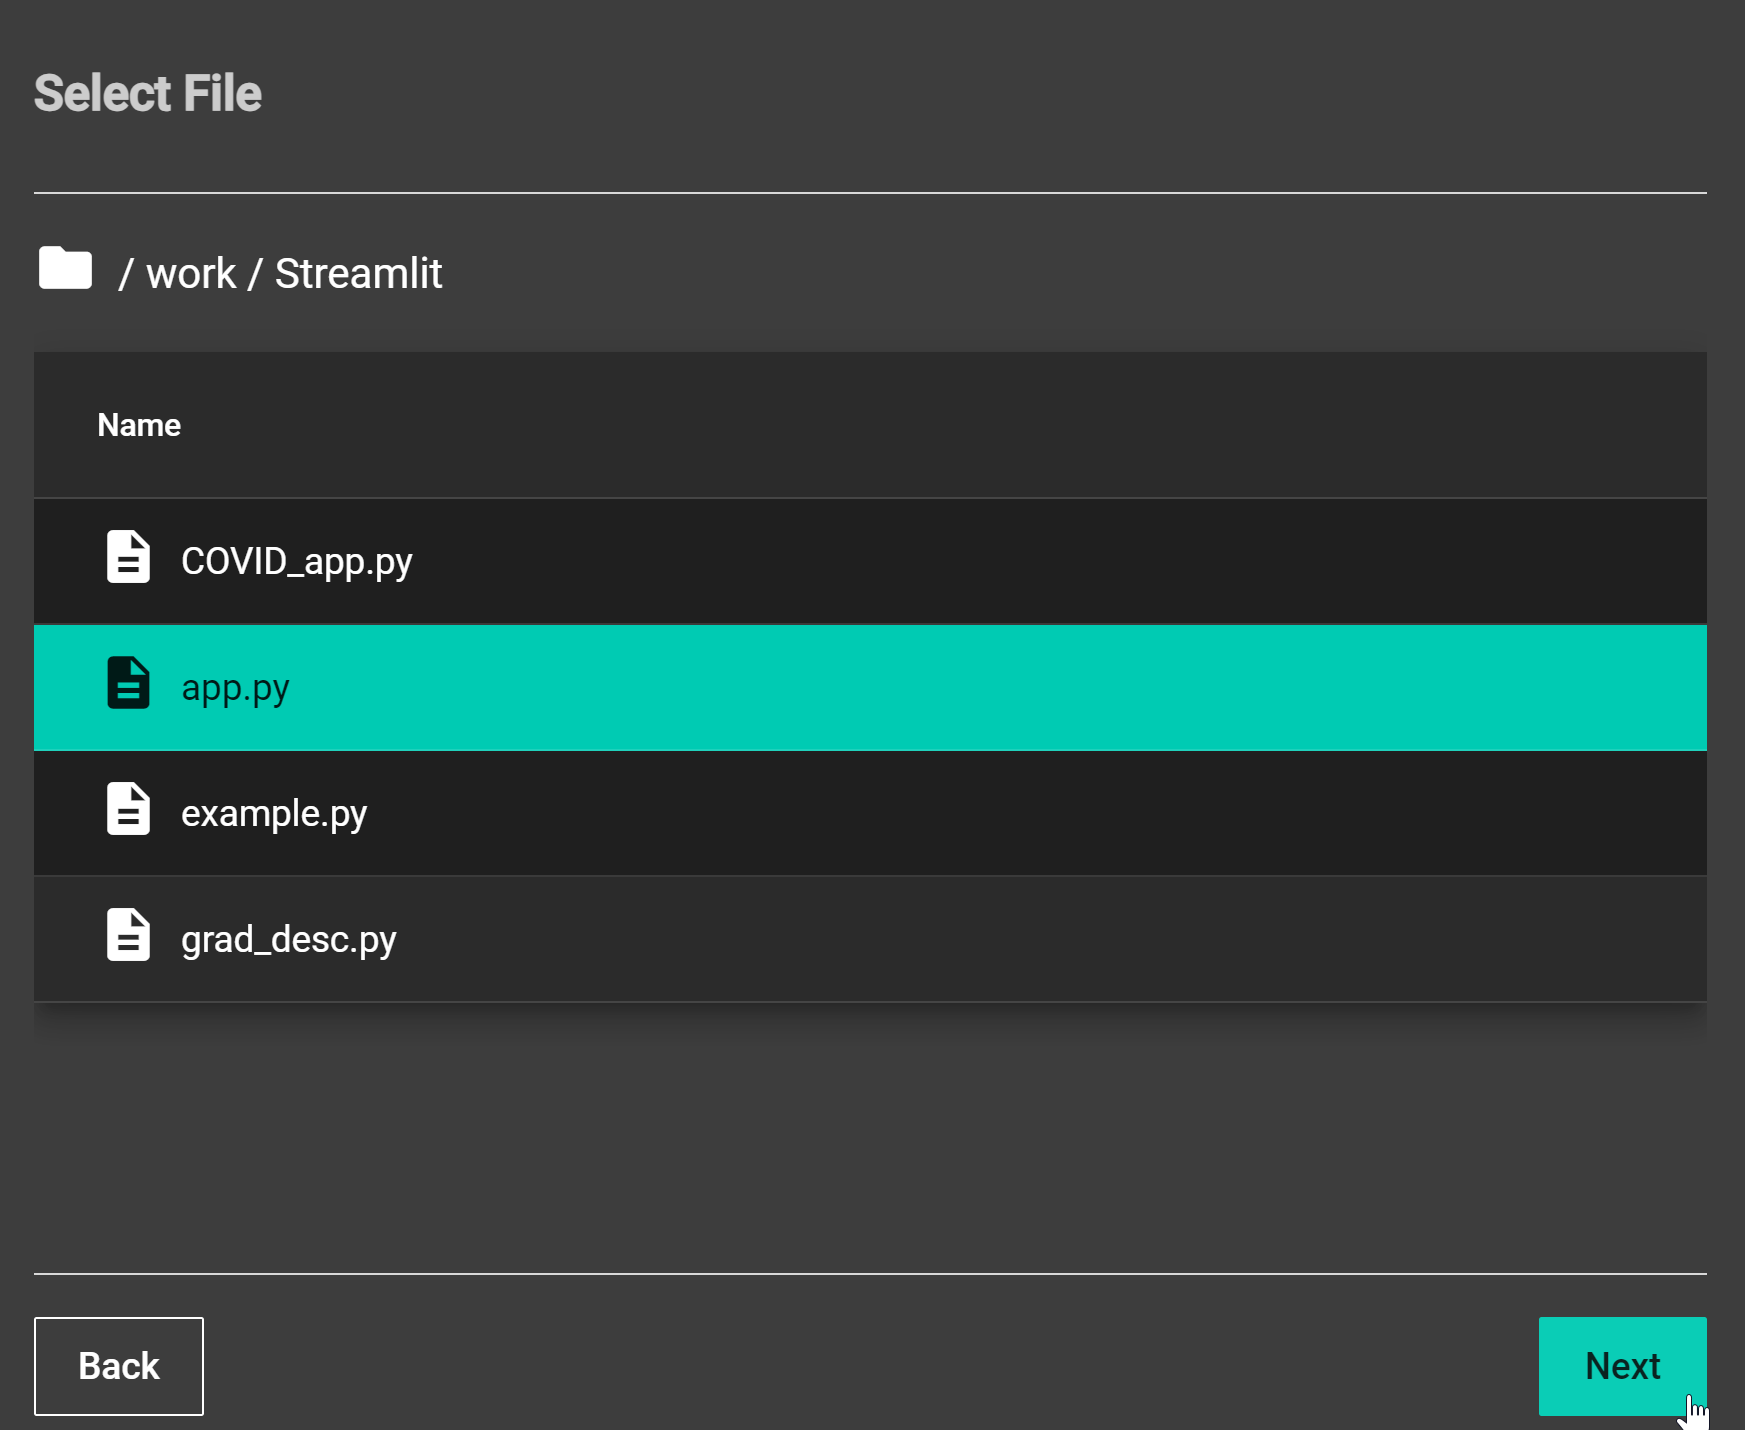
A screenshot of Notebooks Hub workflow to launch Streamlit app
Select appropriate hardware to utilize from server host.
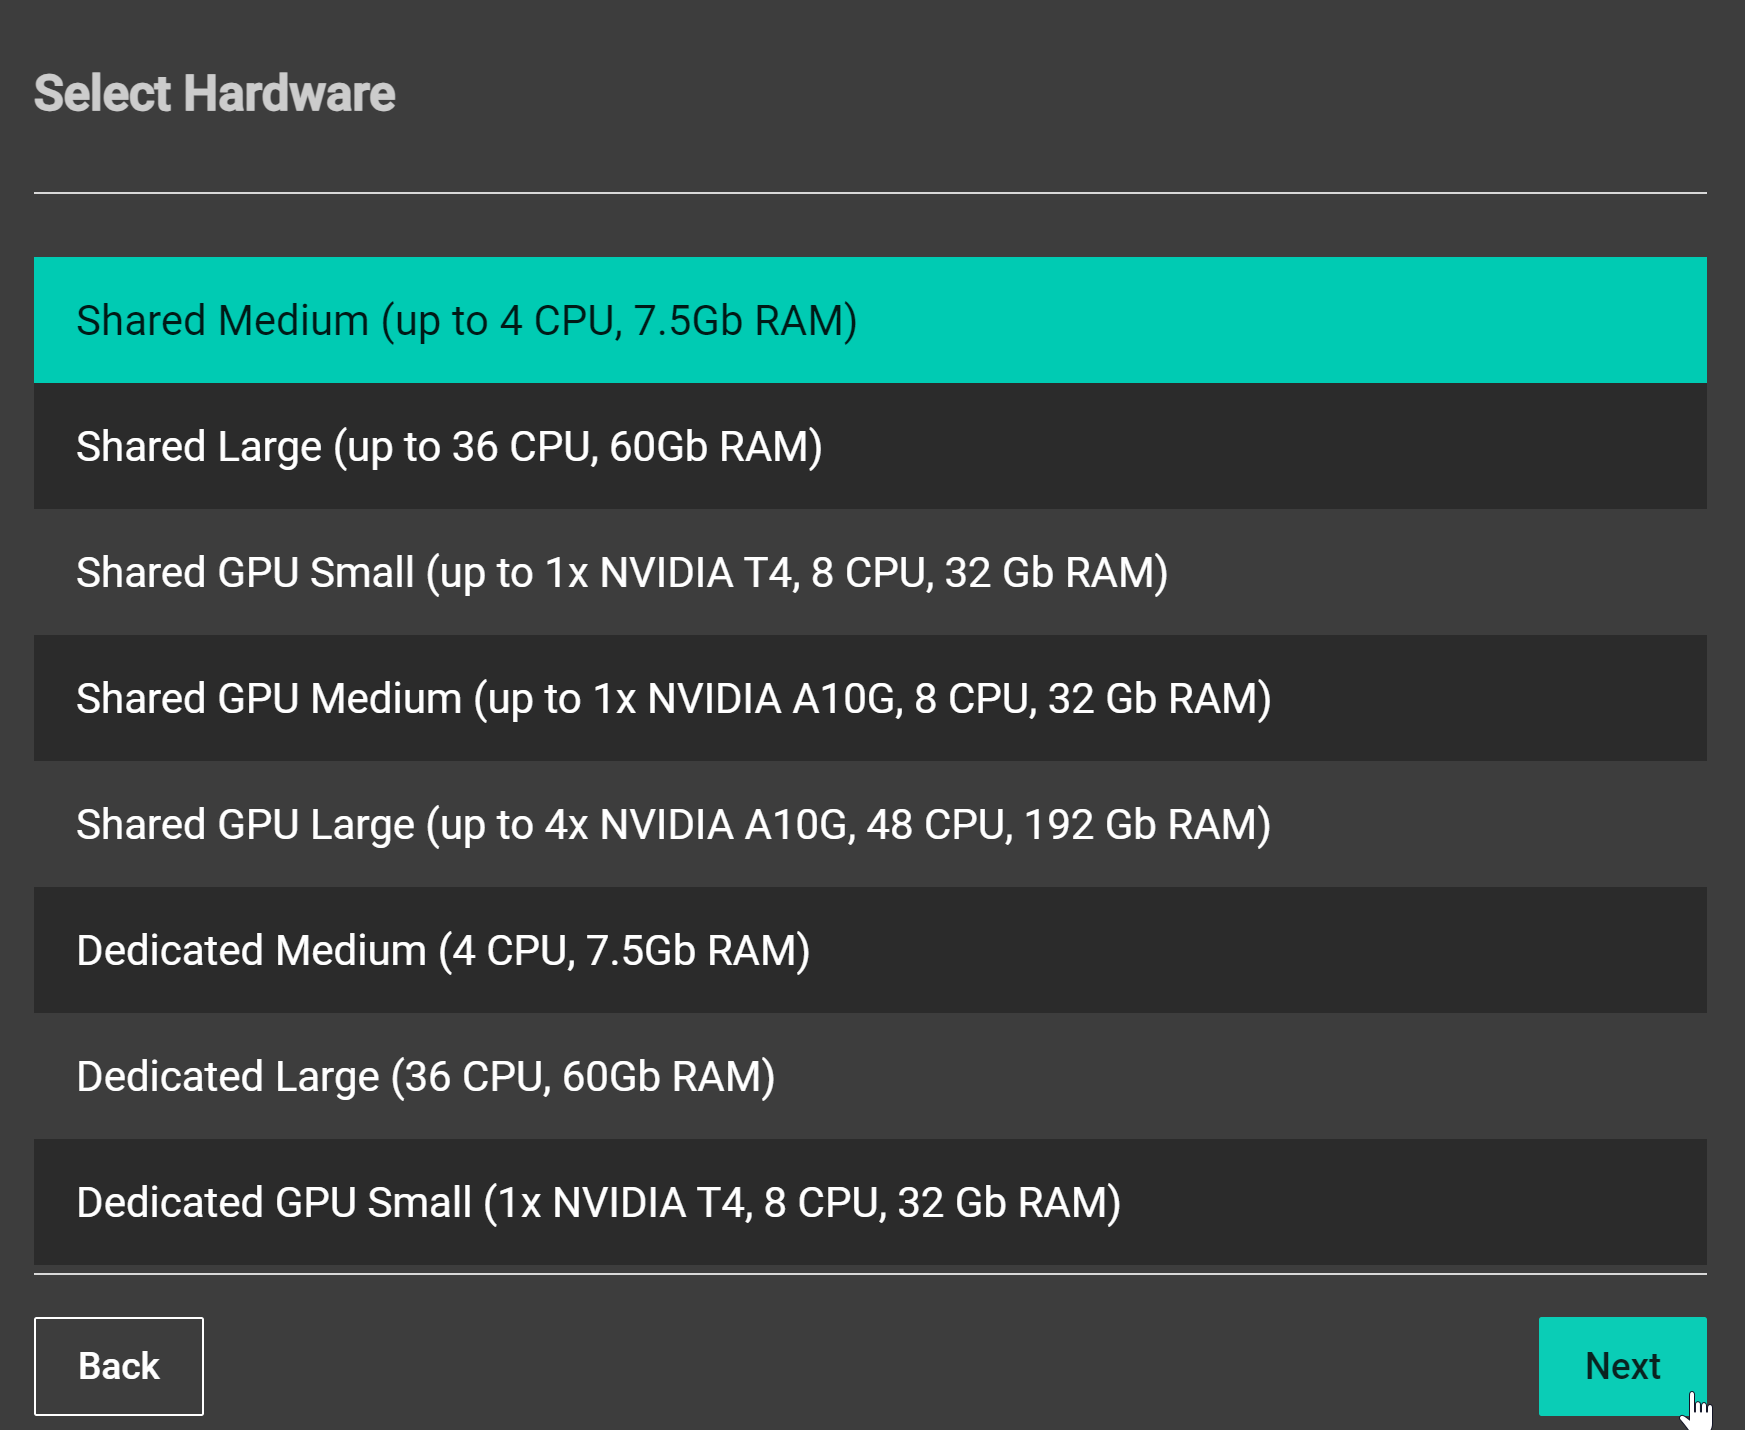
A screenshot of Notebooks Hub workflow to launch Streamlit app
Select appropriate module (i.e., python environment) to load for
<appFilename>.pyfile.
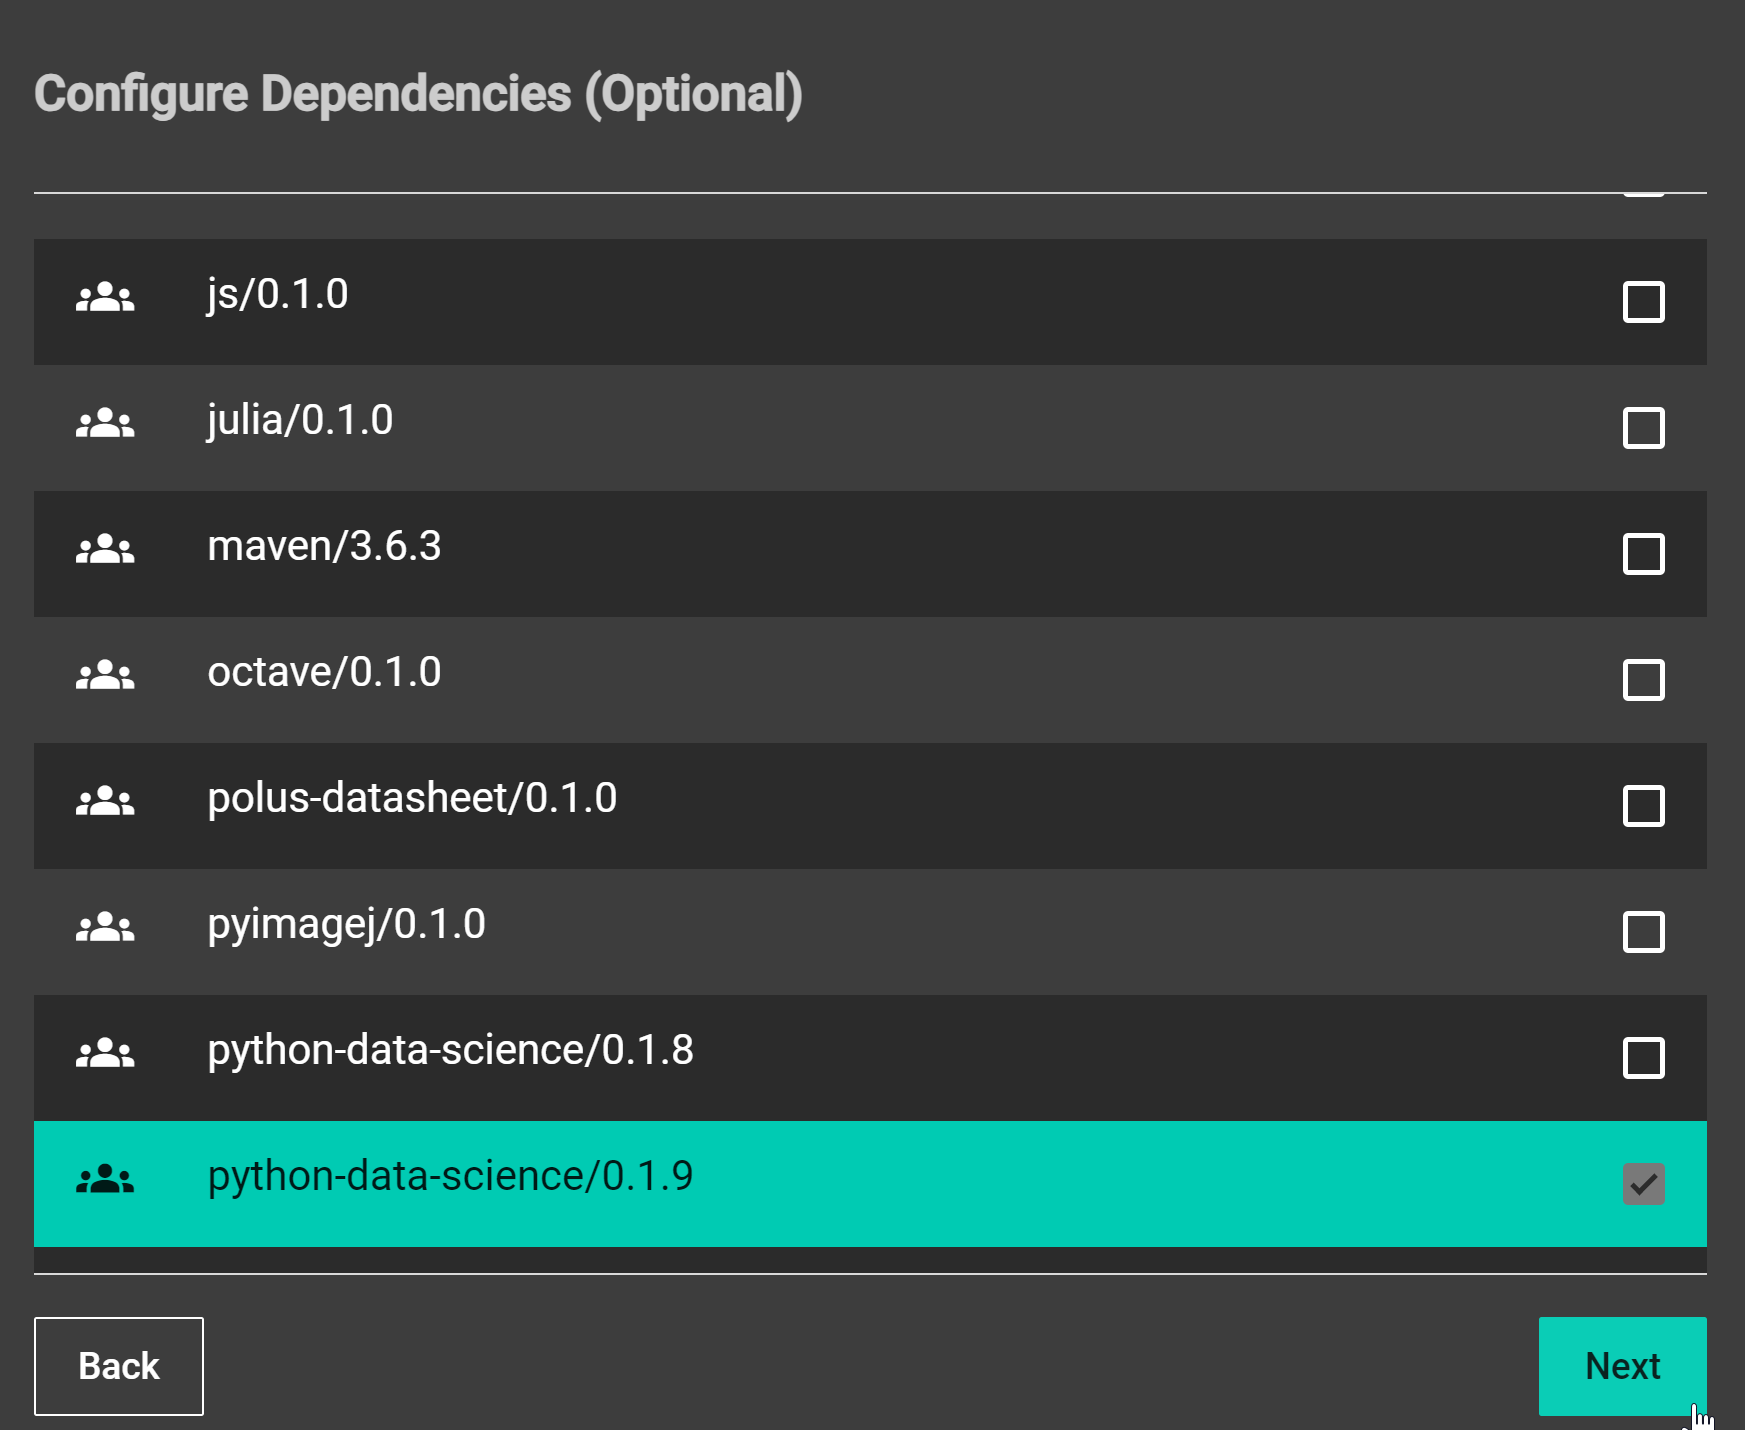
A screenshot of Notebooks Hub workflow to launch Streamlit app
Add app name and description.
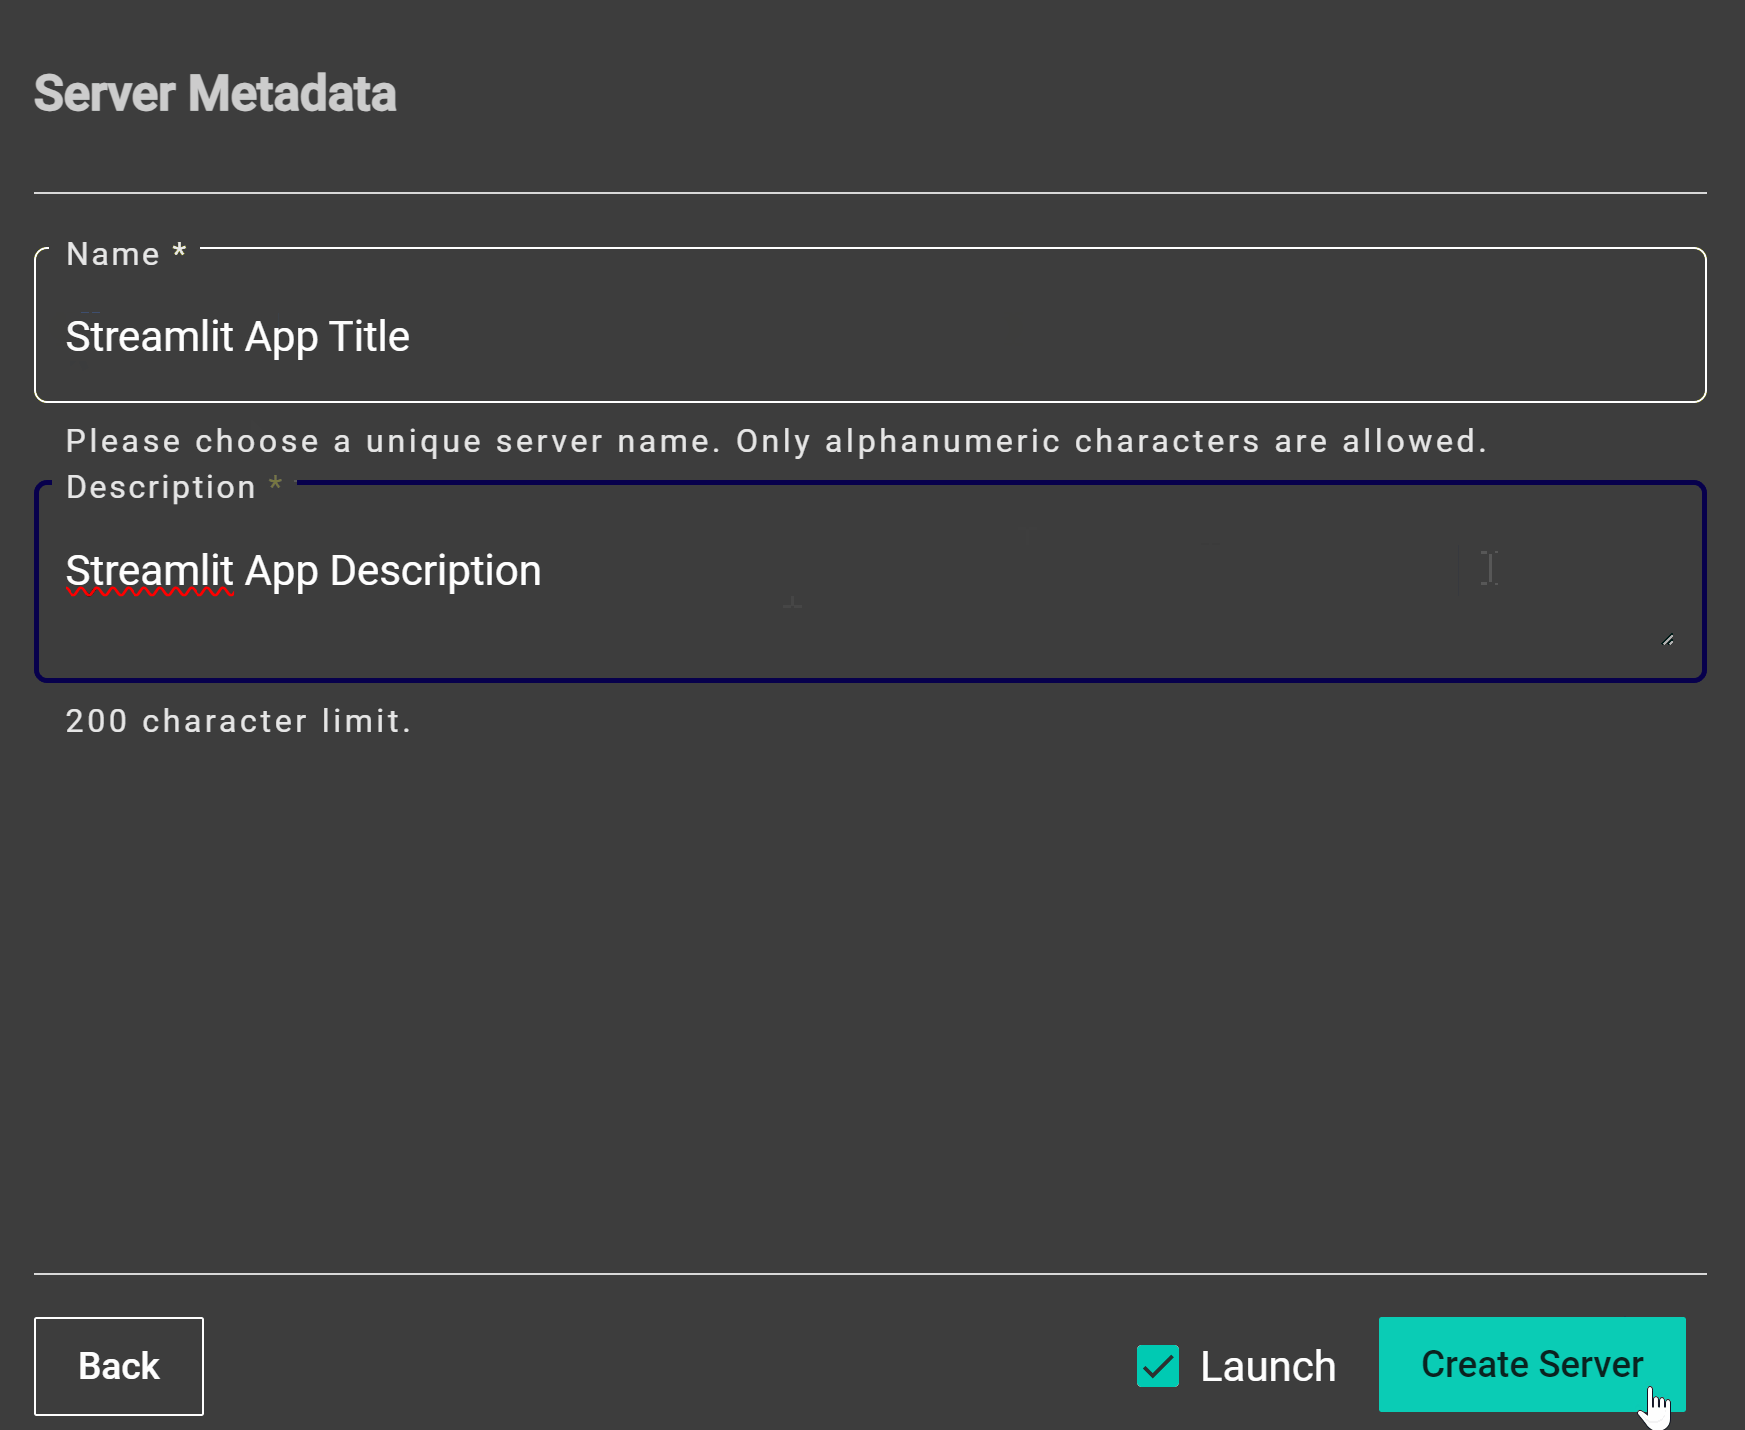
A screenshot of Notebooks Hub workflow to launch Streamlit app
After selecting “Create Server” through the wizard, your app should now appear on the Notebooks Hub dashboard.
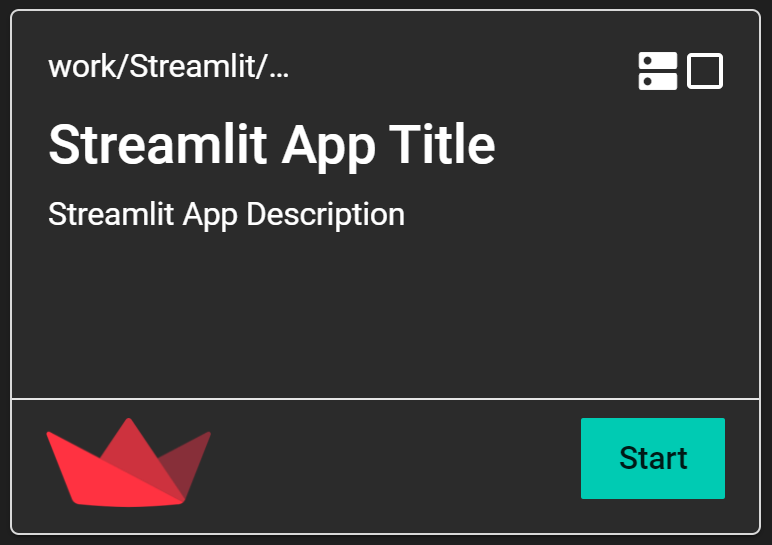
A screenshot of the streamlit dashboard on Notebooks Hub