RStudio IDE
RStudio is an integrated development environment (IDE) for open-source data science using R, a programming language for statistical computing and graphics. RStudio IDE is one of many open-source tools offered by Posit and supports a variety of file types in addition to those using R, such as Python, C++, Markdown, and more.
Launch RStudio Instance on Notebooks Hub
Go to Notebooks Hub and log in with your credentials.
A screenshot of the Notebooks Hub login page

A screenshot of the Notebooks Hub credentials page
Next, launch RStudio using either of the following two methods.
Method 1: Quick Launch
From the Home page, select RStudio to quick launch the IDE.
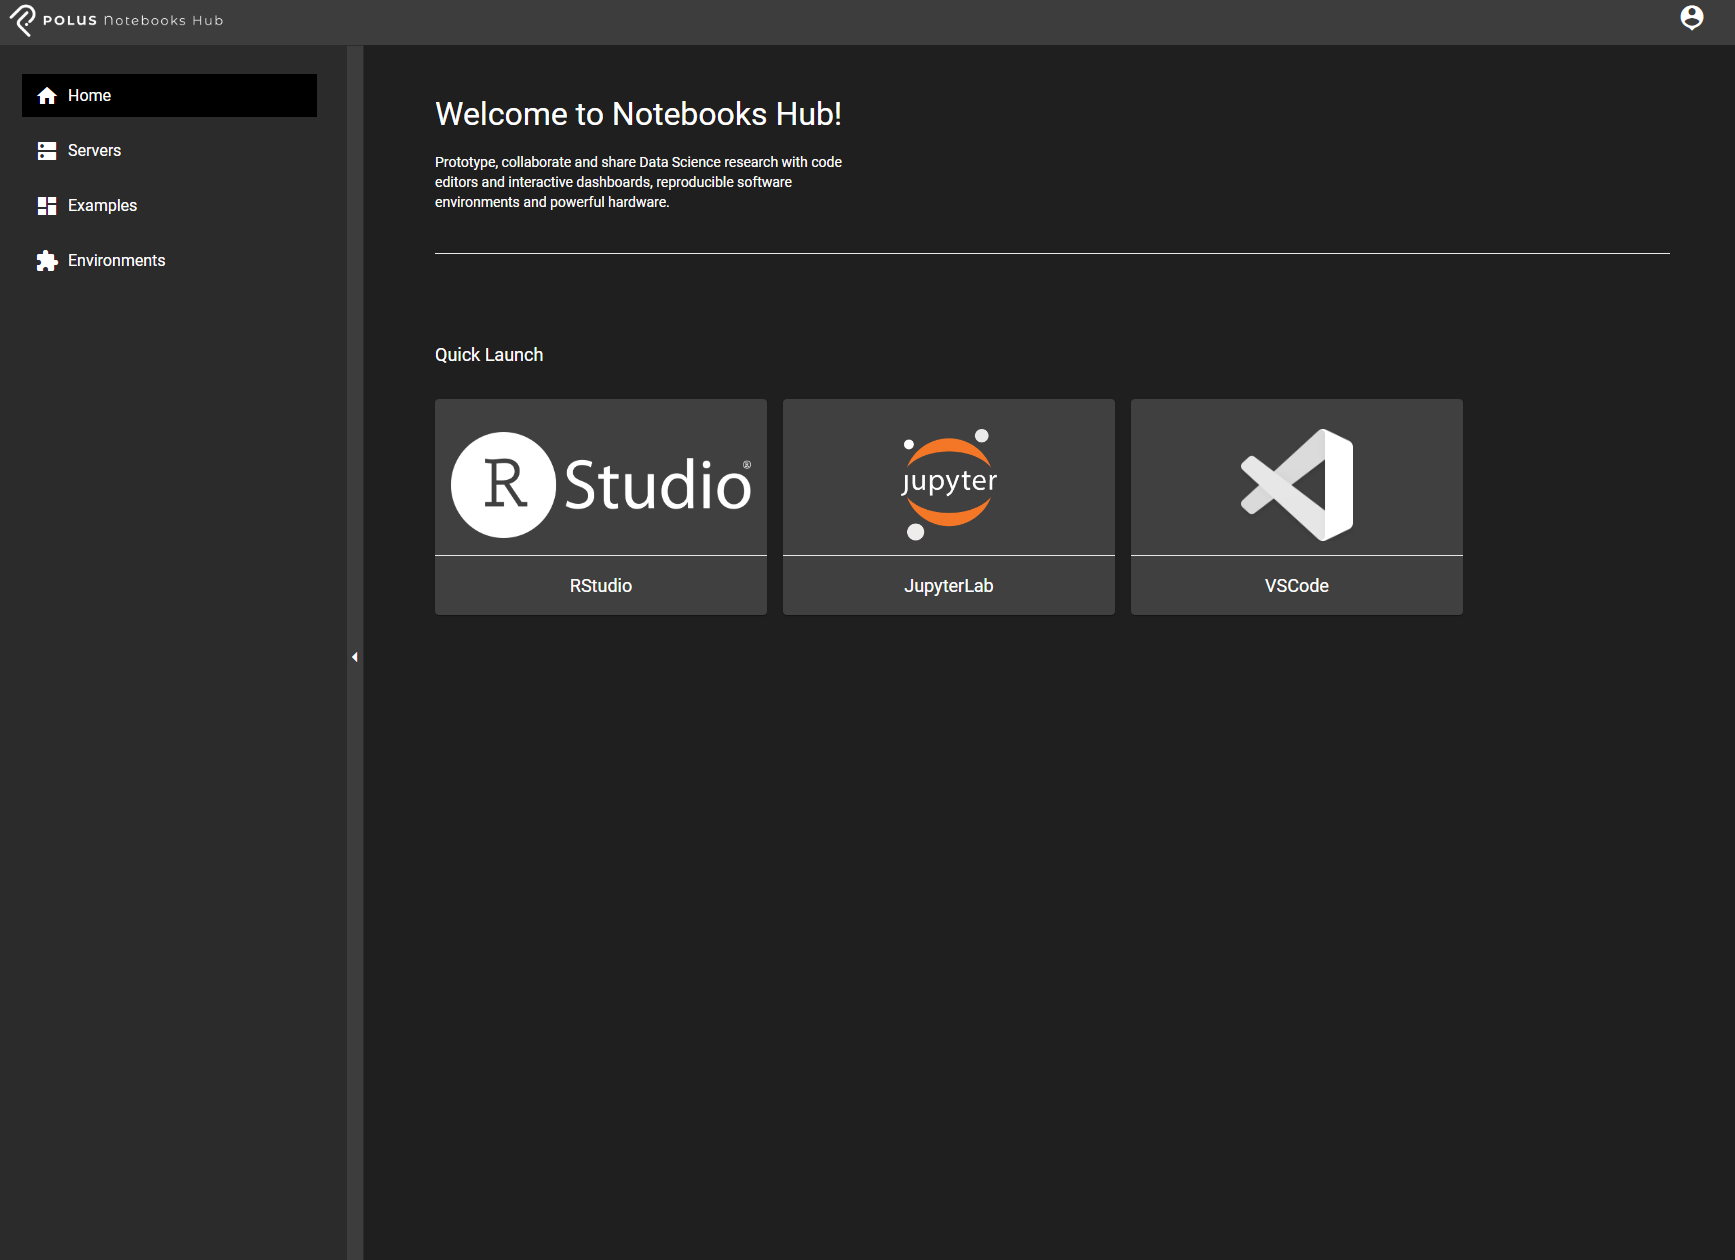
A screenshot of the Notebooks Hub home page
Method 2: Custom Server Instance
Alternatively, use the sidebar navigation panel to select Servers and select Create New to launch an RStudio Instance with additional configurations.

A screenshot of the Notebooks Hub sidebar and dashboard panel
Next, work through the steps within the server wizard. Steps are illustrated below.
Select RStudio under the IDE tab.
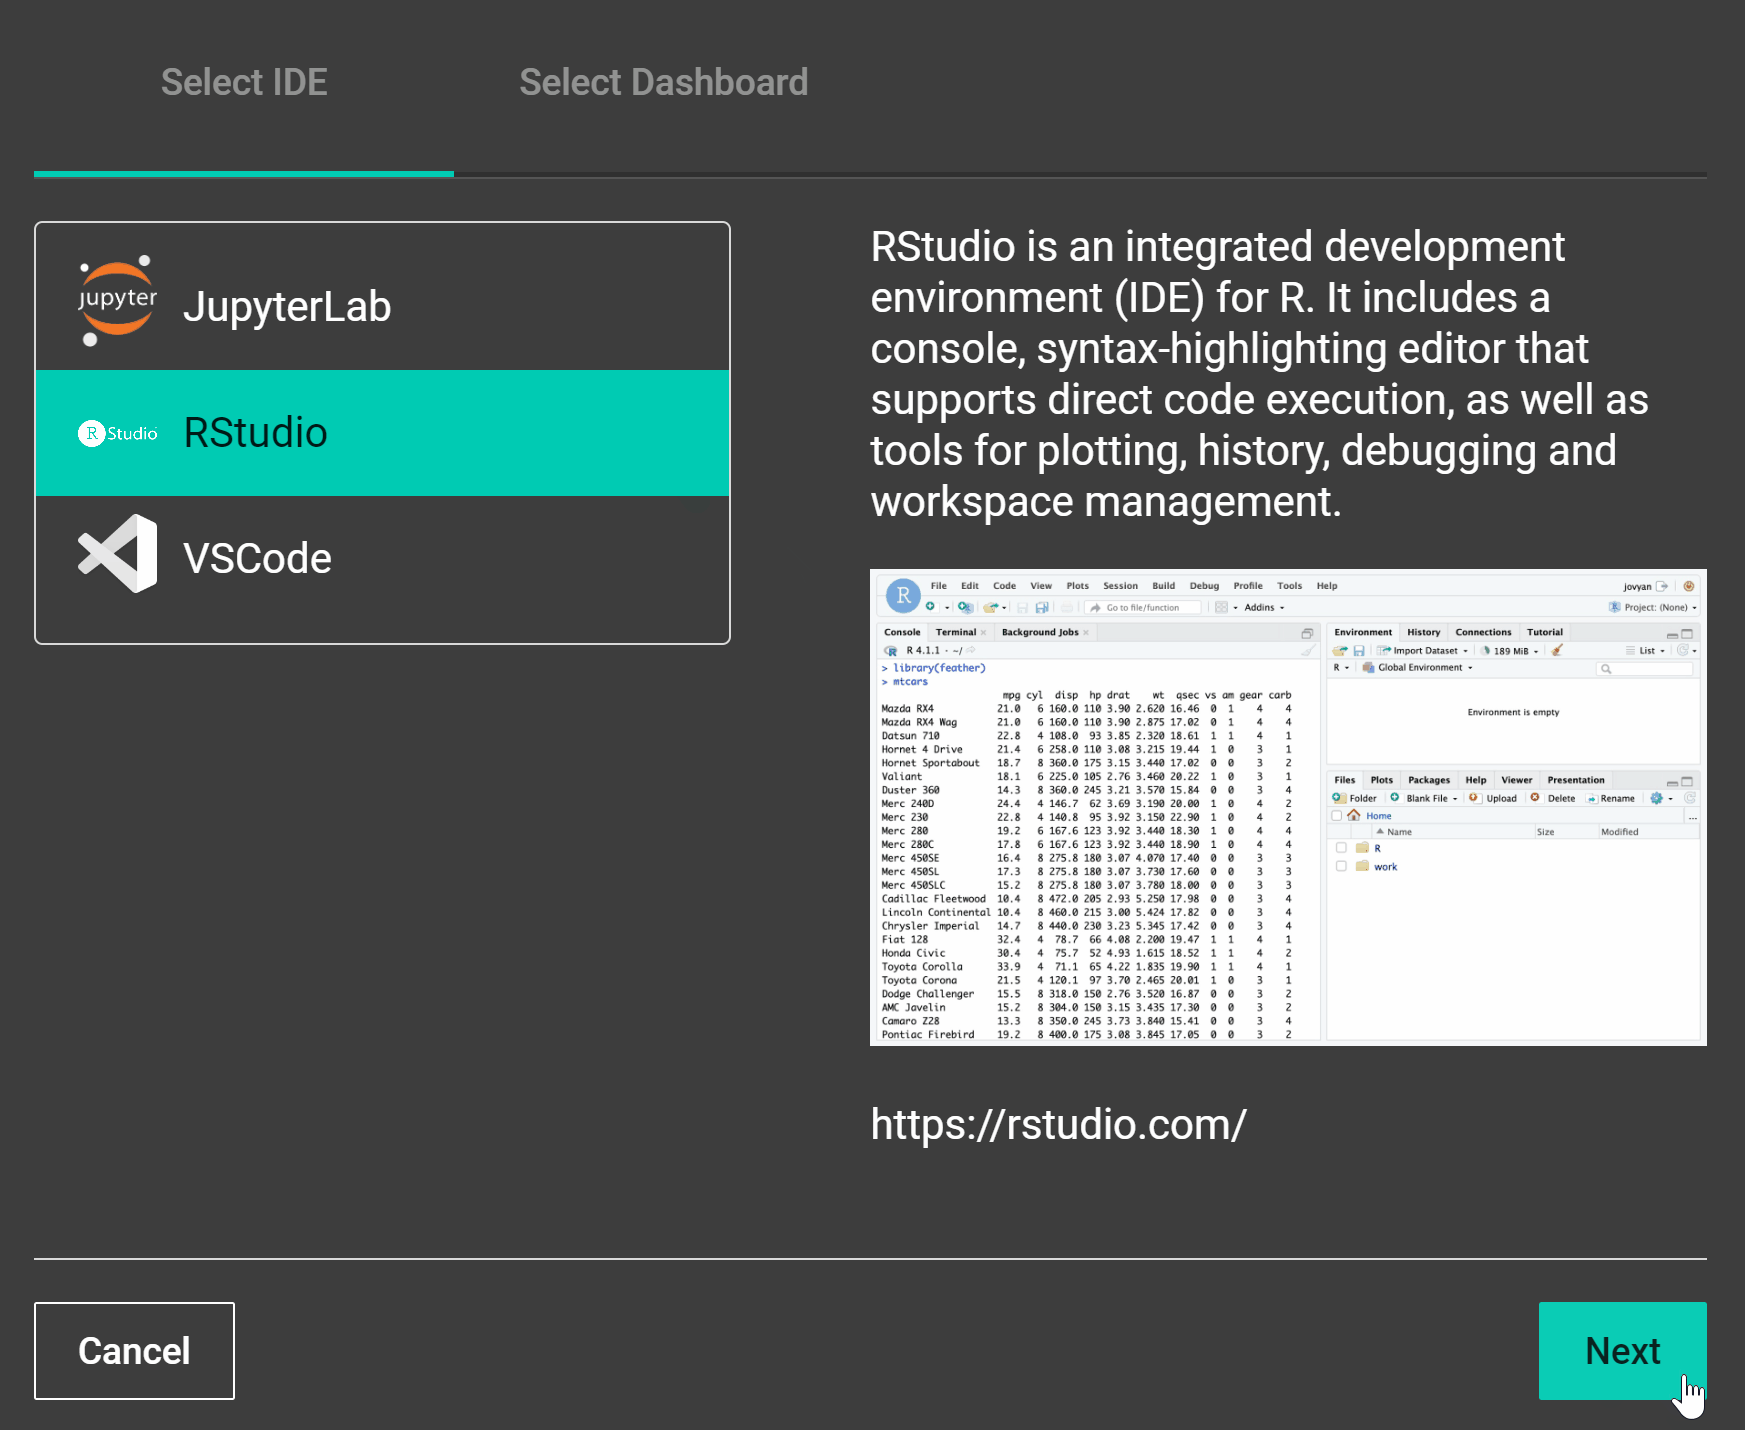
A screenshot of the Notebooks Hub new server steps
Select one of the options provided below.
Create New File: Create a new file when launching the server. If selected, the wizard will provide possible file extensions for the new file.
Upload File: This option allows the user to upload a file from the local computer onto the server.
Select File/Folder: This option points the server to a specific file that already exists on the server.
Skip: Launch without pointing to file. This is helpful when launching a fresh instance.
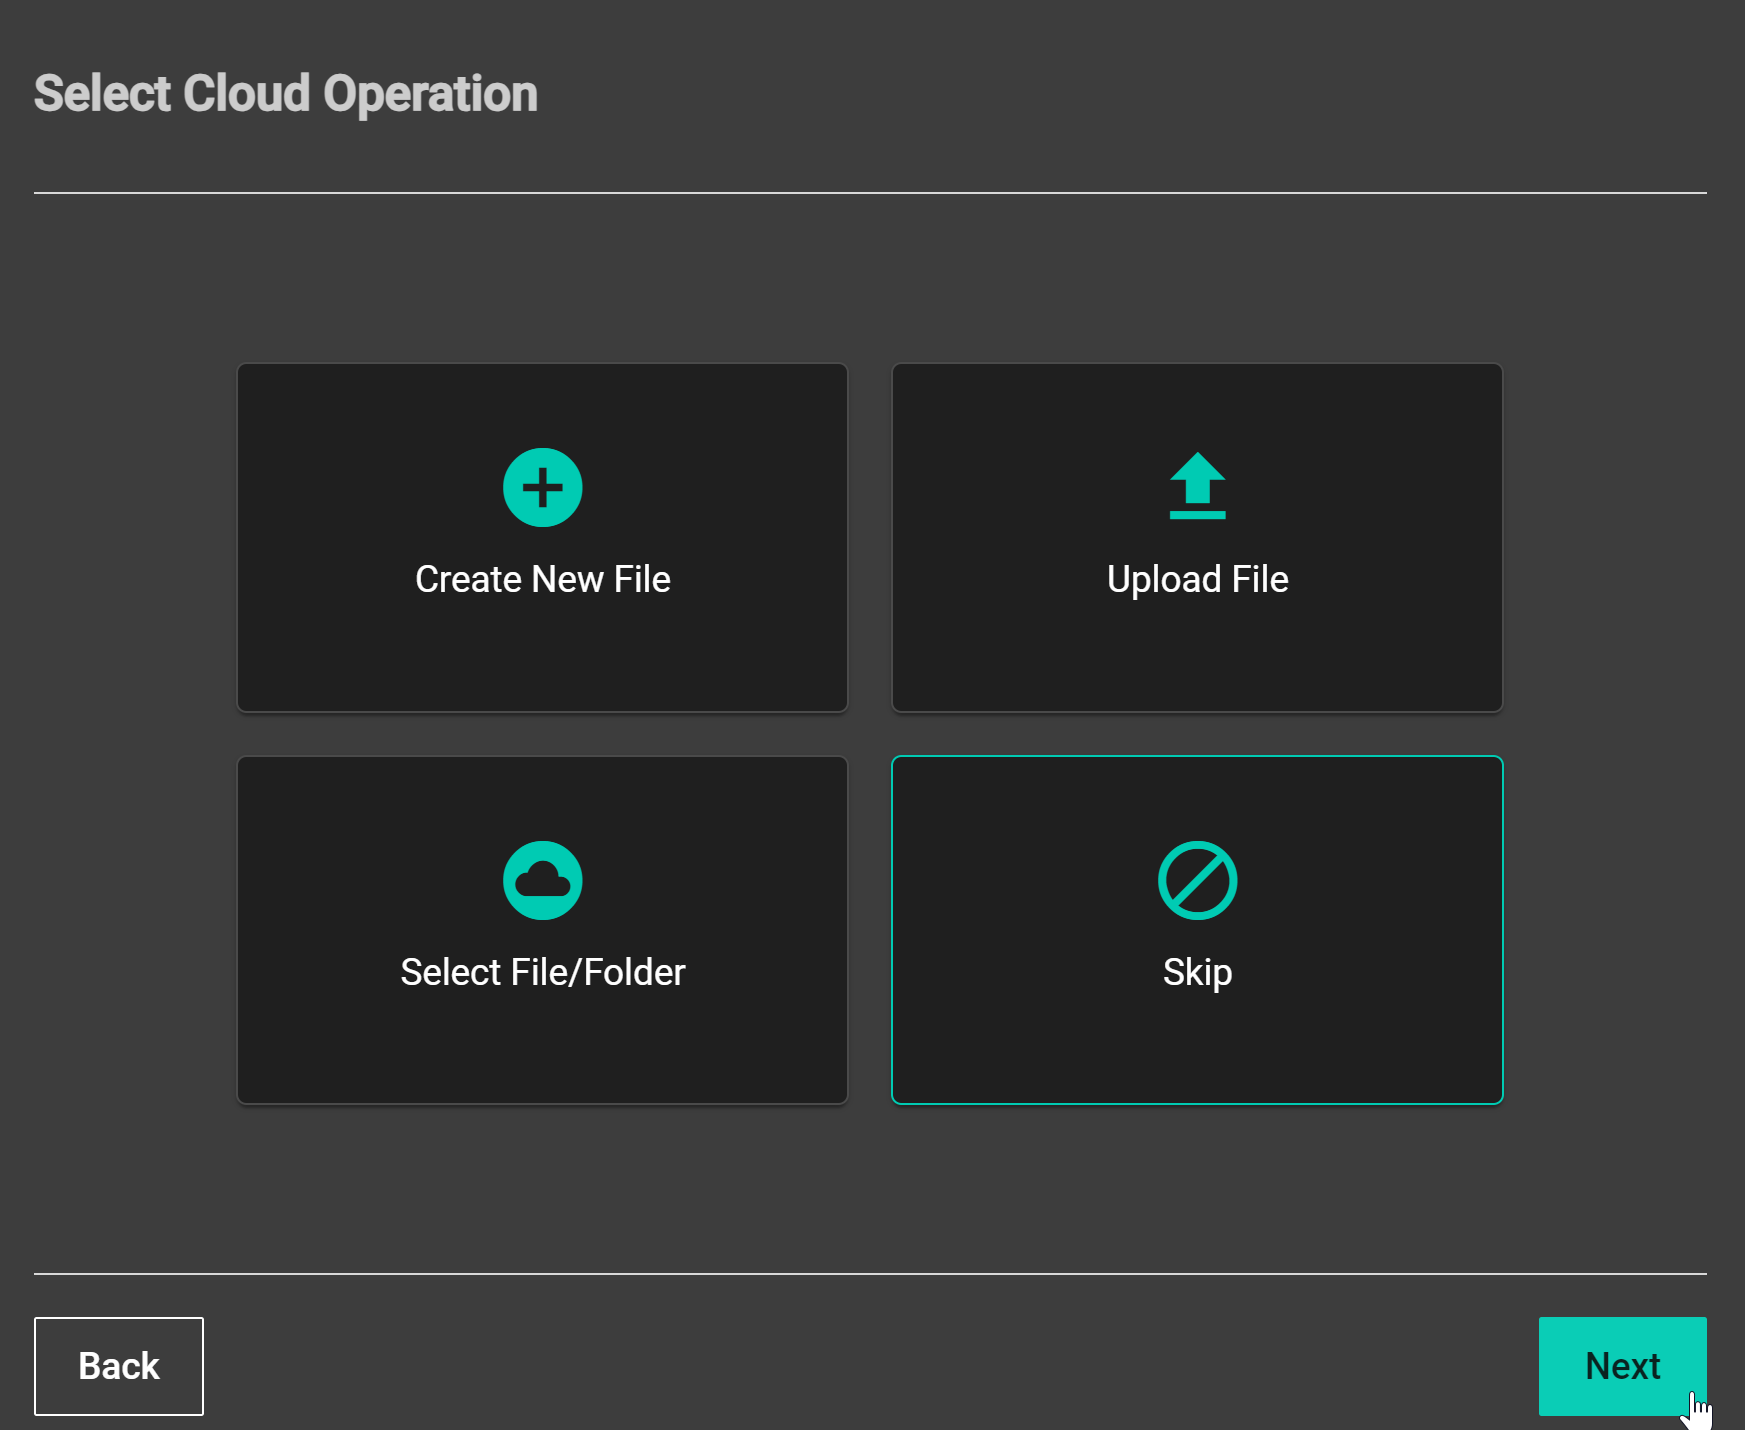
A screenshot of the Notebooks Hub new server steps
Select appropriate virtual hardware to utilize from the server host. In most cases, Shared Medium CPU is sufficient.
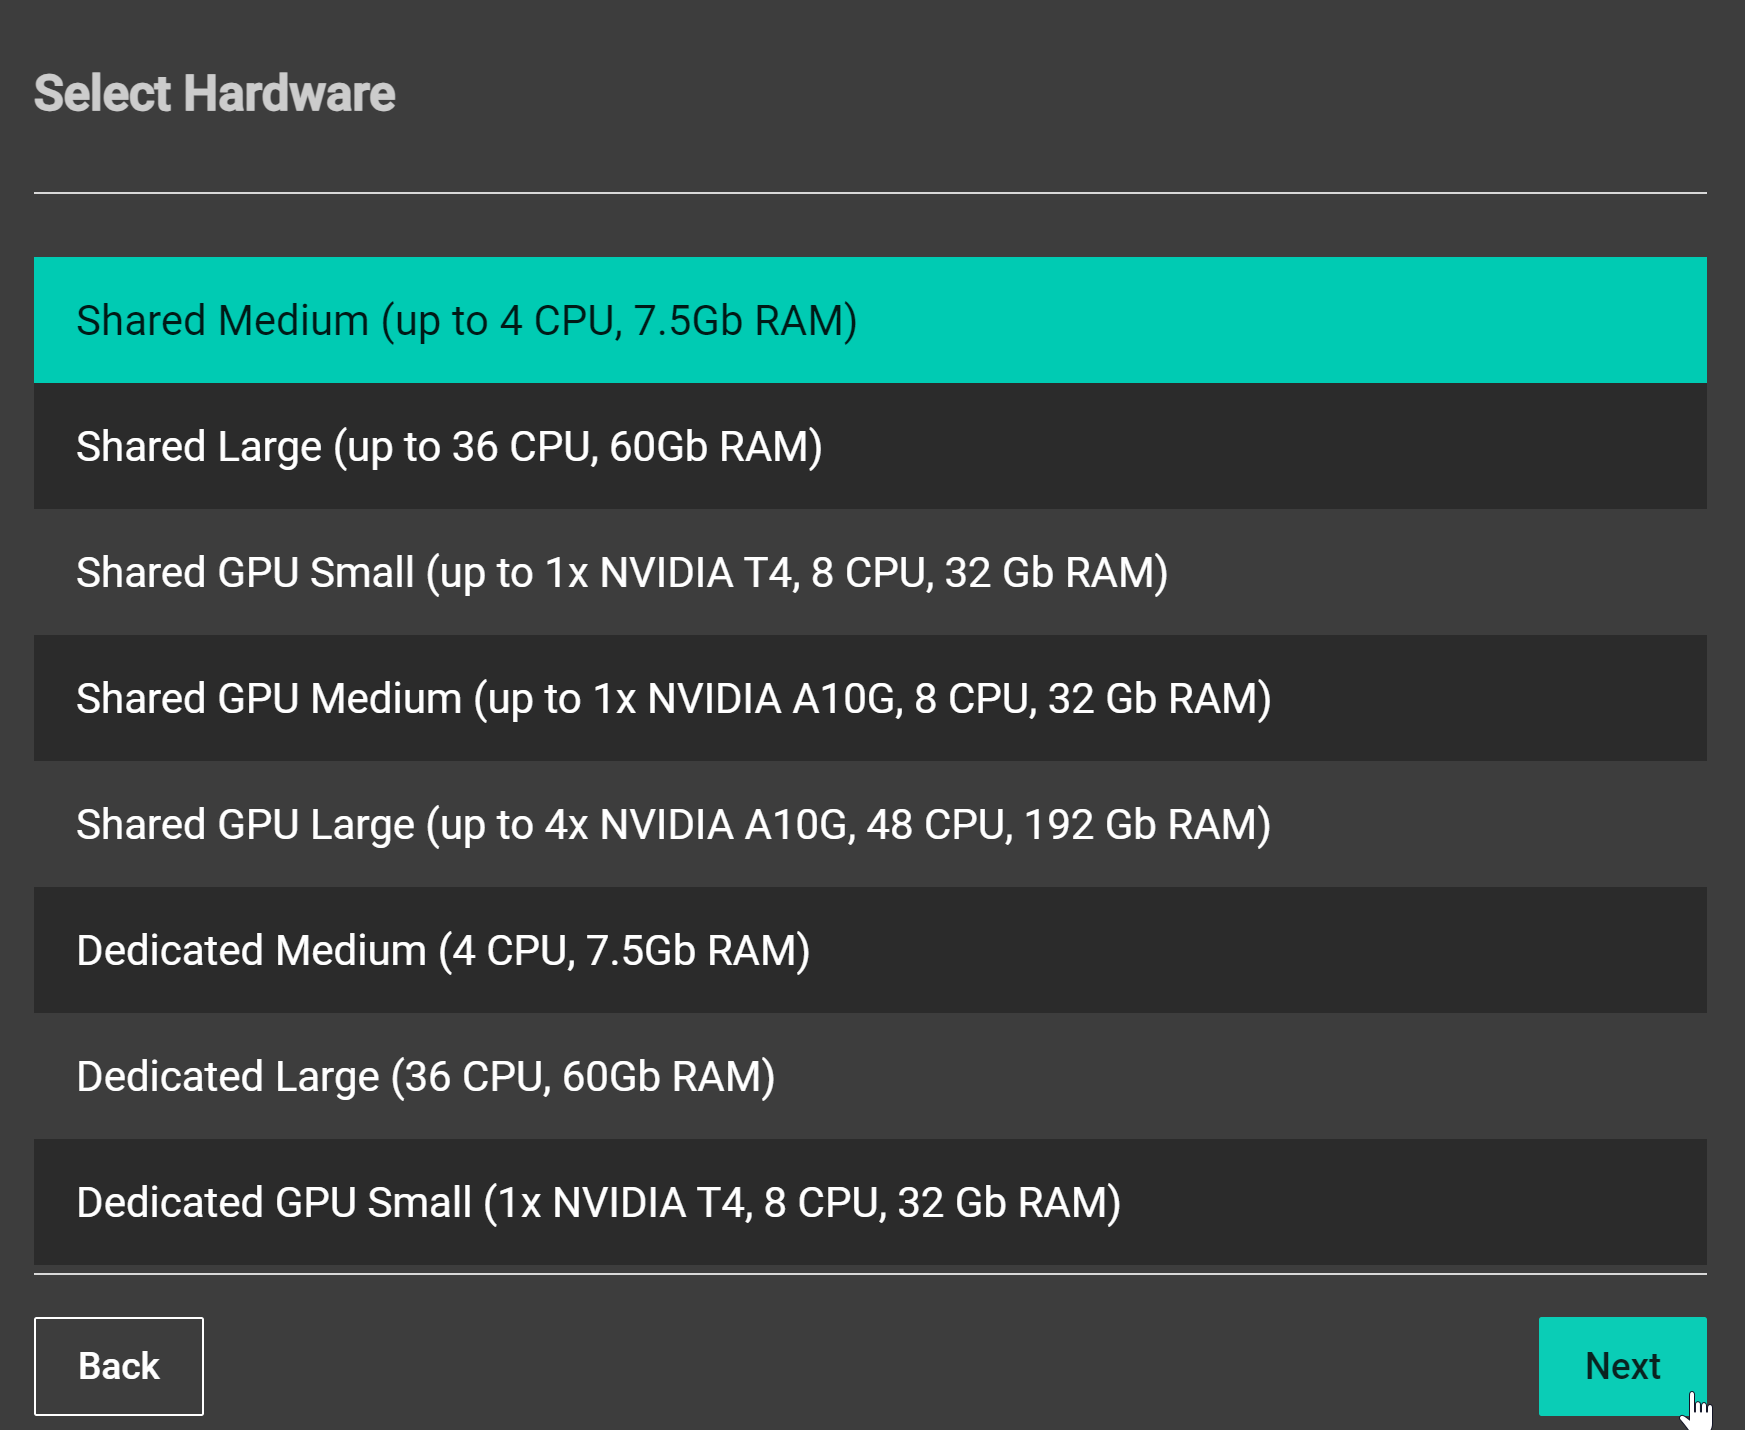
A screenshot of the Notebooks Hub new server steps
Select the appropriate module (i.e., python environment) to load for the instance. The latest R module is a great starting point. Custom python environments for R can be created by adapting the steps outlined inside the Notebooks Hub UI section.
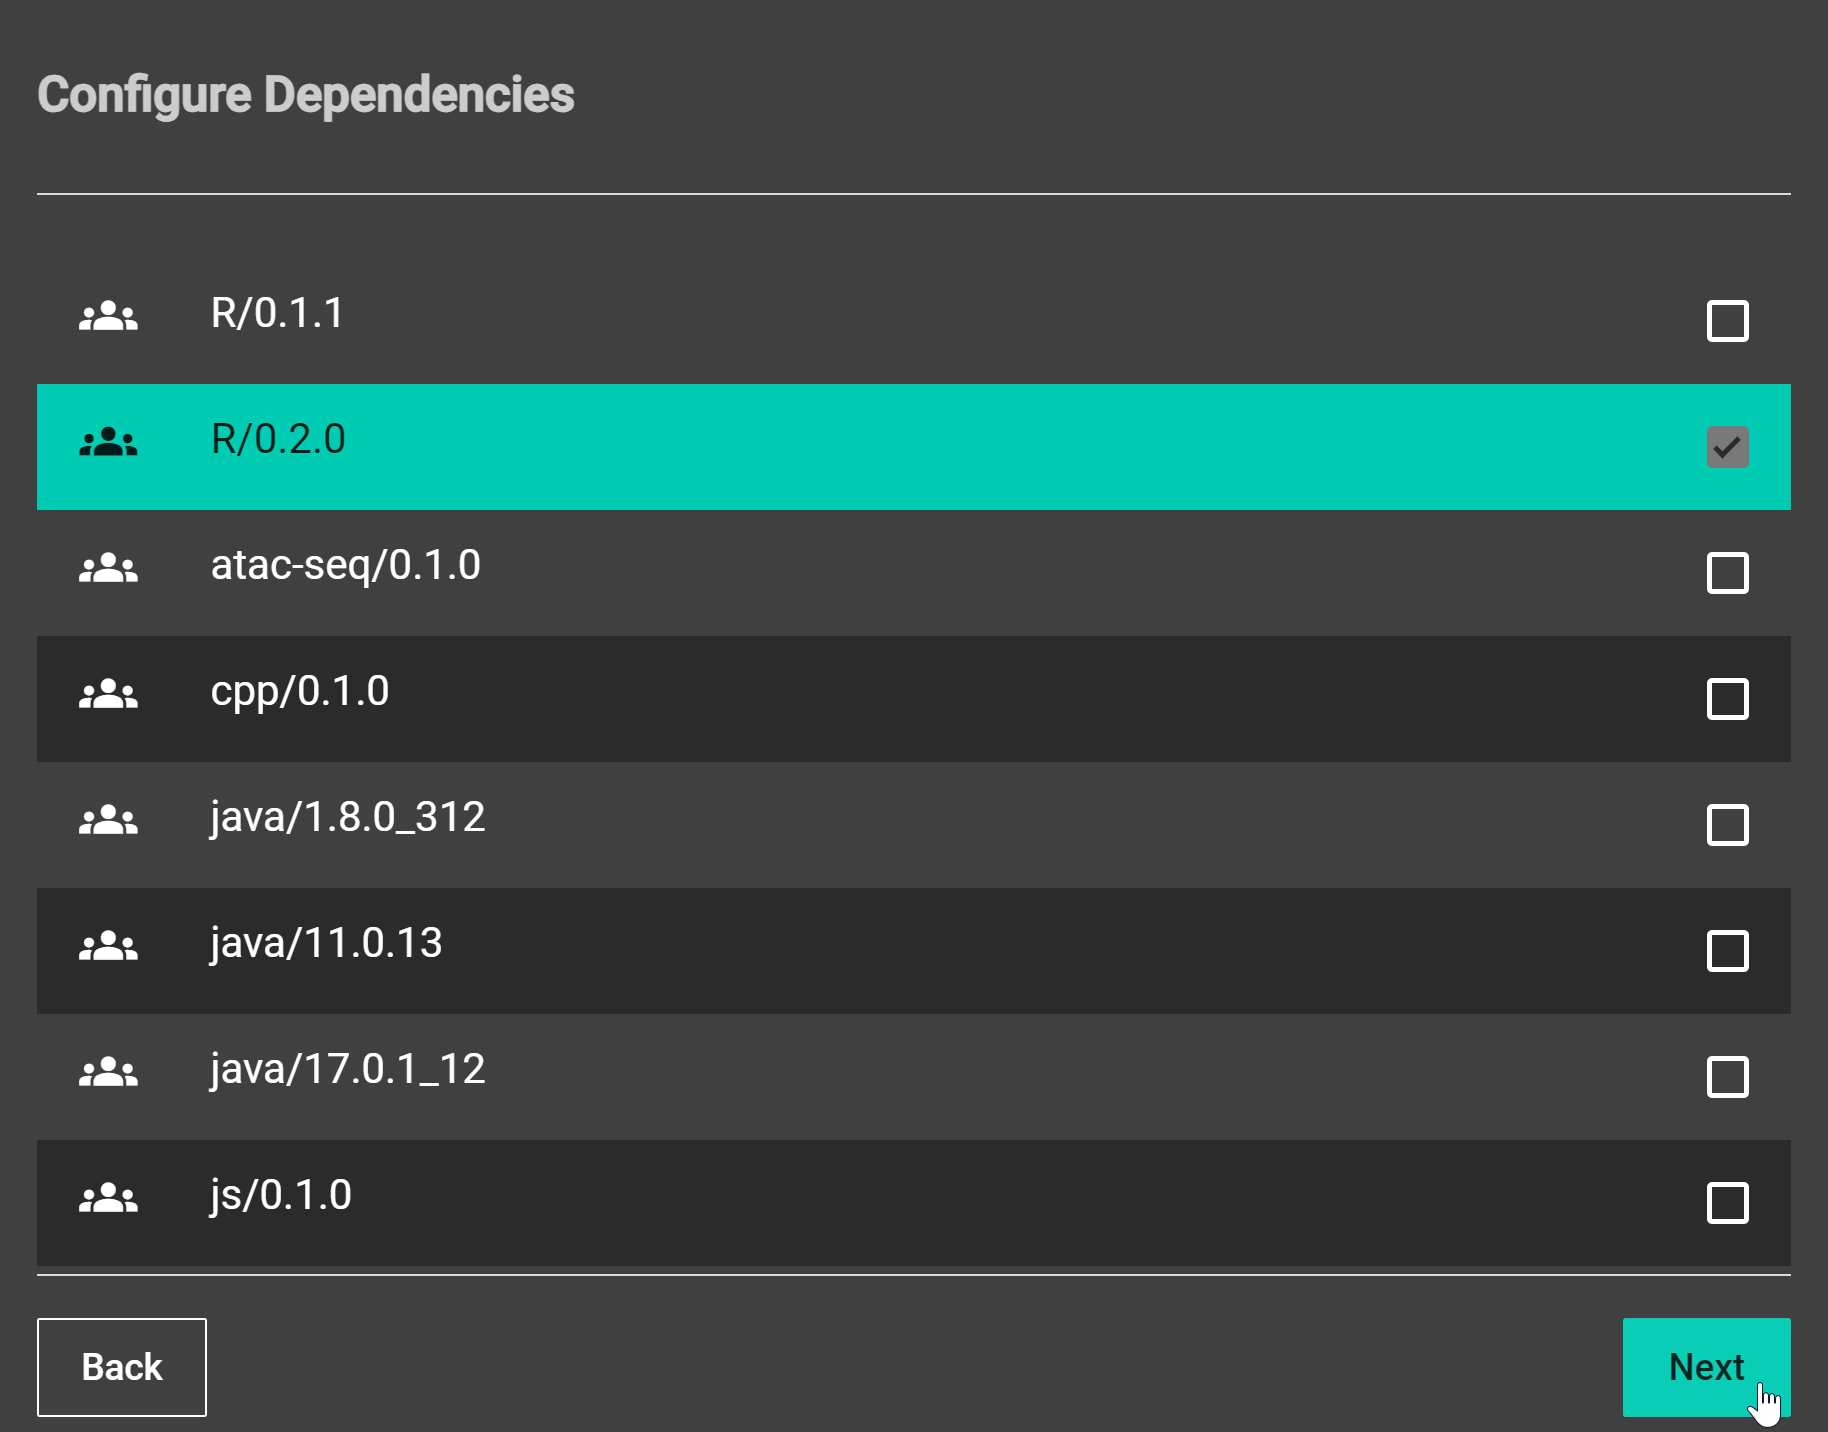
A screenshot of the Notebooks Hub new server steps
Add details to your server instance and click launch.
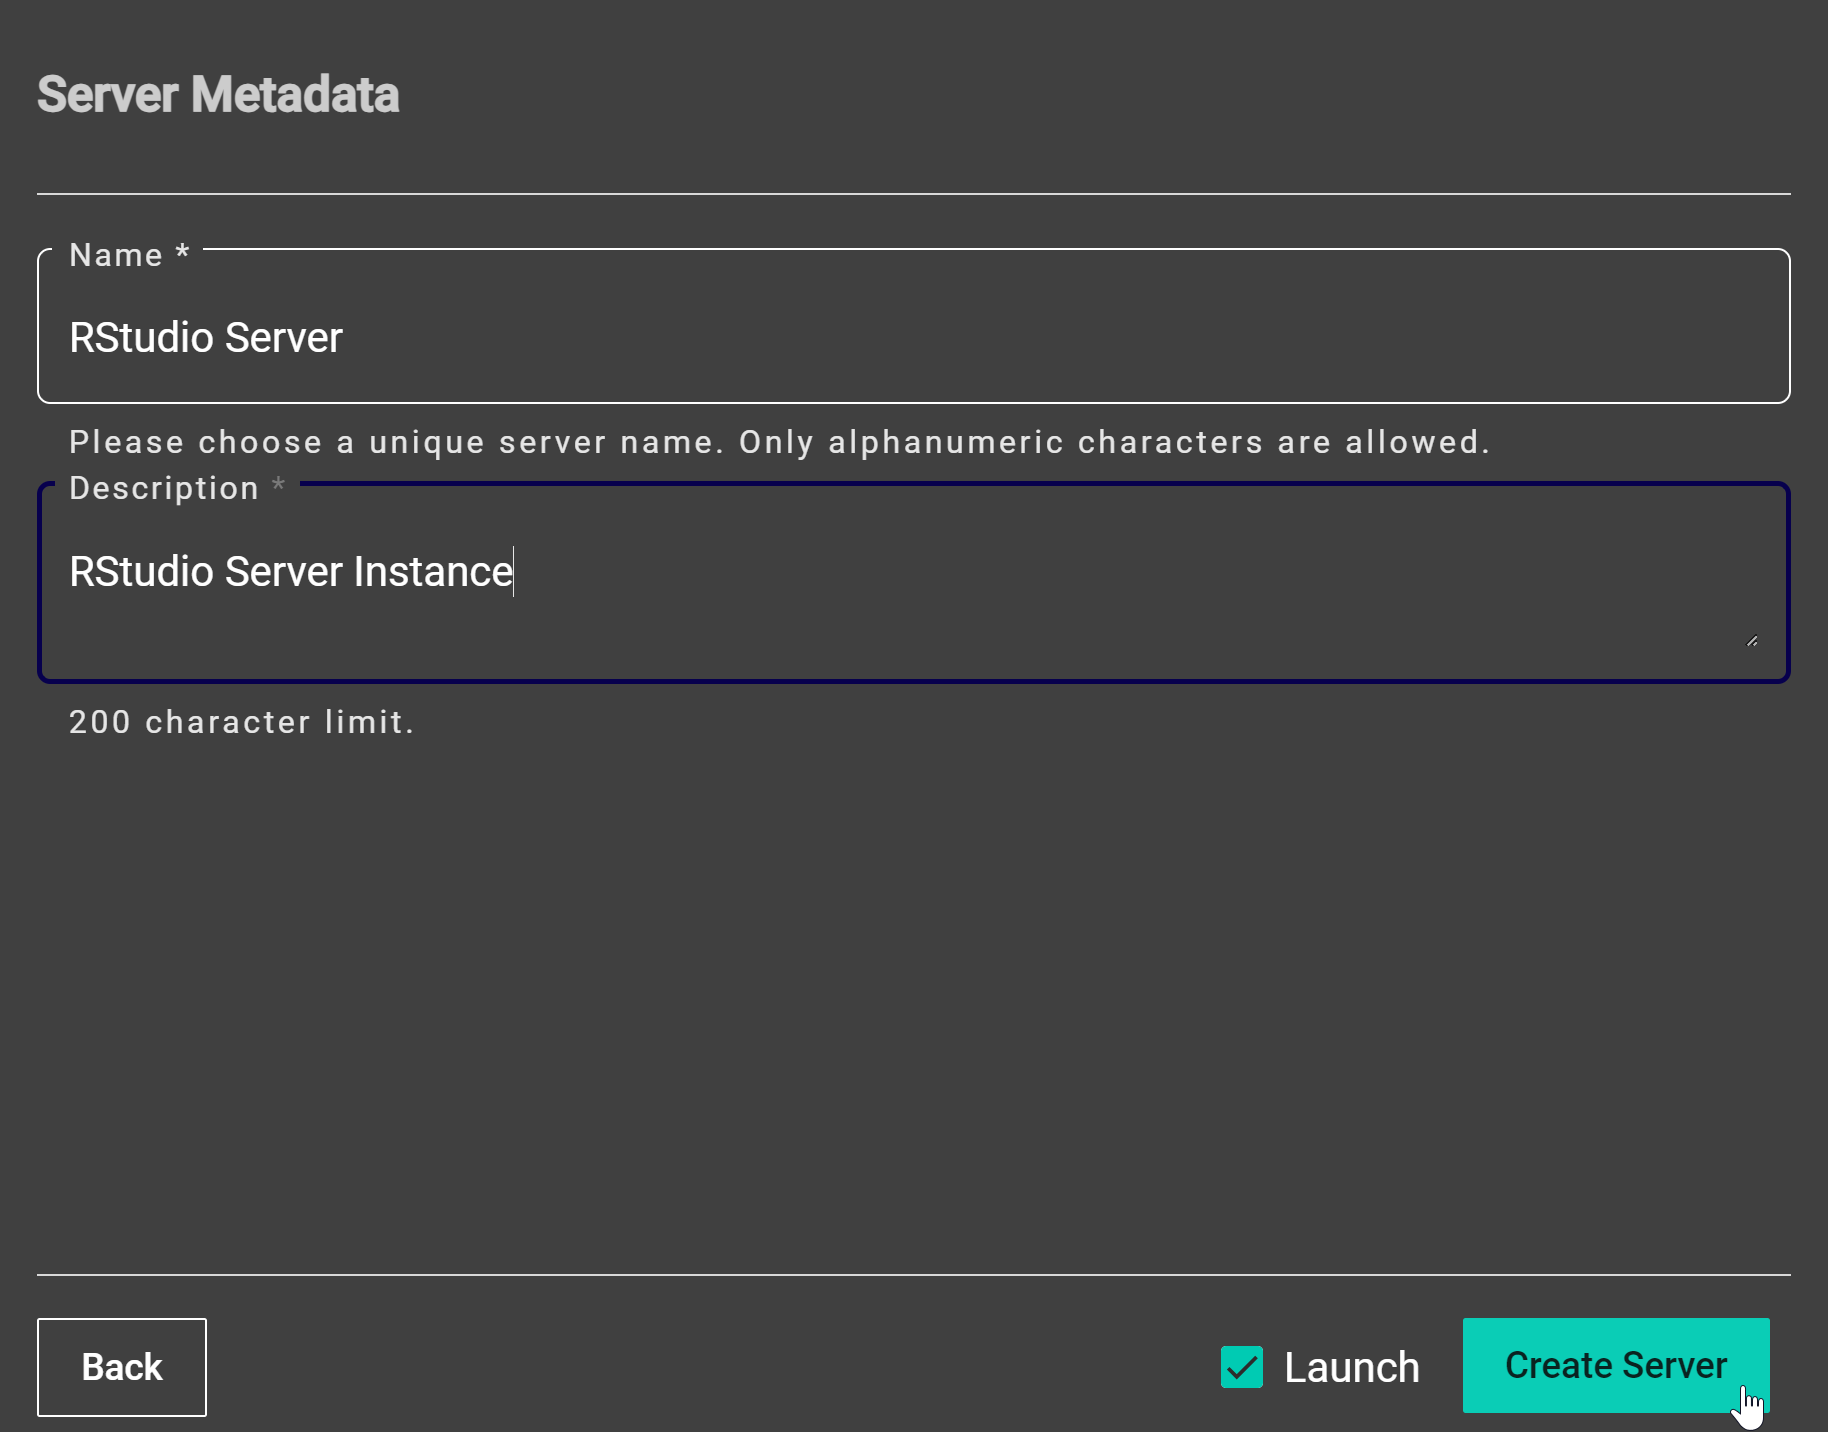
A screenshot of the Notebooks Hub new server steps
After the VS Code instance is created using either method, it will show up on your Servers page. The home icon on the top right corner of the instance indicates it was generated with quick launch from the Home page.
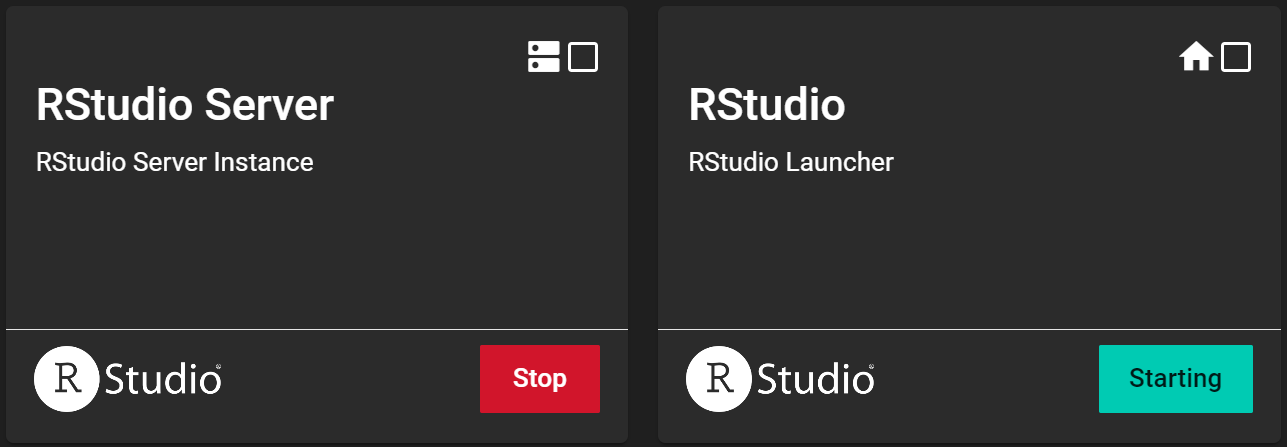
A screenshot of the RStudio instances on QA servers panel
Open RStudio
There are many ways to create a new file in RStudio. It is best practice to create new files inside designated R projects for isolated, self-contained working environments. See details here.

A Screenshot of the RStudio Control Panel
Create a New Project
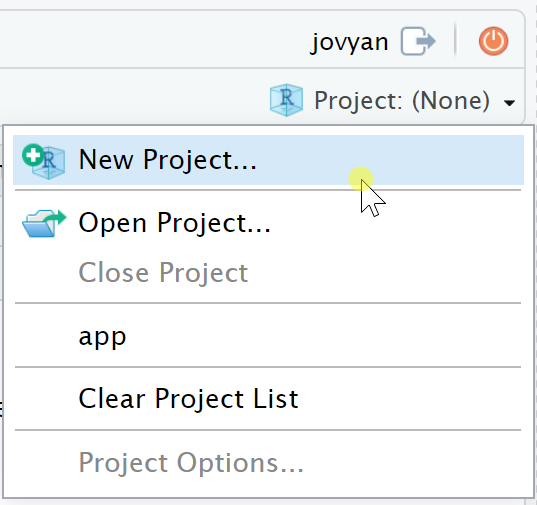
First, create a new project directory. In the Navigation Toolbar, select the New Project icon on the left or use the Project Explorer dropdown on the right.
A Screenshot of the RStudio New Project icon
A Screenshot of the RStudio New Project Panel
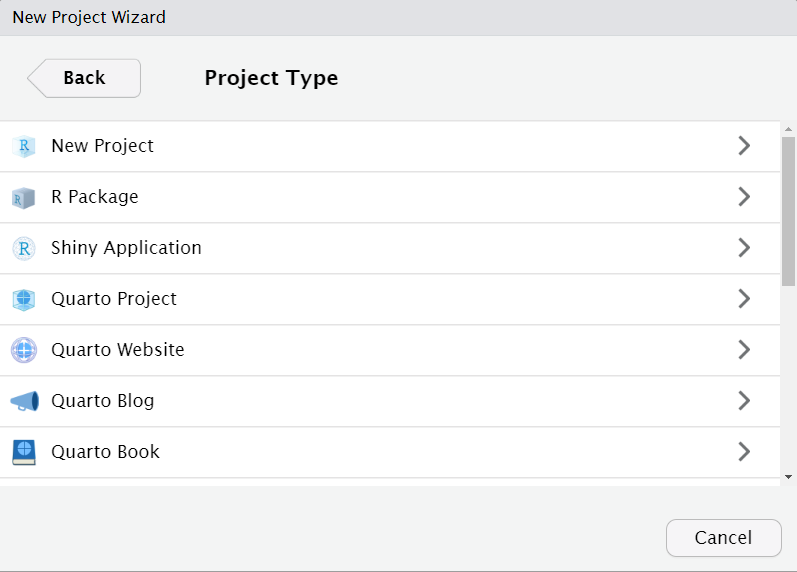
Follow the steps in the New Project Wizard.
Create project by selecting New Project.
A Screenshot of the RStudio New Project Wizard
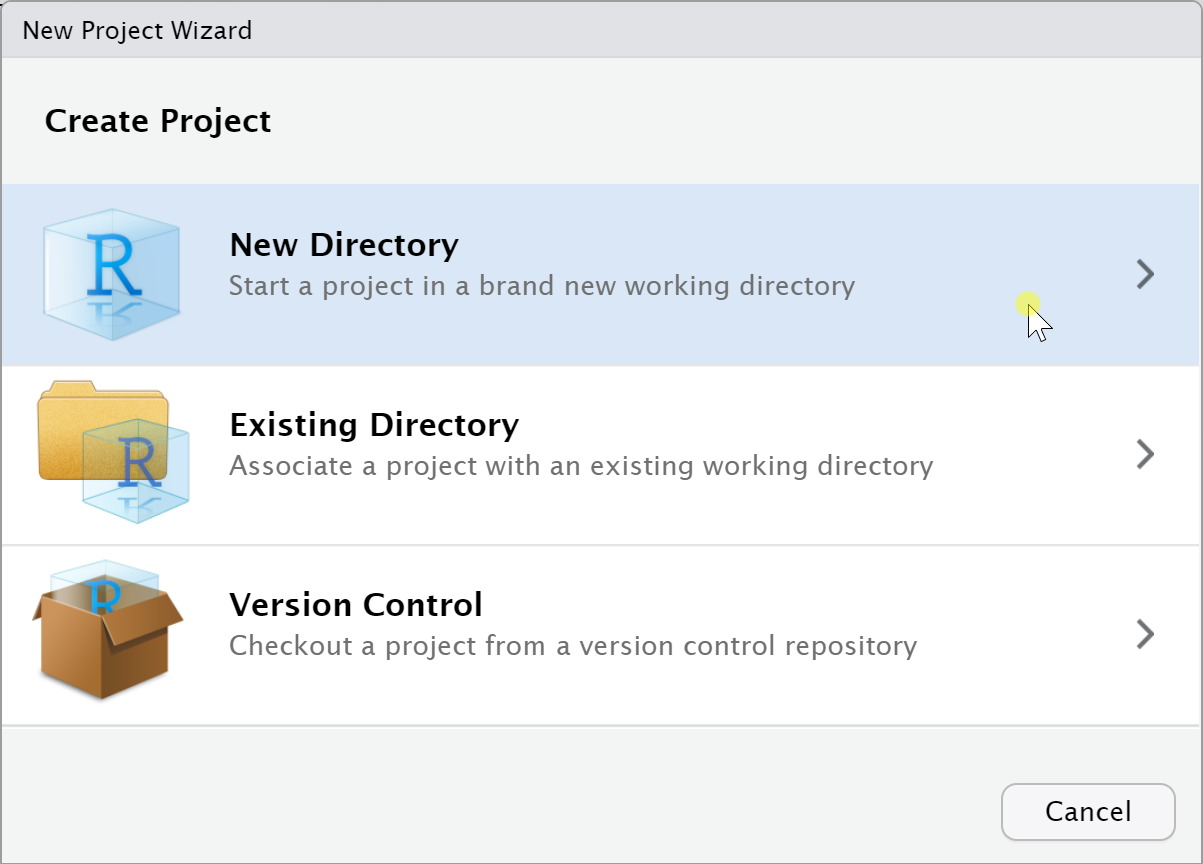
Select New Directory.
A Screenshot of the RStudio New Project Wizard
Name your project directory (e.g.,
projectName) and, if applicable, navigate to the desired parent directory (e.g.,~/work) in which to place your project. This will create a project folder (e.g.,projectName) containing an R project file (e.g.,projectName.Rproj). R project files are shortcuts to working environments. Note: Files saved to your personal work directory will persist across user sessions.

A Screenshot of the RStudio New Project Wizard
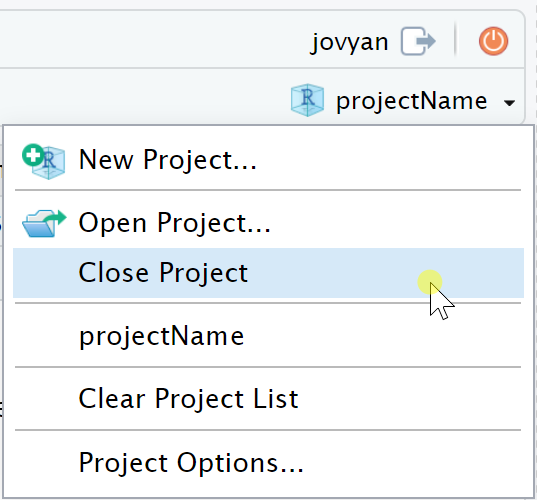
To close or switch projects, use the Project Explorer dropdown and select Close Project.
A screenshot of the RStudio project panel to close project
Create an R File
.ipynb notebooks. See
additional details
here.shiny package. Shiny elements can be embedded into R
Notebooks, launched using RStudio IDE, or launched on various host
servers, including Notebooks Hub.An R script (.R) is much like a Python script (.py) but written
using the R language.
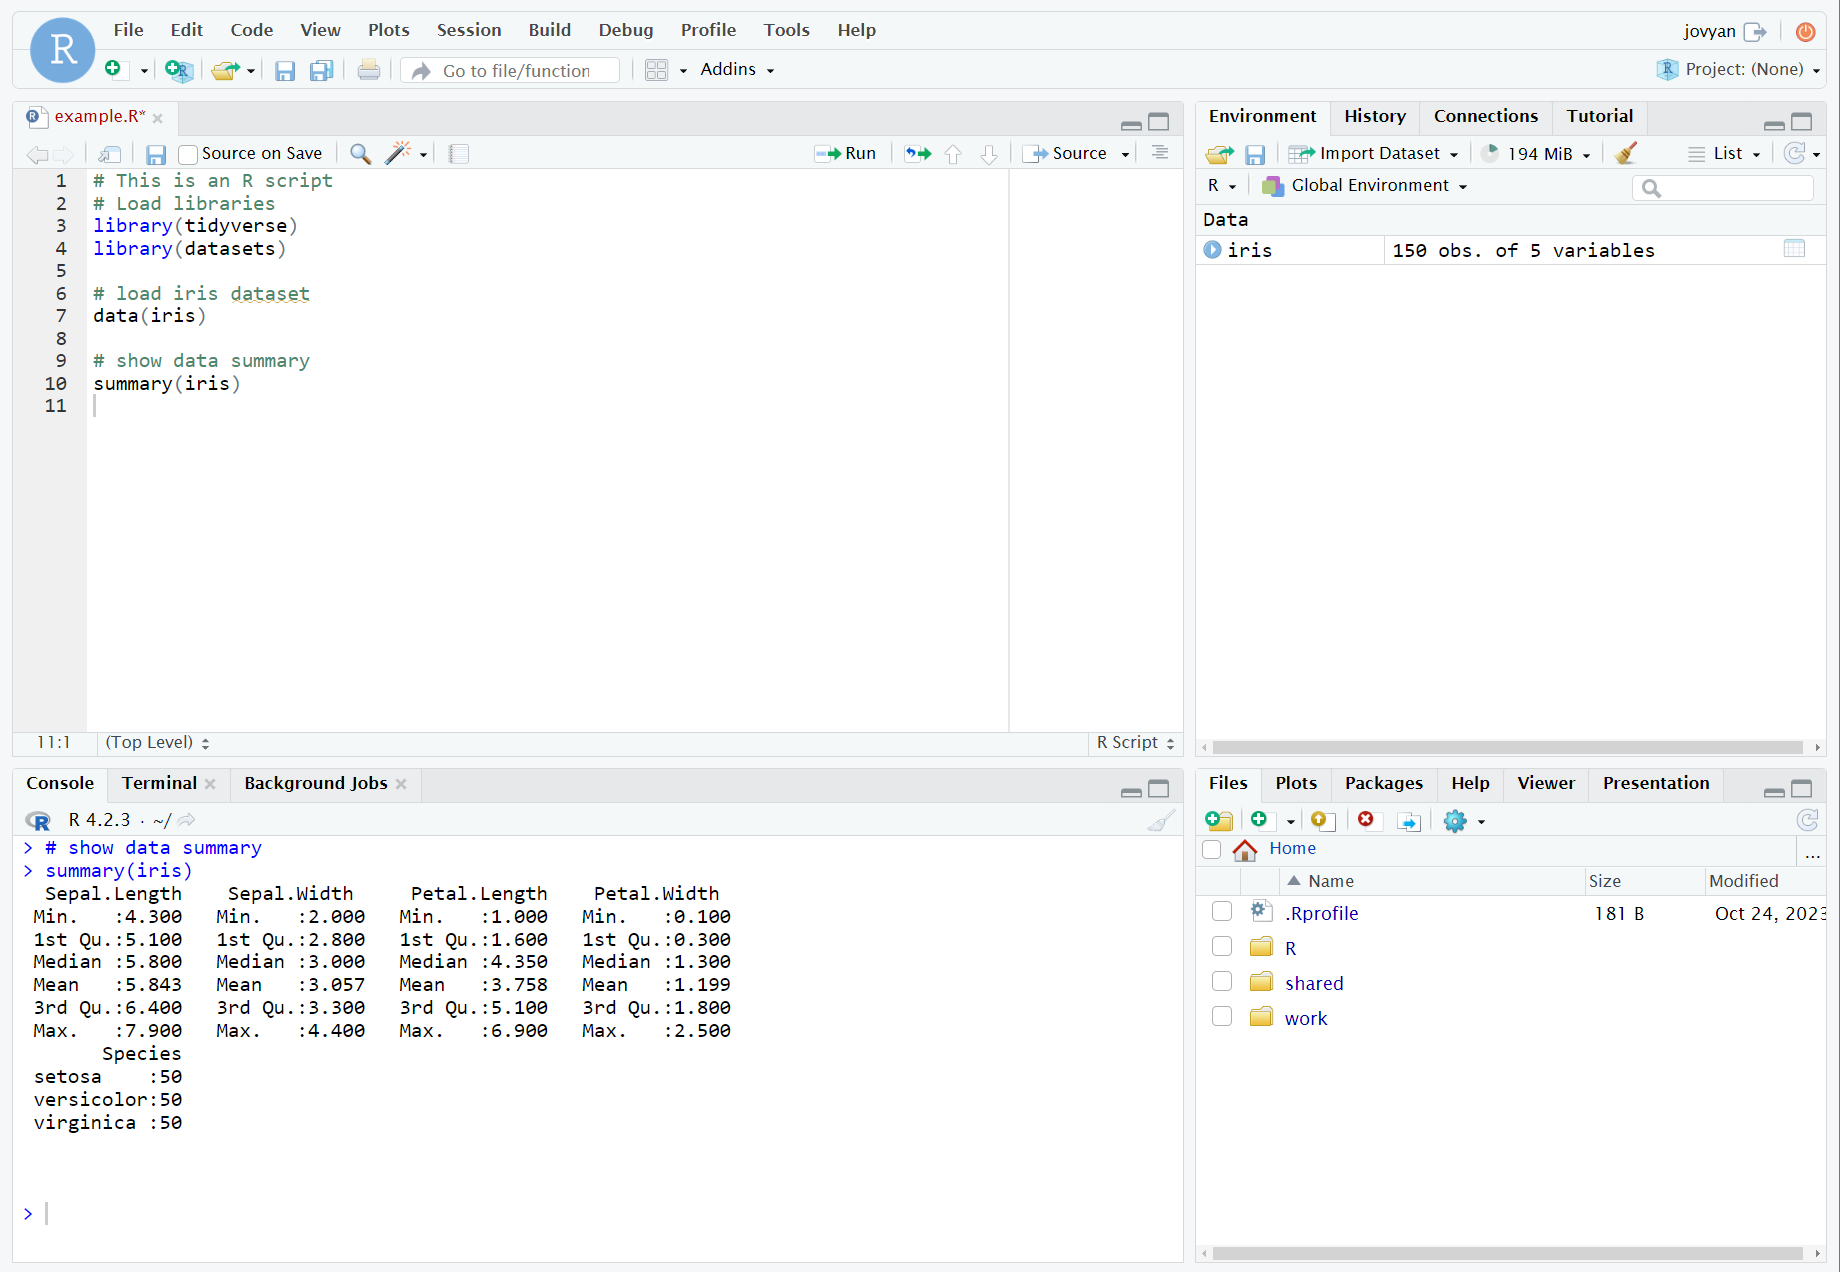
A screenshot of an R script file
An R markdown file (.Rmd) enables markdown syntax.
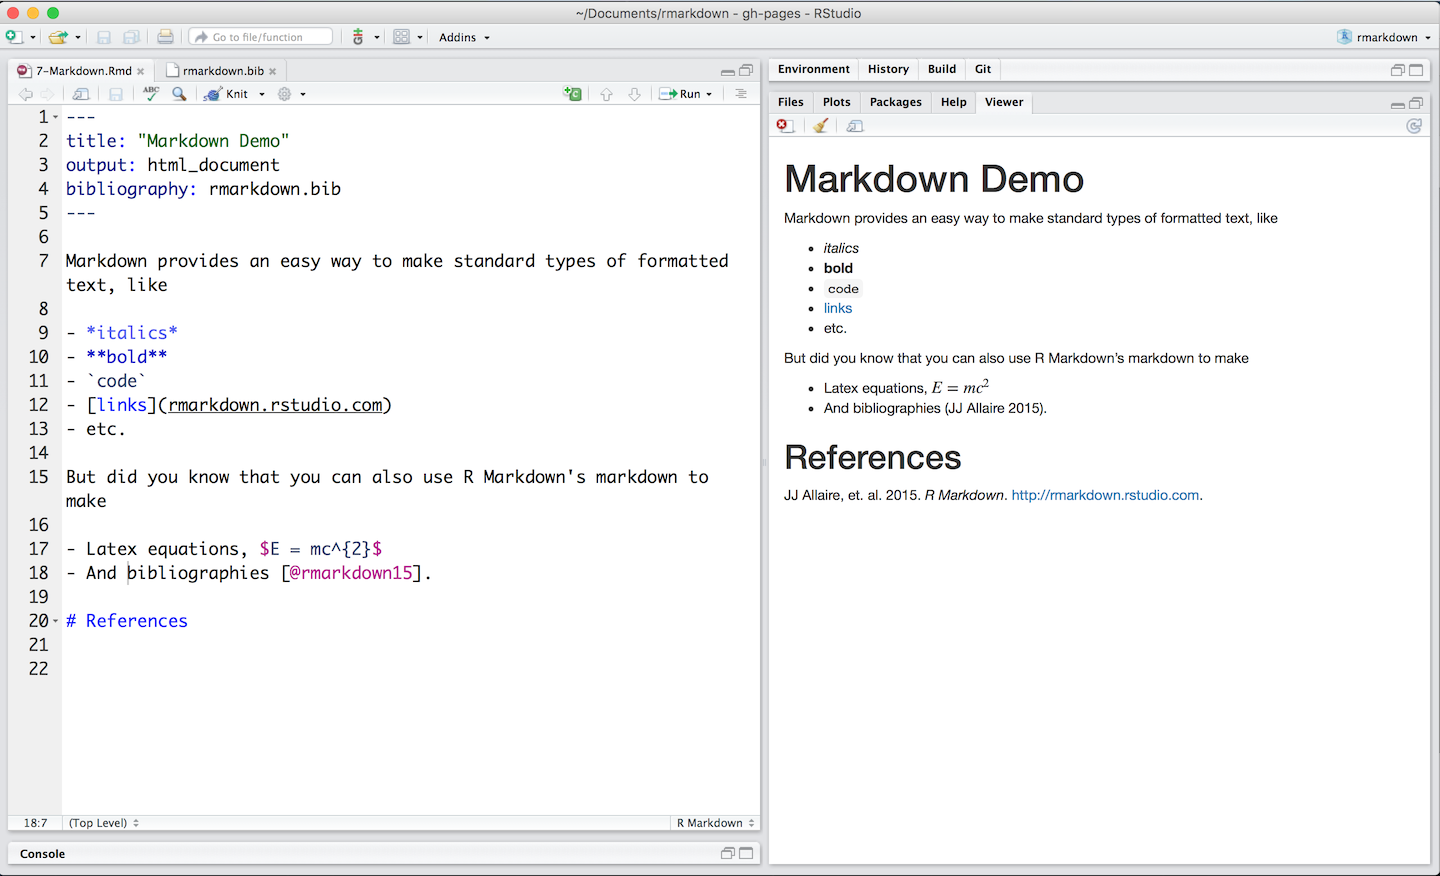
Image of RStudio’s R Markdown demo
An R notebook (also .Rmd) takes an R markdown file further and
incorporates code chunks, which functionally mimic code cells in
Jupyter notebooks (.ipynb).
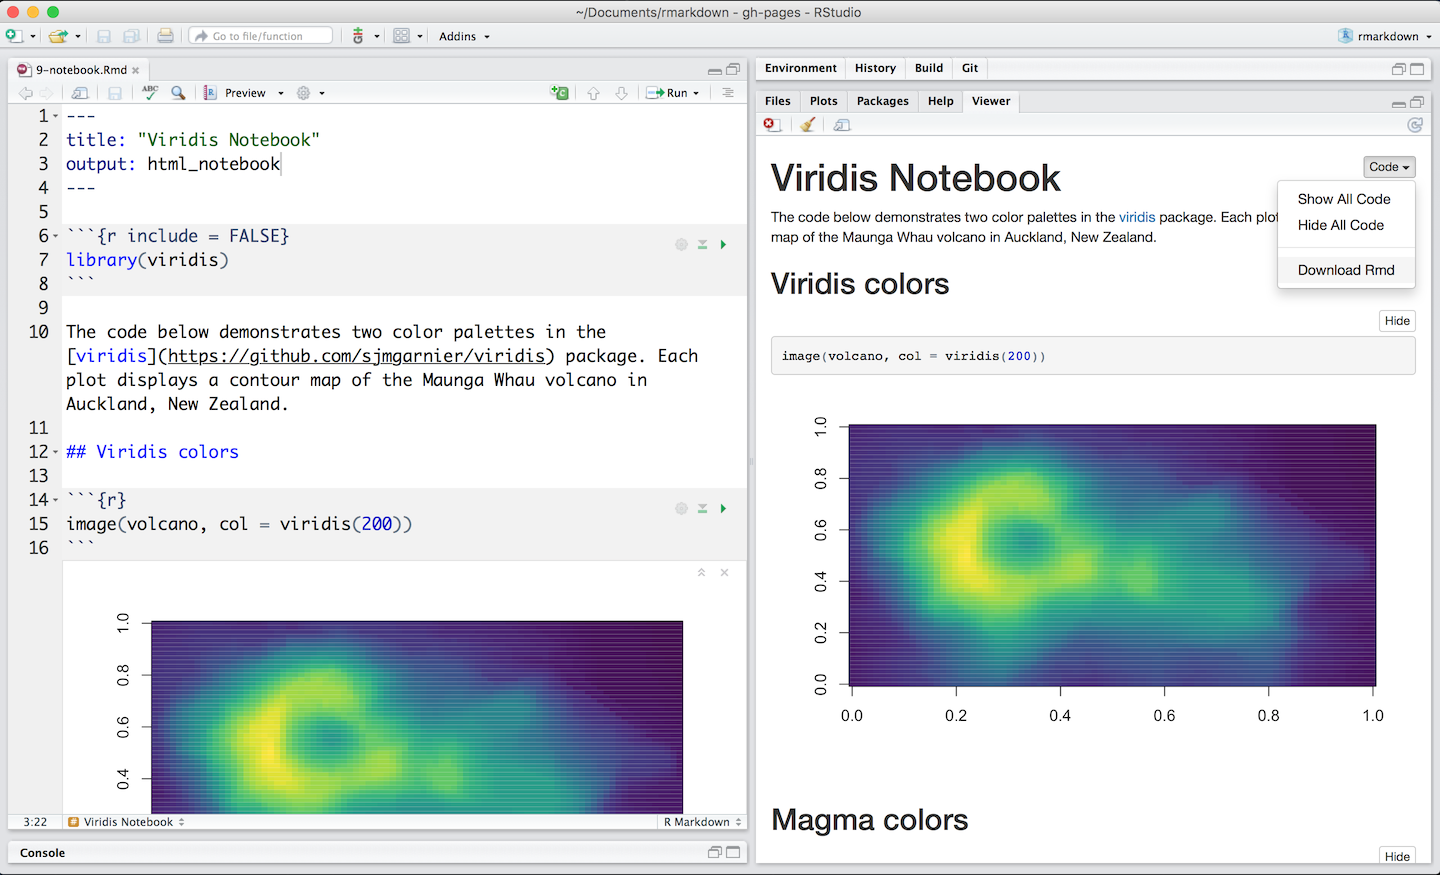
Image of RStudio’s R Notebook demo
Shiny apps can be created in one single app.R file or split into two
files, ui.R and server.R. Users can select the option that is
most convenient for them, usually based on the expected code complexity
of the application (i.e., lengthy code).
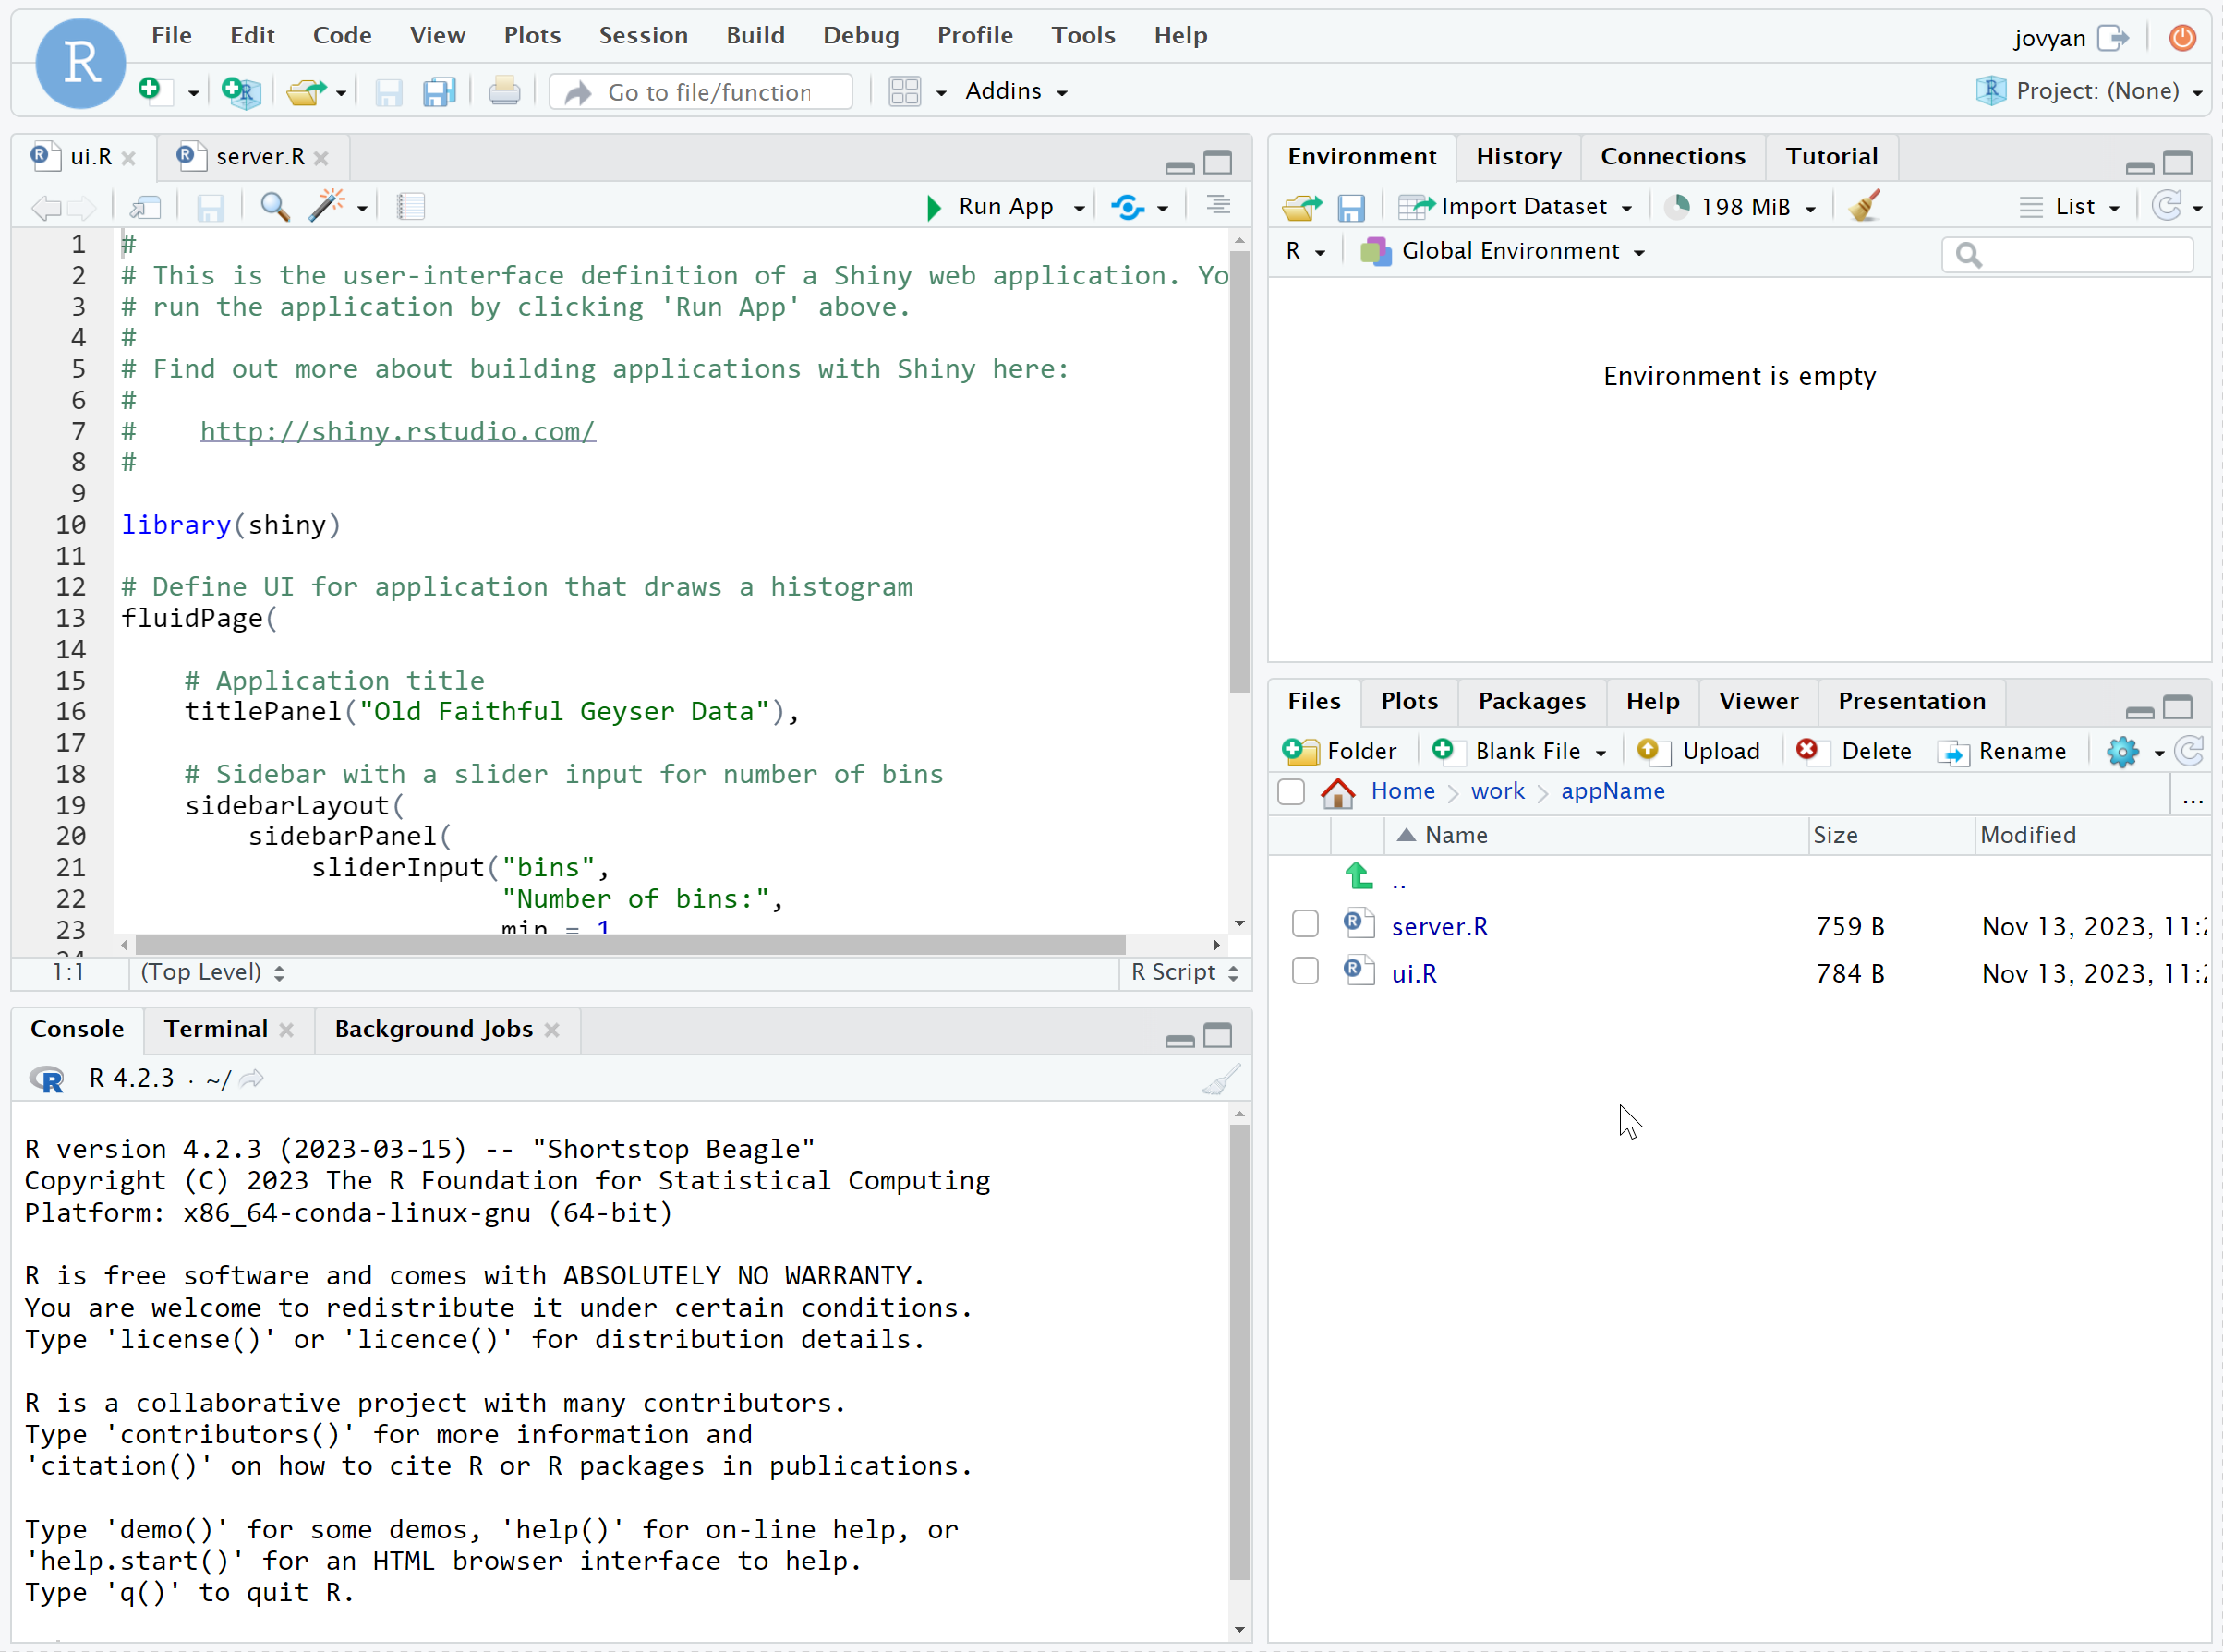
A screenshot of the RStudio with split app files
There are many advanced applications of R Markdown. Combining available tools such as flexdashboard, htmlwidgets, and shiny, users are able to create interactive dashboards, visualizations, presentations, websites, and more.
Helpful R Packages
There are many helpful R packages available individually and in curated collections. Most packages can be found on the Comprehensive R Archive Network (CRAN) website by navigating to the Packages page under Software in the navigation toolbar on the left. Packages found in the CRAN repository are stable releases.
One helpful set is tidyverse, an opinionated package collection designed for data science.
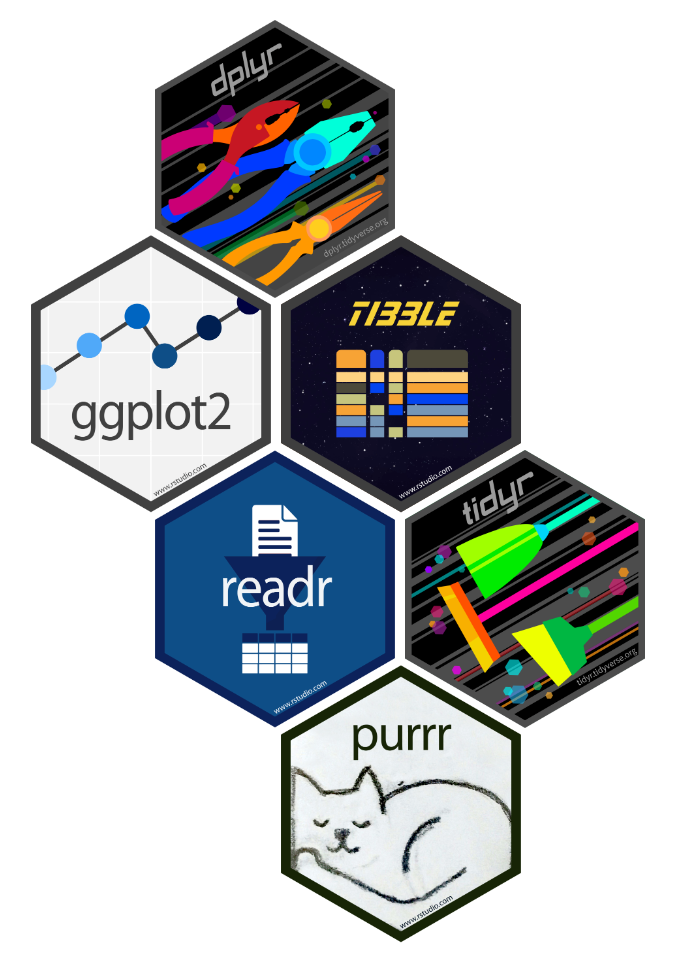
Image of Tidyverse Packages
The built-in R modules within Notebooks Hub come pre-configured with
select R packages. To confirm whether your desired package (e.g.,
packageName) has been pre-installed, run
system.file(package='packageName') or
find.package('packageName') inside the R Console. If the package is
installed in the loaded environment (e.g., R-0.2.0), the command
will output the path where the package is located.
R-0.2.0 was the selected module loaded when launching RStudio on
Notebooks Hubtidyverse is already
installedshiny is already installedsystem.file(package='shiny')

A screenshot of the R Console confirming installed package
If the package does not exist, no path will be returned (i.e., "").
This means the package will need to be installed.
find.package() can also be used to check for multiple packages by
using a vectored list (i.e., c('item1', 'item2')).
find.package(c("tidyverse","shiny"))
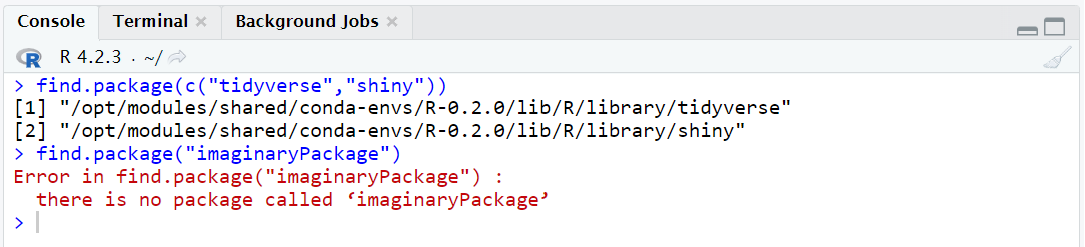
A screenshot of the R Console confirming installed packages
If the package does not exist, the console will provide an error. The package(s) will need to be installed.
Installing Packages from Comprehensive R Archive Network (CRAN)
By default, packages are installed from CRAN using
install.packages().
To install your desired package(s), run
install.packages('packageName') or
install.packages(c('package1', 'package2')) inside the R console.
install.packages("shiny")                   # install individual package
install.packages("tidyverse")               # install package collection
install.packages(c("shiny", "tidyverse"))   # install multiple packages
Installing Packages from Other Repositories
Packages can also be installed from other repositories, such as GitHub.
To do so, either remotes or devtools packages must first be
installed from CRAN.
install.packages('remotes')

install.packages('devtools')
install.packages('devtools', lib='~/R/lib') # alternative method
To install from a public GitHub repository, call install_github()
from either remotes or devtools by using
remotes::install_github() or
devtools::install_github(username/repo_name[/subdir]), respectively.
Additionally, remotes enables specification of a desired git
reference (e.g., commit, tag, branch name, or a call to
github_pull()).
devtools::install_github('rstudio/shiny')                           # standard example using devtools

remotes::install_github('rstudio/shiny')                            # standard example using remotes
remotes::install_github("wch/ggplot2", ref = github_pull("142"))    # more precise specification
To install from other external repositories, use install.packages()
and include the repository URL with the repo argument as follows:
install.packages('packageName', repos='<URL>', dependencies=TRUE)
install.packages('furrr', repos='http://cran.us.r-project.org', dependencies=TRUE) # example using CRAN url
Lastly, packages can also be installed from a zip file (.zip or
tar.gz) containing an R package that may have been shared directly
and downloaded to your local machine. First, upload the zip file to your
work folder in RStudio on Notebooks Hub, then use install.packages()
with repo=NULL and type='source'. You can also use the
devtools or remotes package.
install.packages('C:/Users/User/Downloads/abc_2.1.zip', repos=NULL, type='source')  # method 1
devtools::install_local(package.zip)                                                # method 2
remotes::install_local(package.zip)                                                 # method 3
R Package Installation using the RStudio IDE UI
R Packages can also be installed from the local machine. Use the following steps to install:
Click Tools → Install Packages
Select Package Archive File (
.zip,.tar.gz) in the Install from: slotFind the corresponding file on the local machine, and click Open
Click Install
Loading R Packages
In addition to installation, R packages need to be called into the
environment for use. This primarily occurs at the beginning of the code
using library(packageName).
Note: Despite the ability to install multiple packages with
install.packages(), this is not the case when loading packages.
Packages must be loaded individually unless bundled in a collection such
as tidyverse. Packages are also called without quotations.
library(shiny)      # load individual package
library(tidyverse)  # load package collection
Helpful R Cheatsheets
Posit offers helpful cheatsheets that serve as quick references to help use some of the community’s favorite R packages.