Solara
Solara is an open-source library that makes it easy to build web apps from pure Python using ipywidgets and a React-likle API. Solara offers the ability to build large, complex apps while keeping code simple. Solara apps work both inside Jupyter Notebooks and as a standalone web app using frameworks like FastAPI, starlette, and more.
Helpful tips can be found by visiting Solara’s Quickstart page. Solara also showcases example apps, found in the featured App Gallery.
We recommend using VS Code when creating Solara apps.
Launch VS Code
Generate VS Code Instance on Notebooks Hub
Go to Notebooks Hub and log in with your credentials.
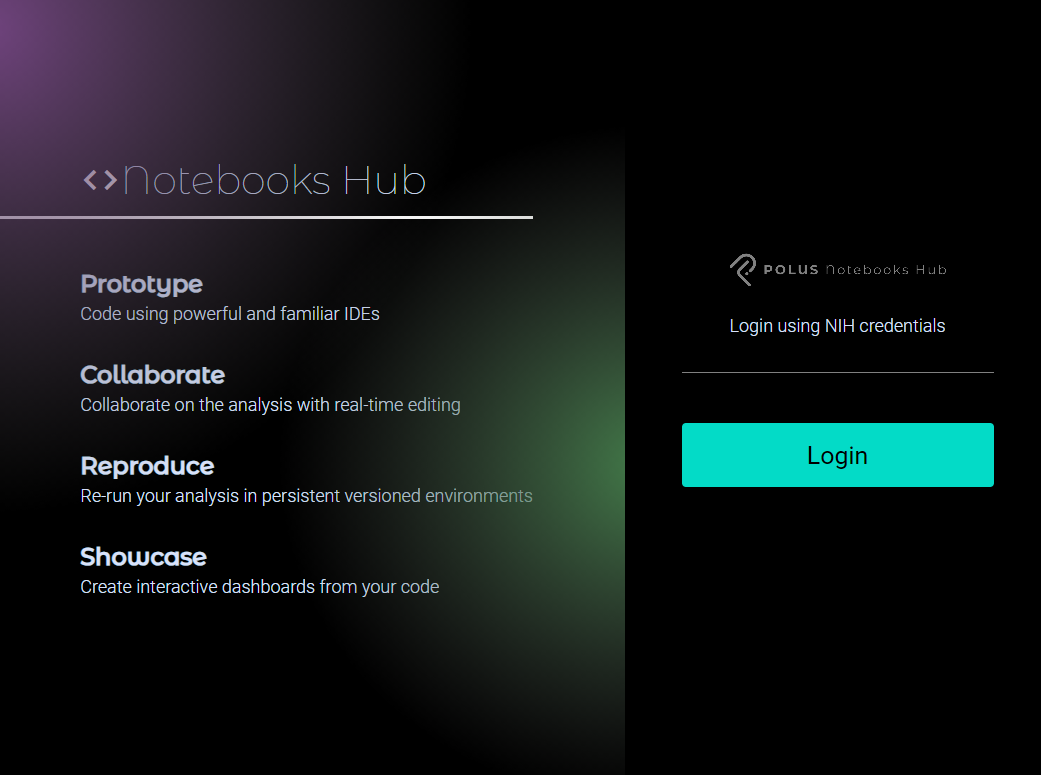
A screenshot of the Notebooks Hub login page
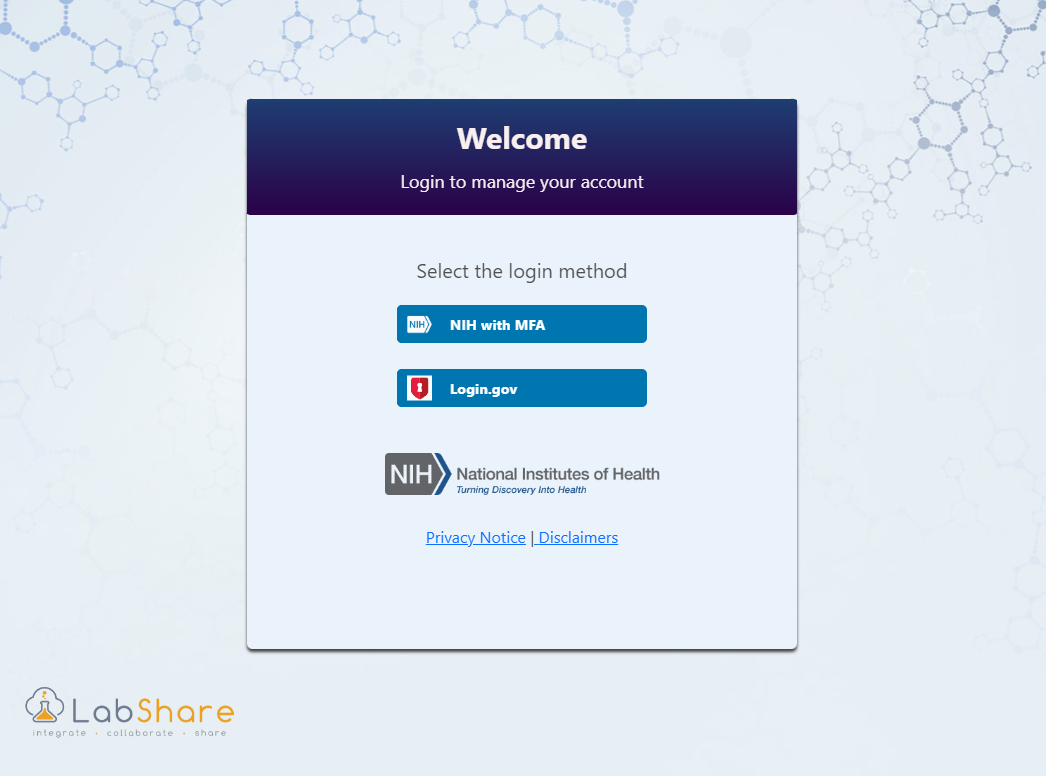
A screenshot of the Notebooks Hub credentials page
Next, launch VS Code using either of the following two methods.
Method 1: Quick Launch
From the Home page, select VS Code to quick launch the IDE.
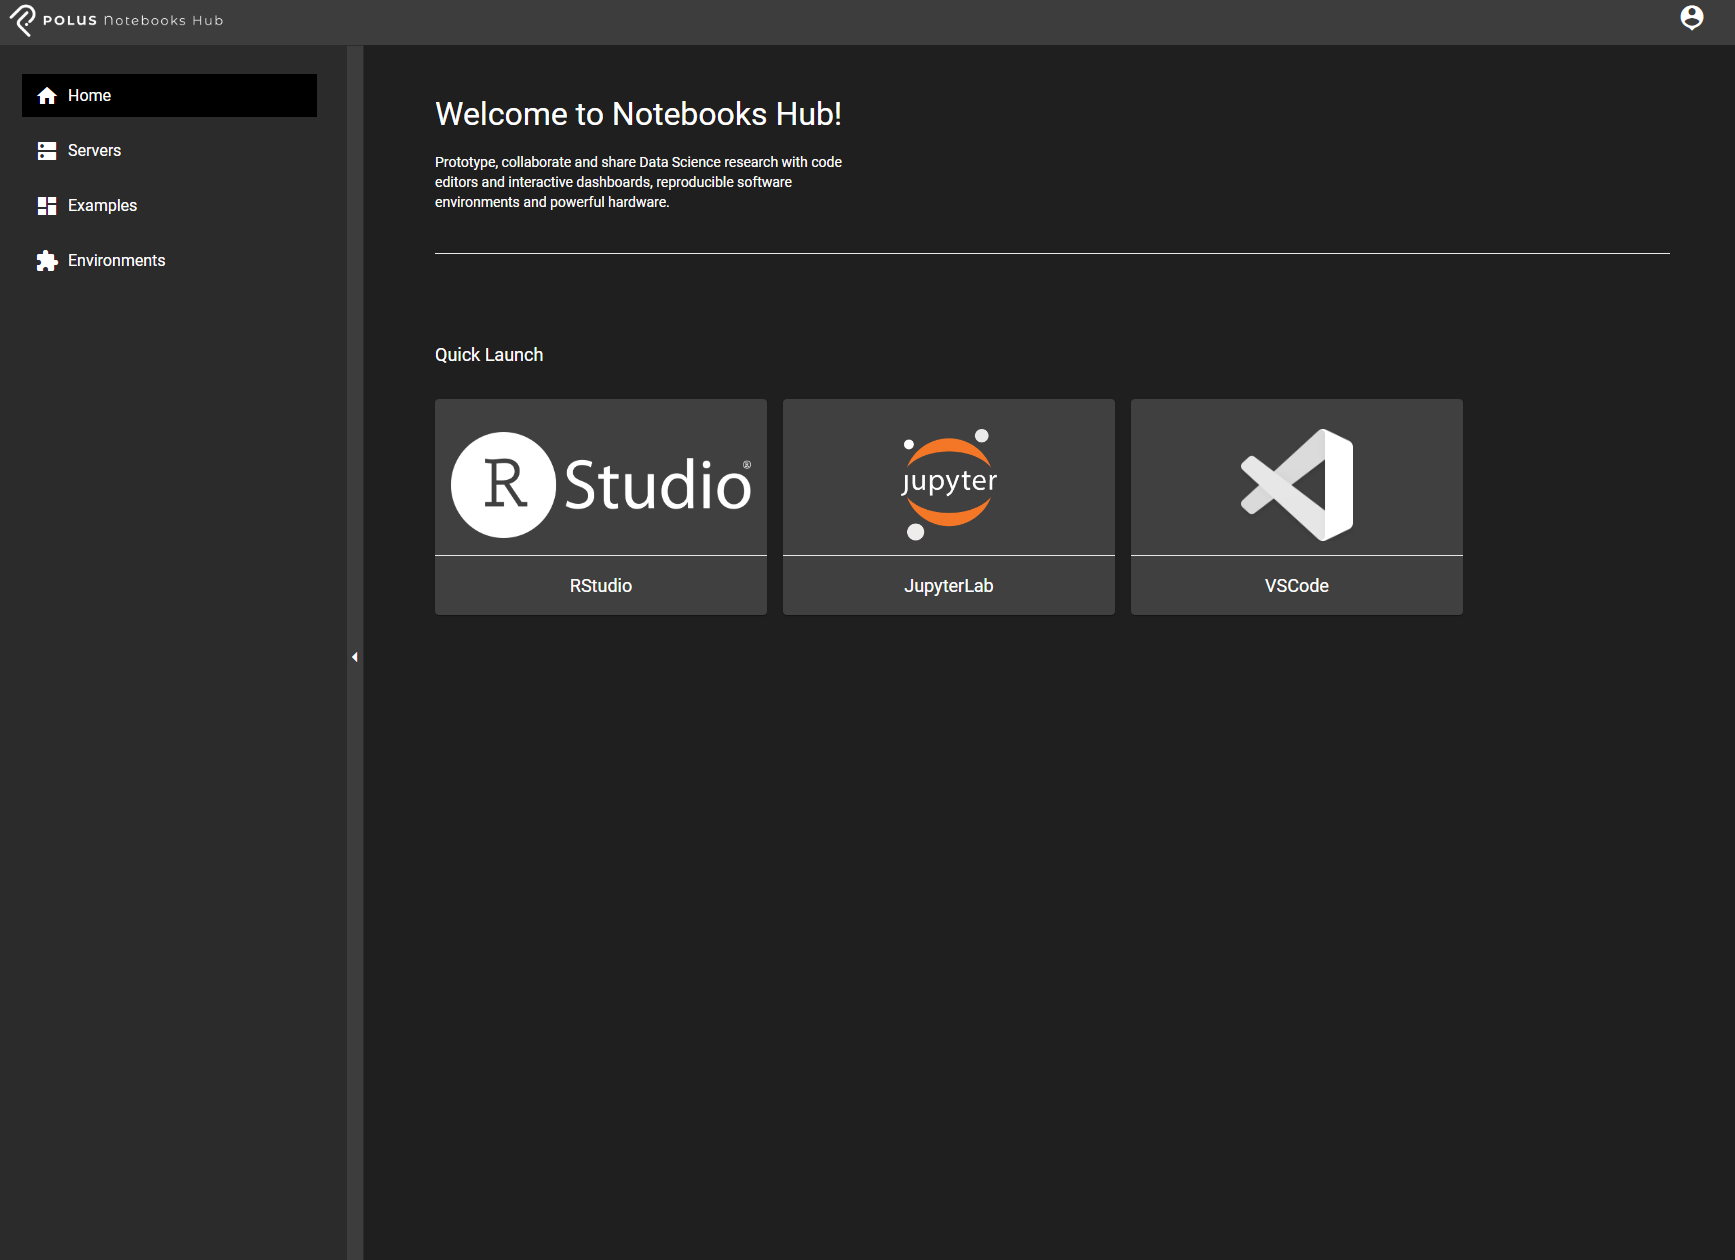
A screenshot of the Notebooks Hub home page
Method 2: Custom Server Instance
Alternatively, use the sidebar navigation panel to select Servers and select Create New to launch a VS Code instance with additional configurations.

A screenshot of the Notebooks Hub sidebar and dashboard panel
Next, work through the steps within the server wizard. Steps are illustrated below. 1. Select VS Code under the IDE tab.
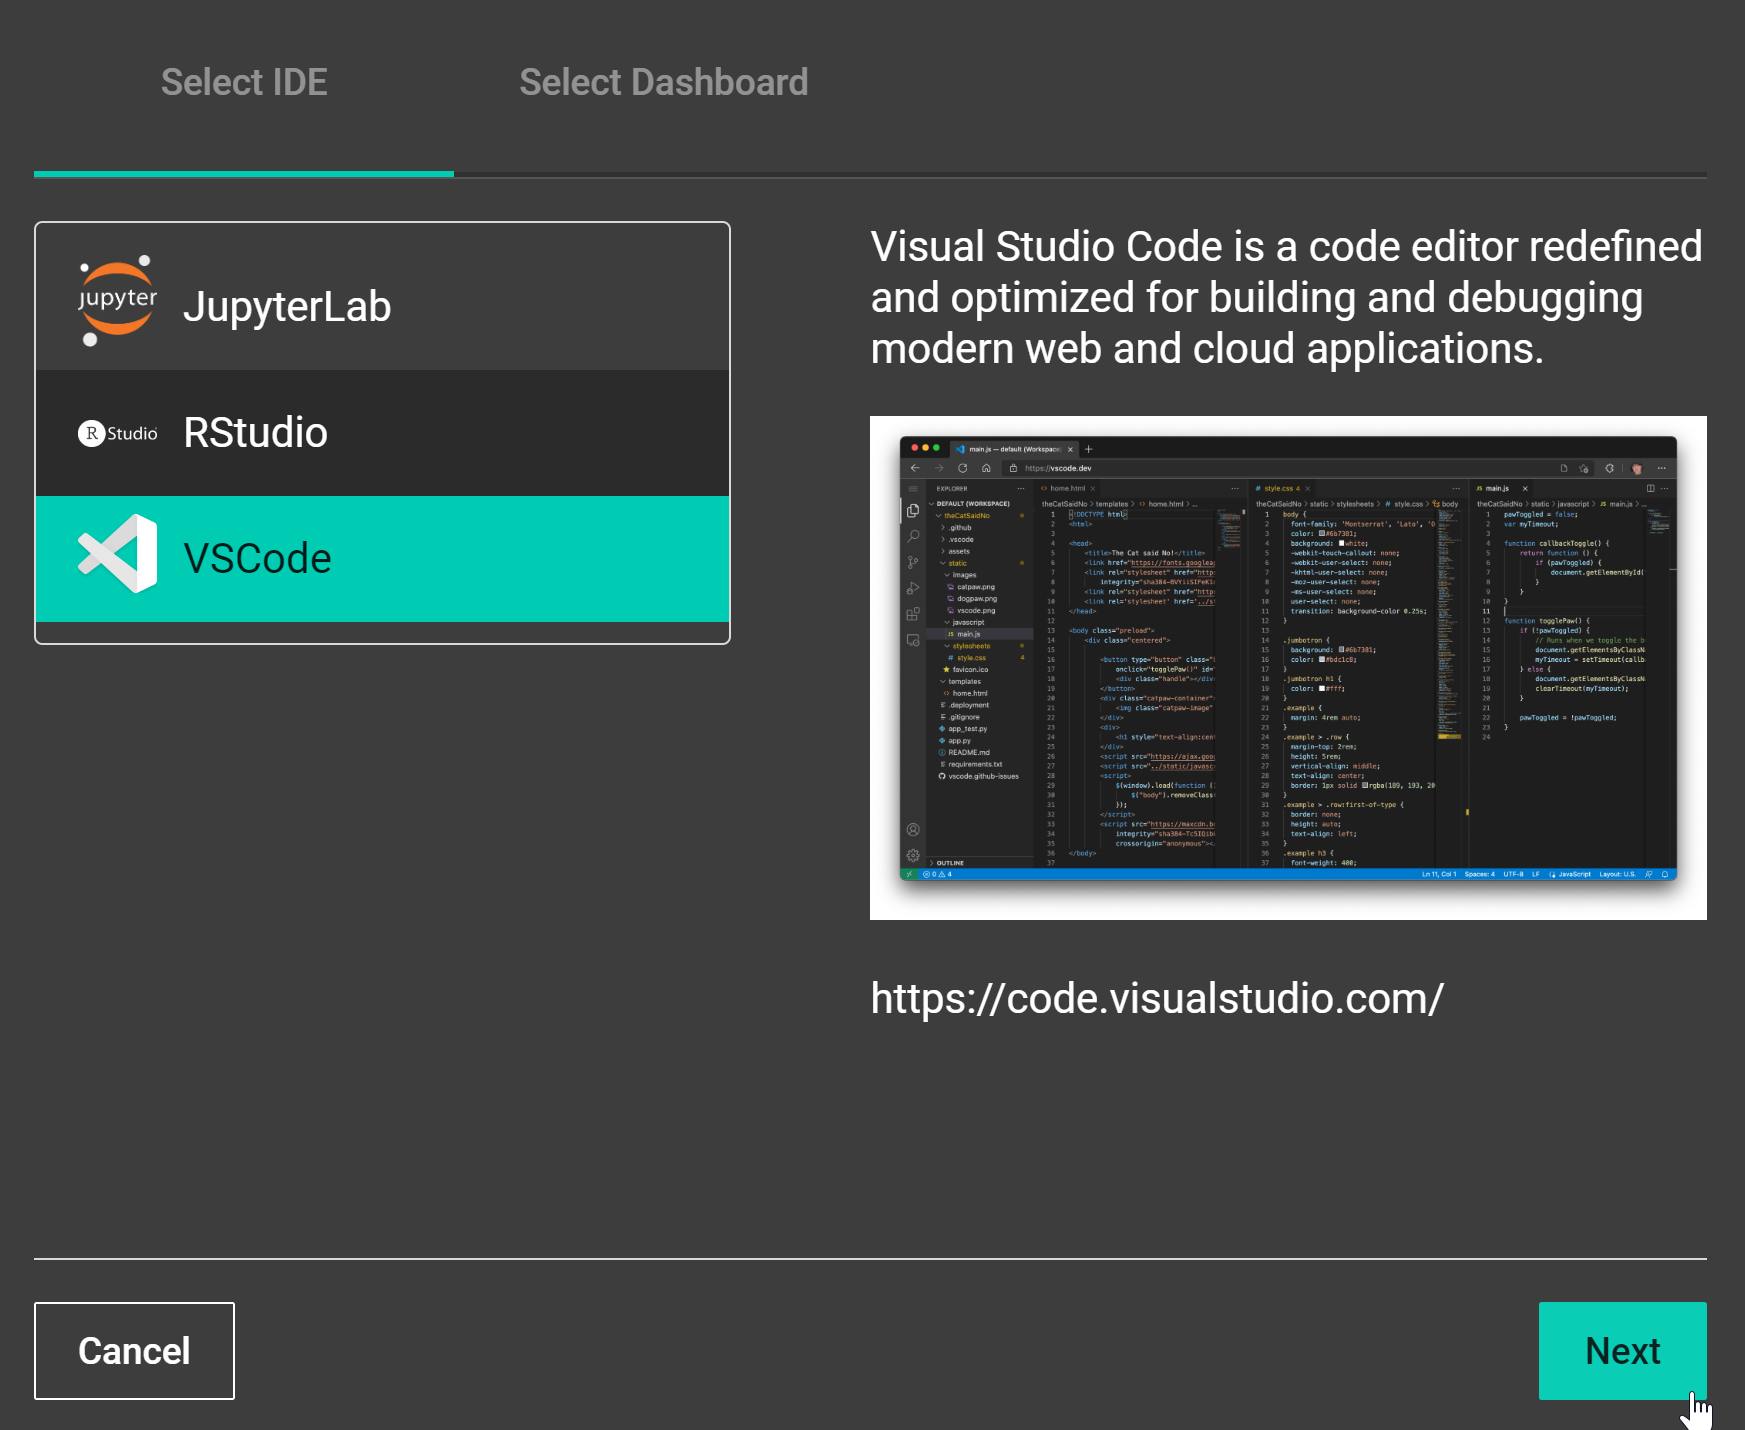
A screenshot of the Notebooks Hub new server steps
Select one of the options provided below.
Create New File: Create a new file when launching the server. If selected, the wizard will provide possible file extensions for the new file.
Upload File: This option allows the user to upload a file from the local computer onto the server.
Select File/Folder: This option points the server to a specific file that already exists on the server.
Skip: Launch without pointing to file. This is helpful when launching a fresh instance.
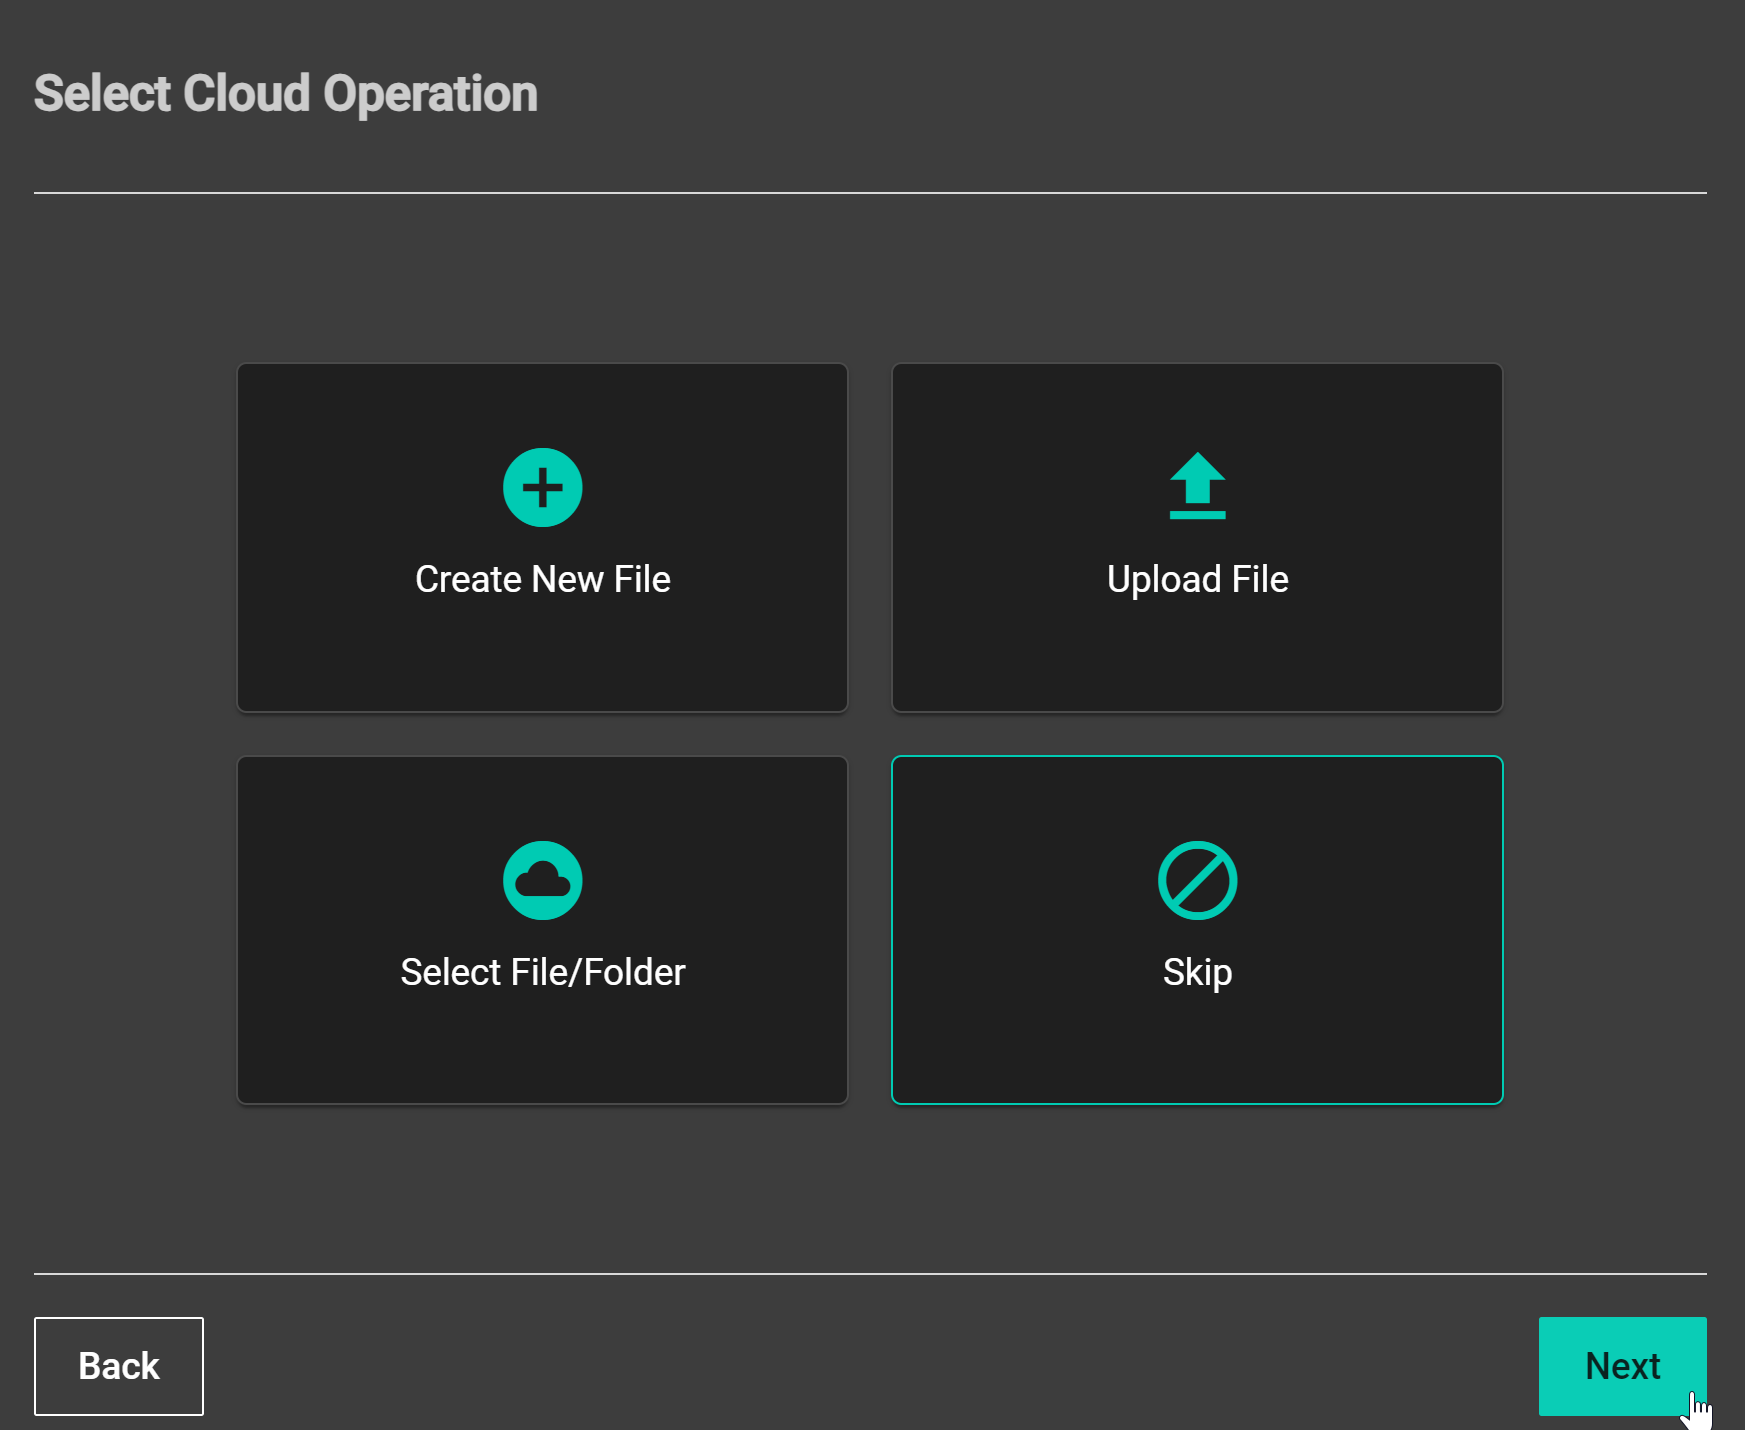
A screenshot of the Notebooks Hub new server steps
Select appropriate virtual hardware to utilize from the server host. In most cases, Shared Medium CPU is sufficient.
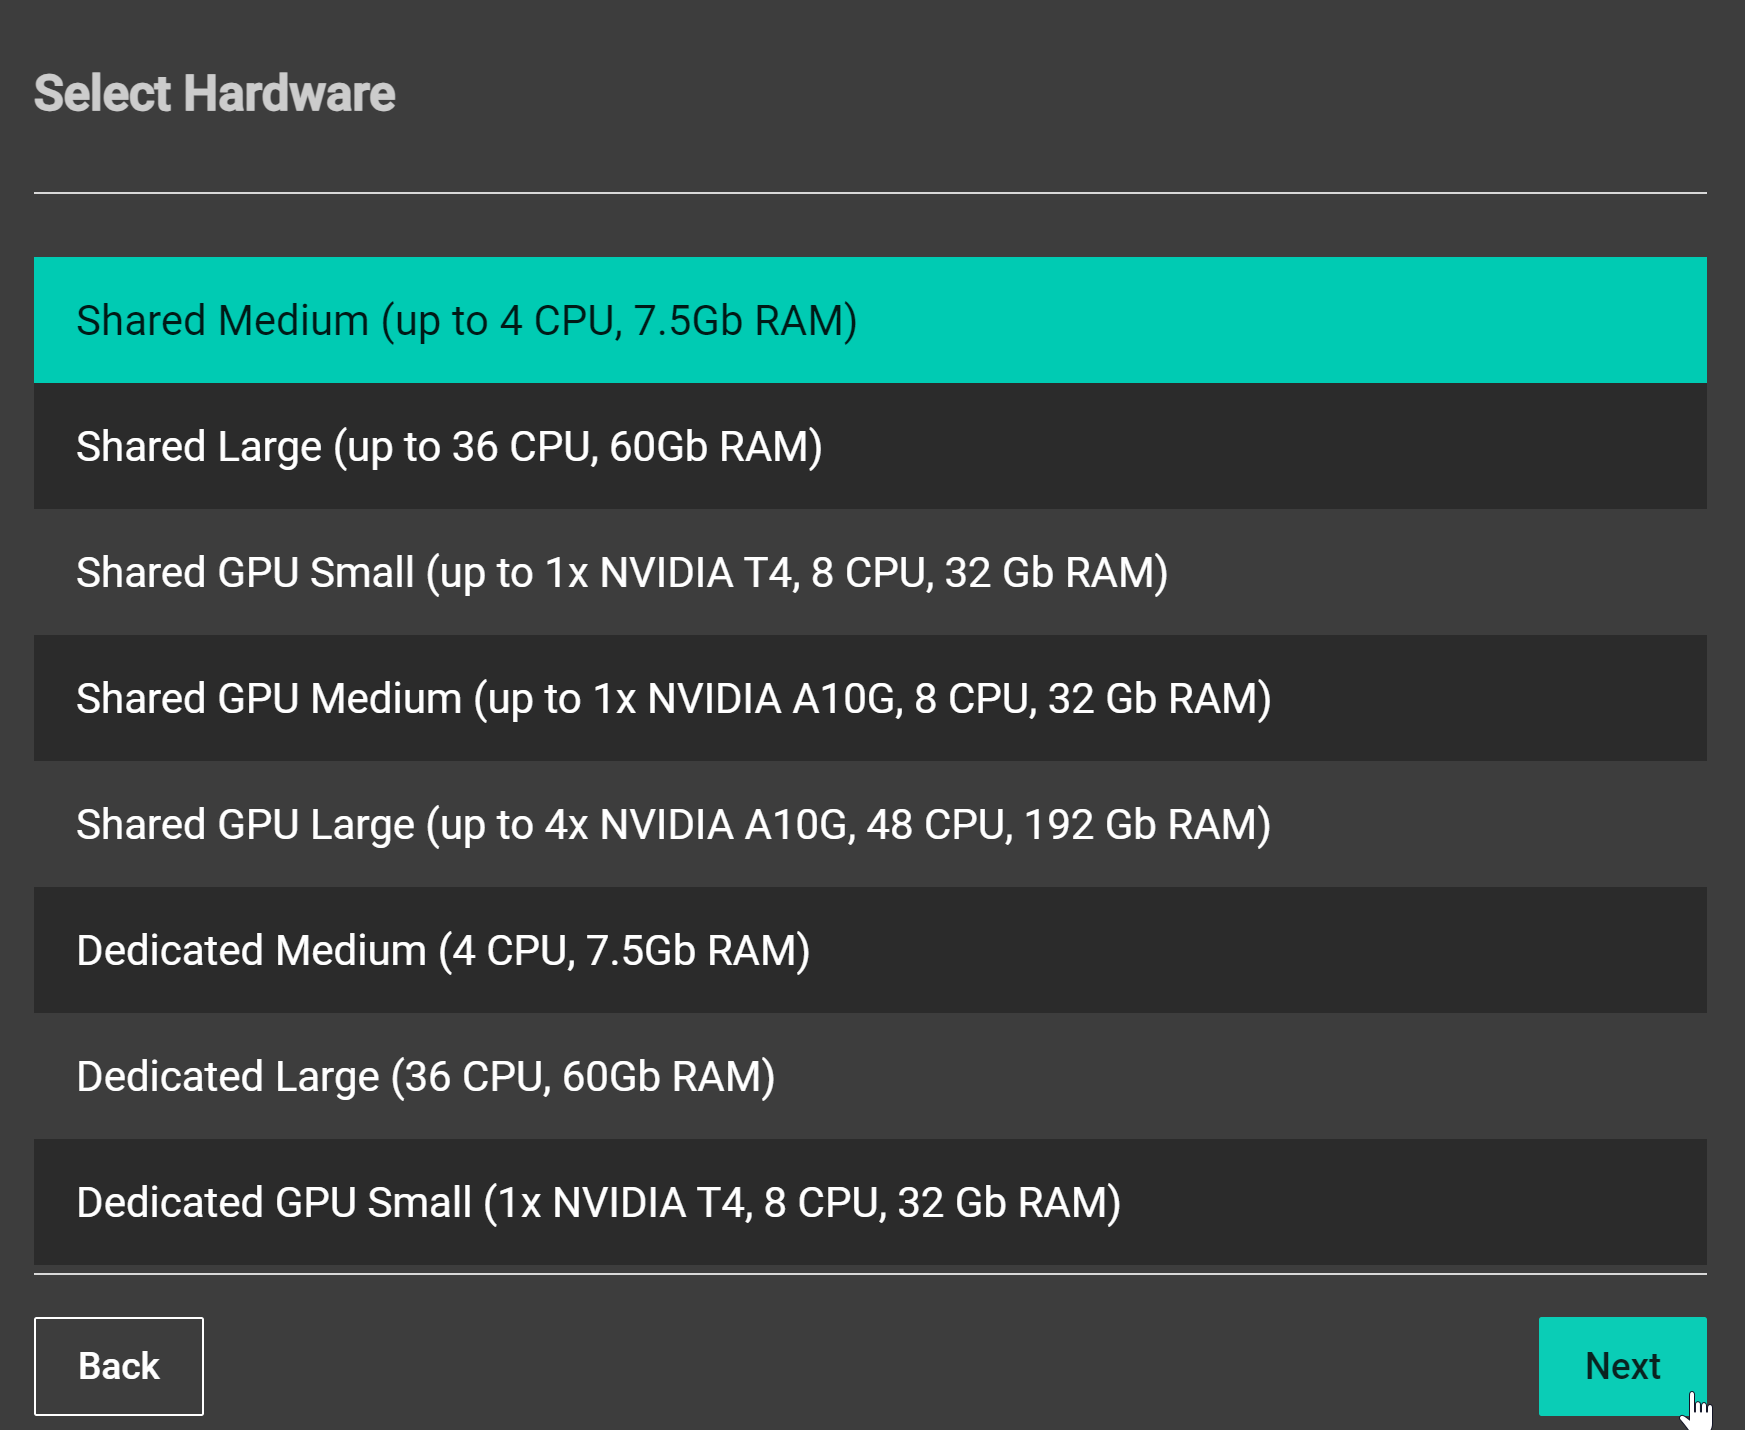
A screenshot of the Notebooks Hub new server steps
Select the appropriate module (i.e., python environment) to load for the instance. The latest python-data-science module is a great starting point. Custom environments and modules can be created following the steps outlined inside the Notebooks Hub UI documentation section found here.
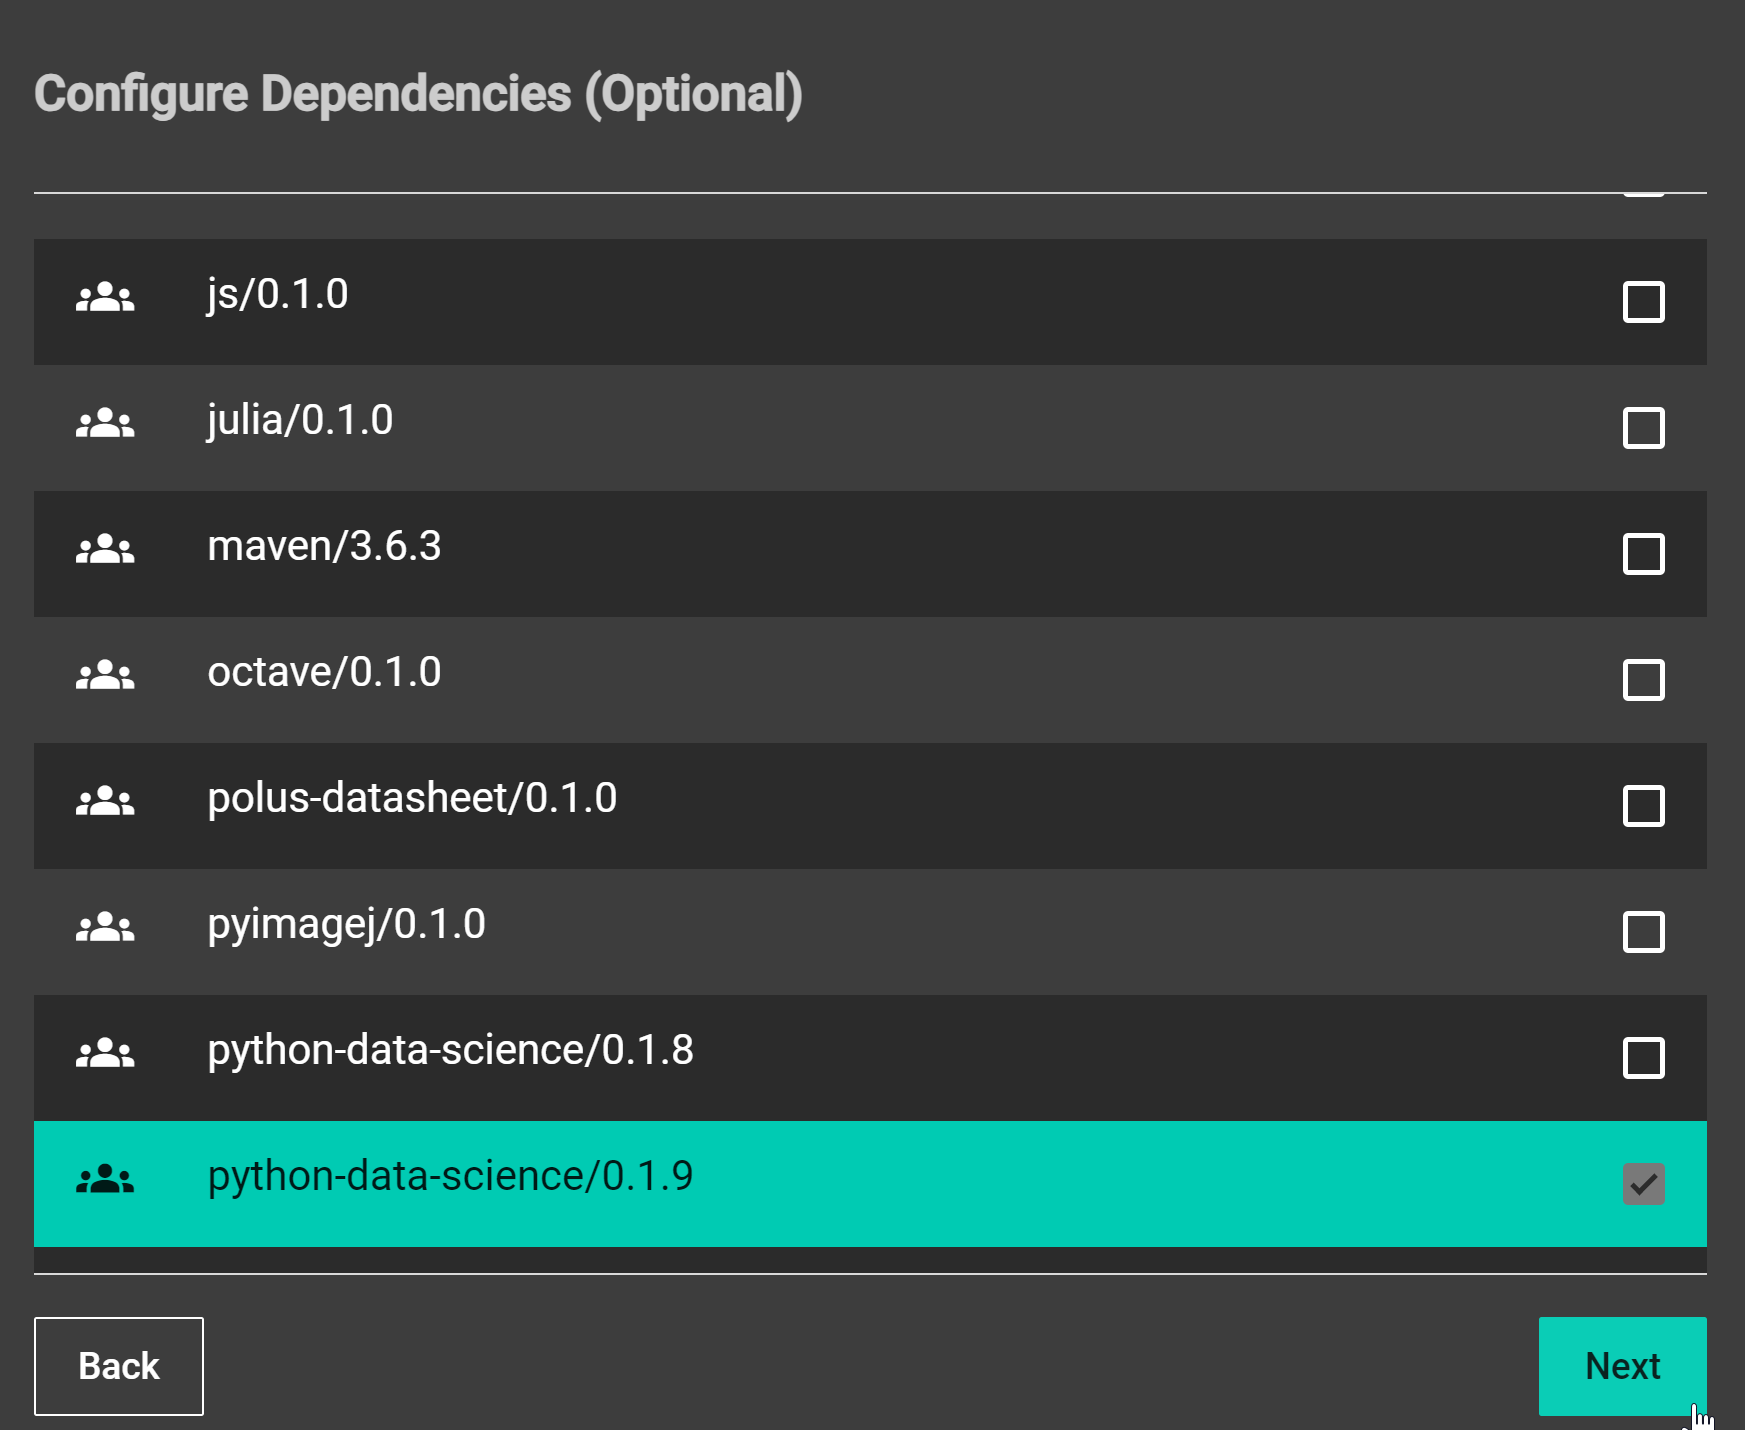
A screenshot of the Notebooks Hub new server steps
Add details to your server instance and click launch.
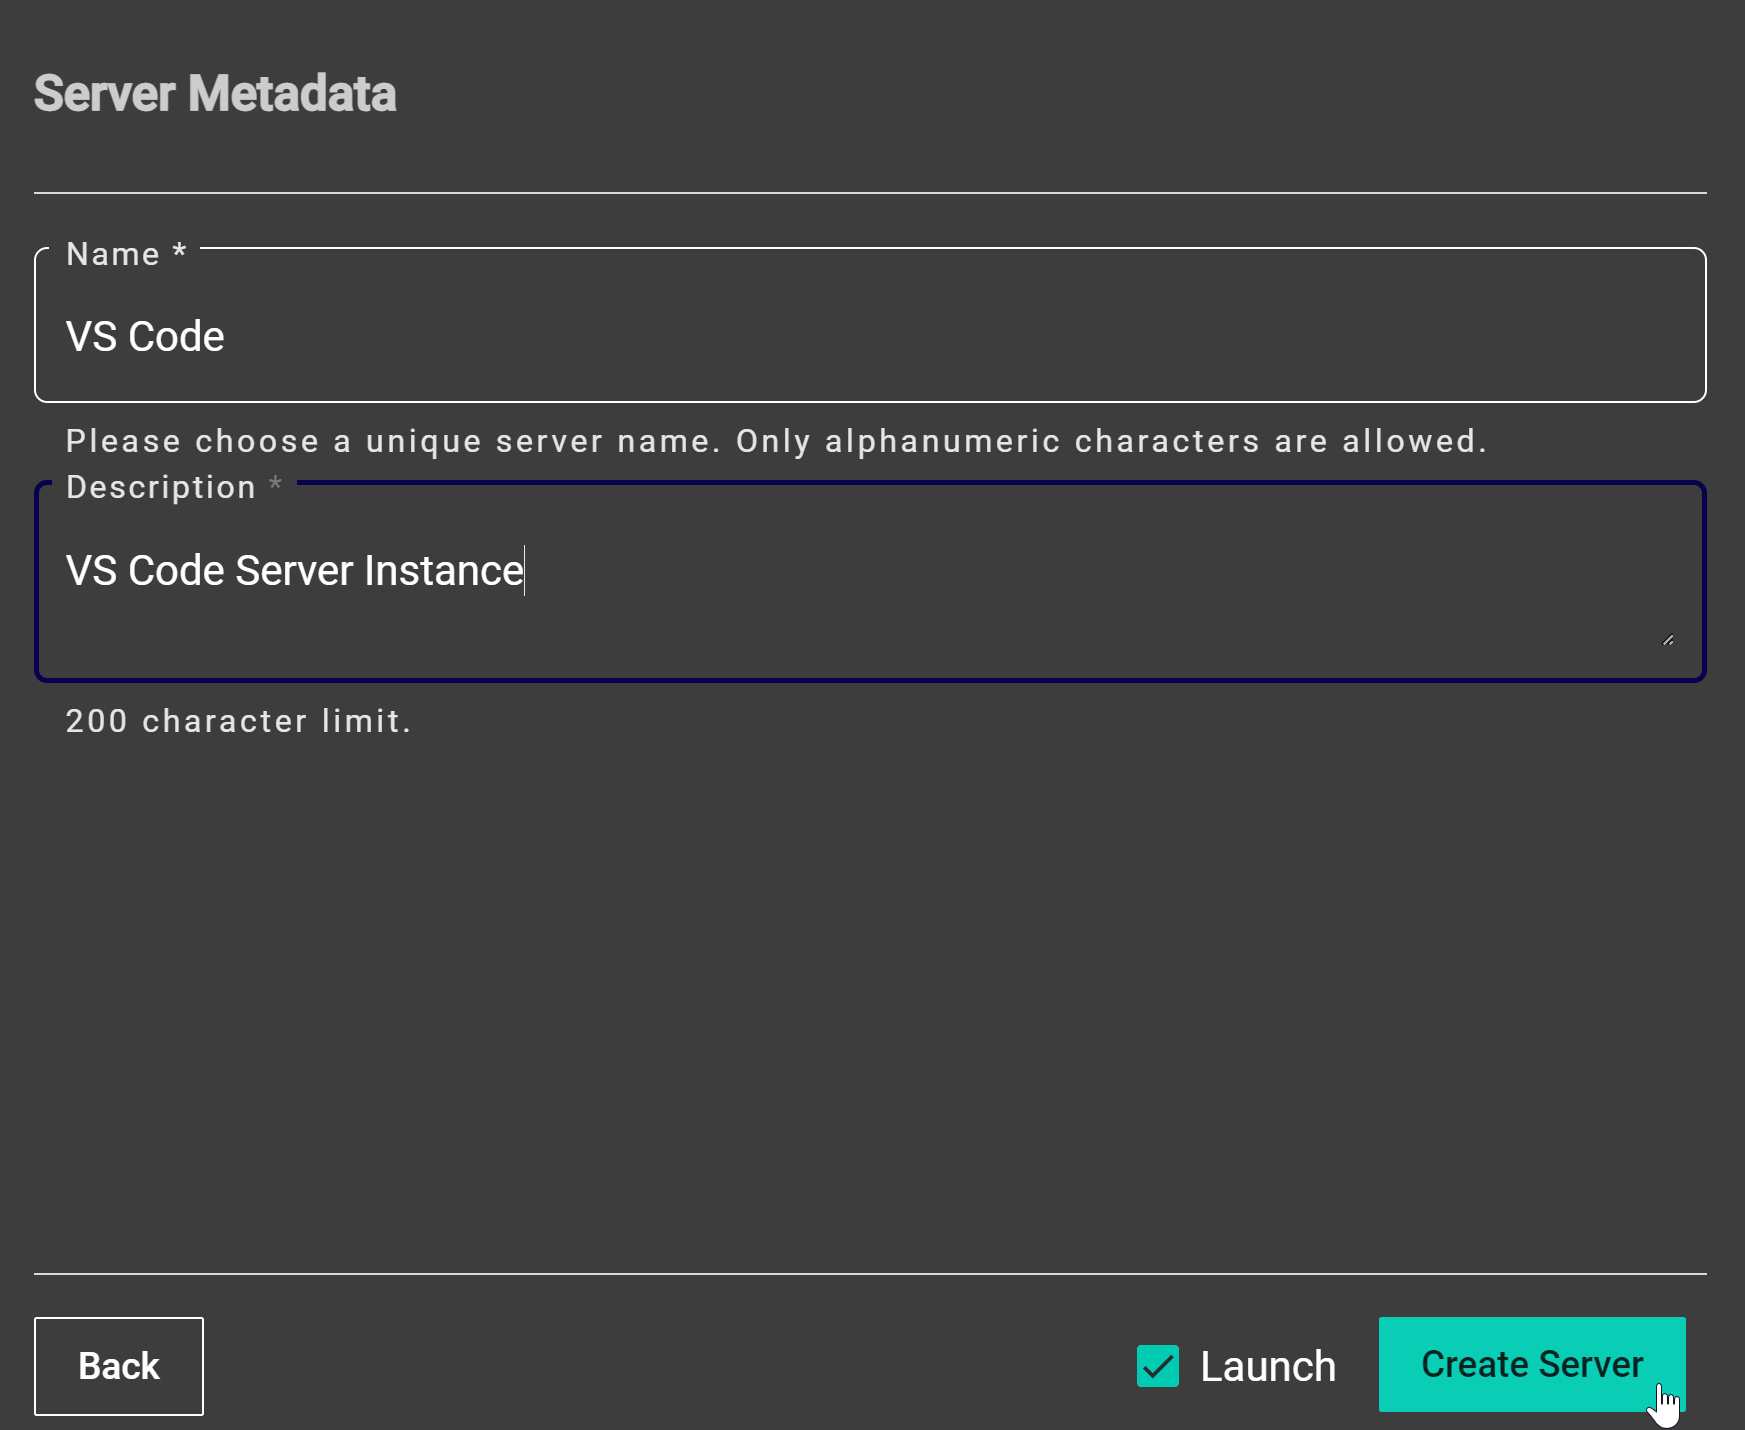
A screenshot of the Notebooks Hub new server steps
After the VS Code instance is created using either method, it will show up on your Servers page. The home icon on the top right corner of the instance indicates it was generated with quick launch from the Home page.
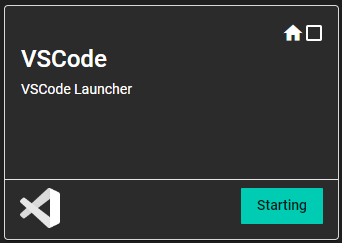
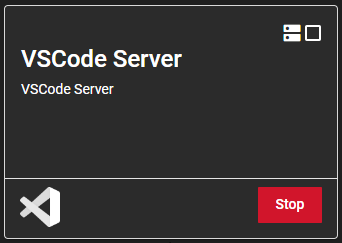
Open VS Code
Open the Navigation Toolbar by clicking the top left corner.
Select File then Add Folder to Workspace….
Select
home/jovyan/workto add the work directory to your workspace. Any files saved in your personal work directory will persist across user sessions. The shared directory (home/jovyan/shared) can also be added to your workspace but cannot be edited. The benefits of adding the shared directory is to access example datasets and applications.A workspace with your selected folder will now appear in the file explorer. This workspace can be saved and renamed as desired.
If needed, additional directories can be added to the same workspace by right clicking inside the file explorer, clicking Add Folder to Workspace…, then selecting your desired folder to add.
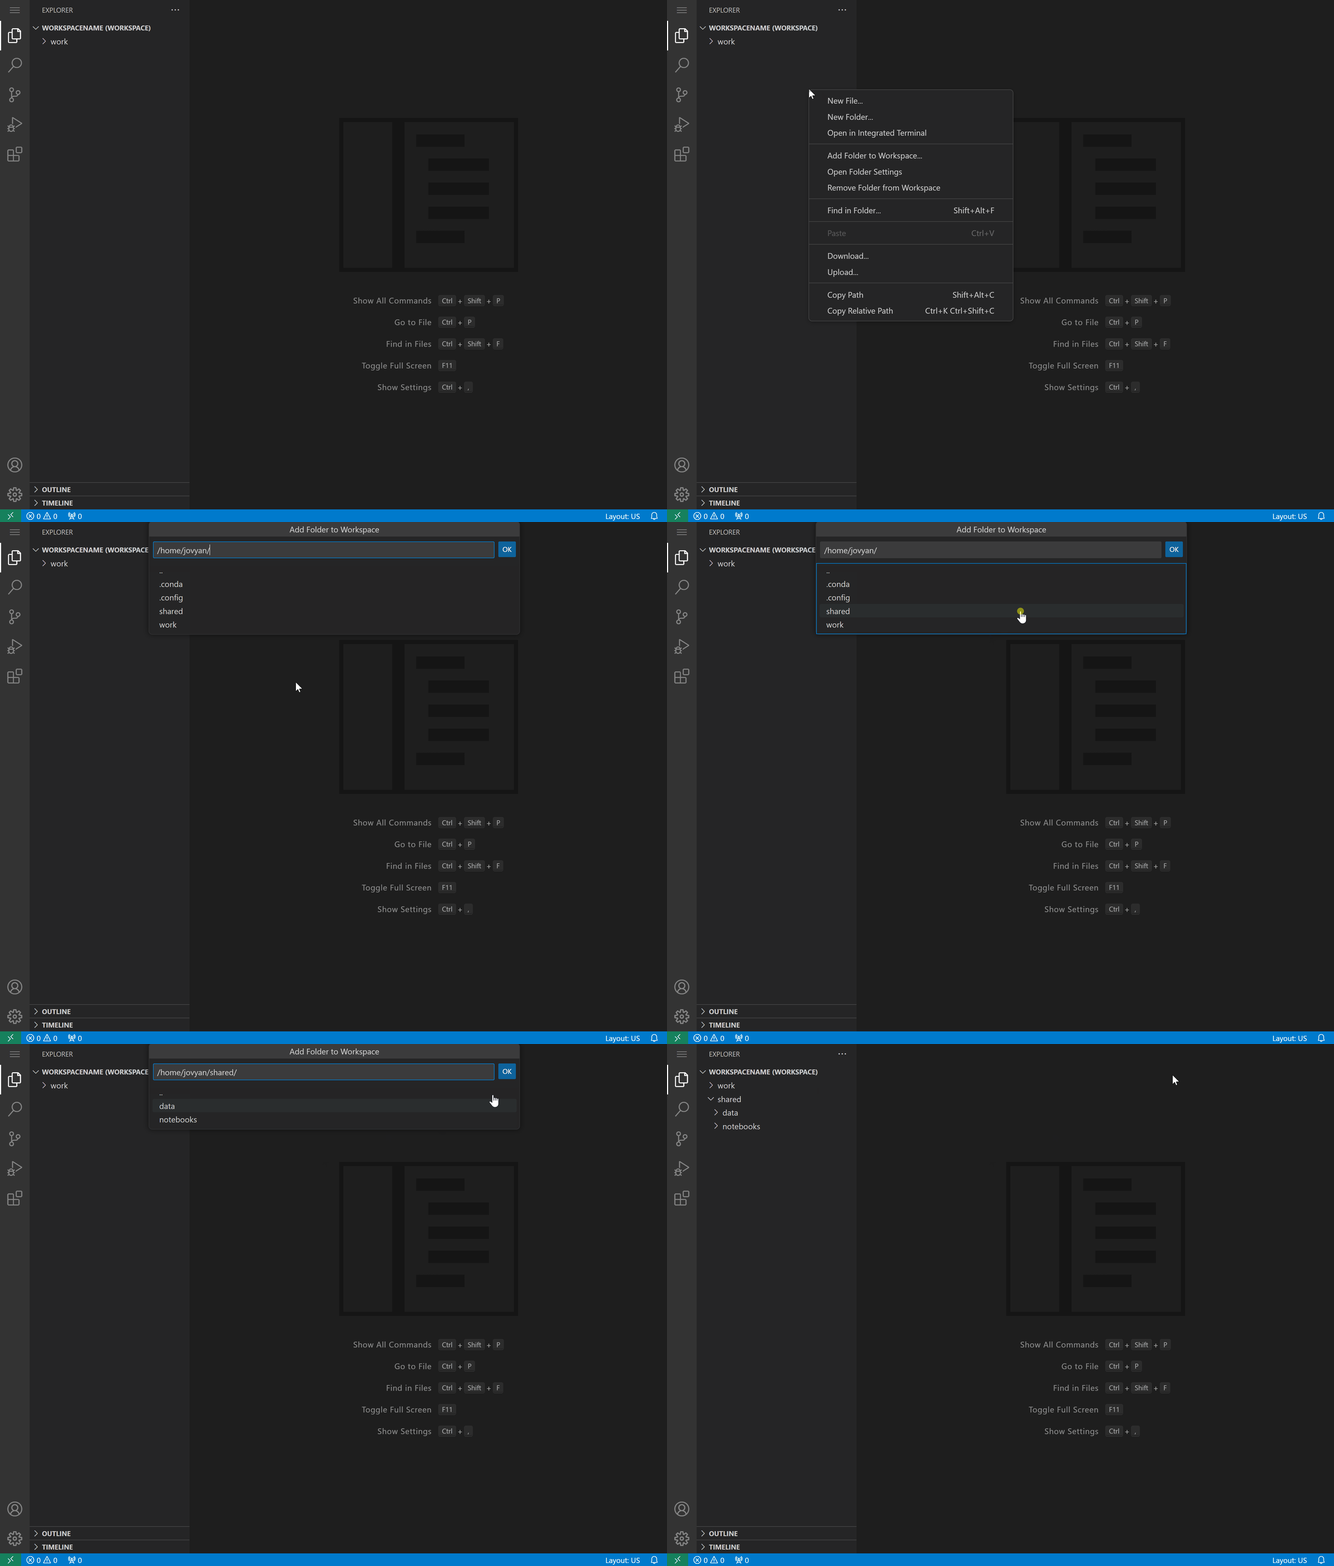
A gif showing how to add folders to workspace in VS Code
Parent folders inside the workspace file explorer can be removed from the workspace. Folders removed from the workspace will not be deleted.
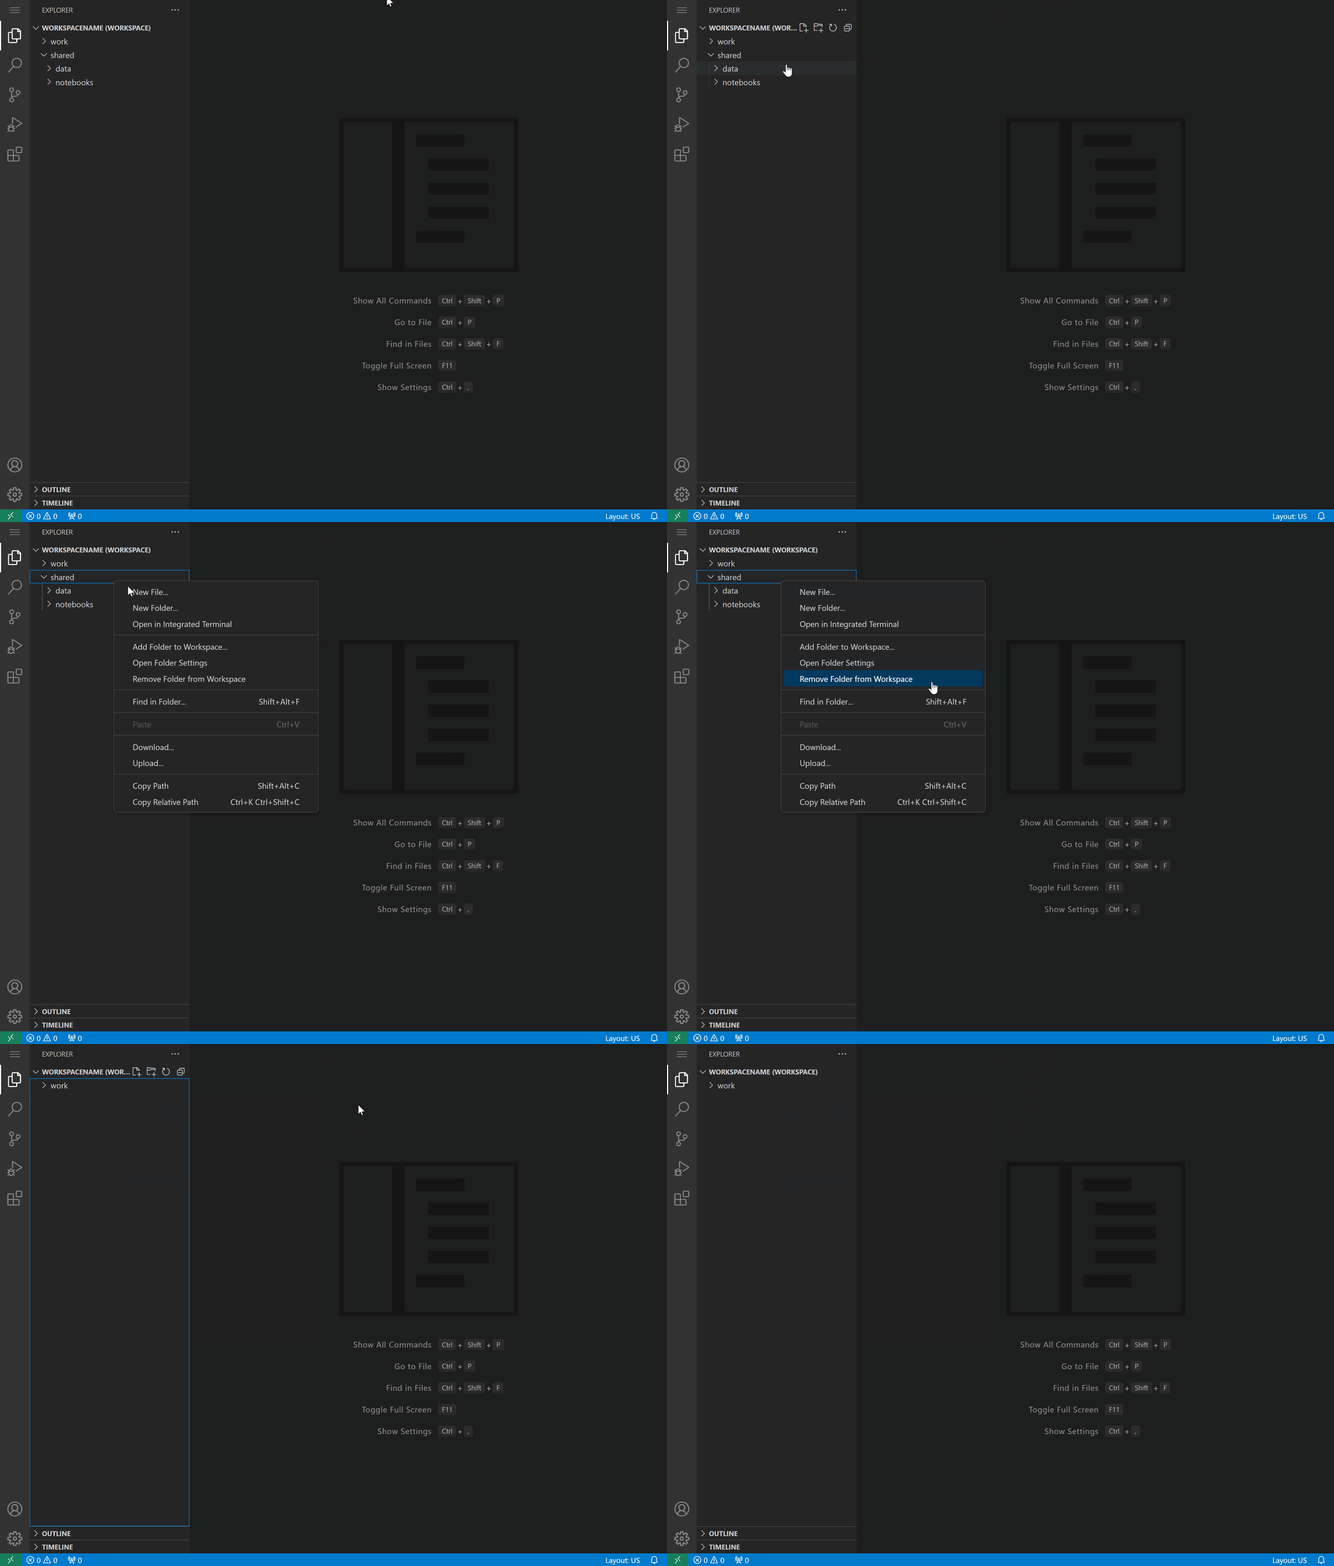
A gif showing how to remove folders to workspace in VS Code
Install Solara
Open a Terminal Window
To open a terminal window inside VS Code, navigate to the Navigation Toolbar > Click on Terminal > Click on New Terminal.
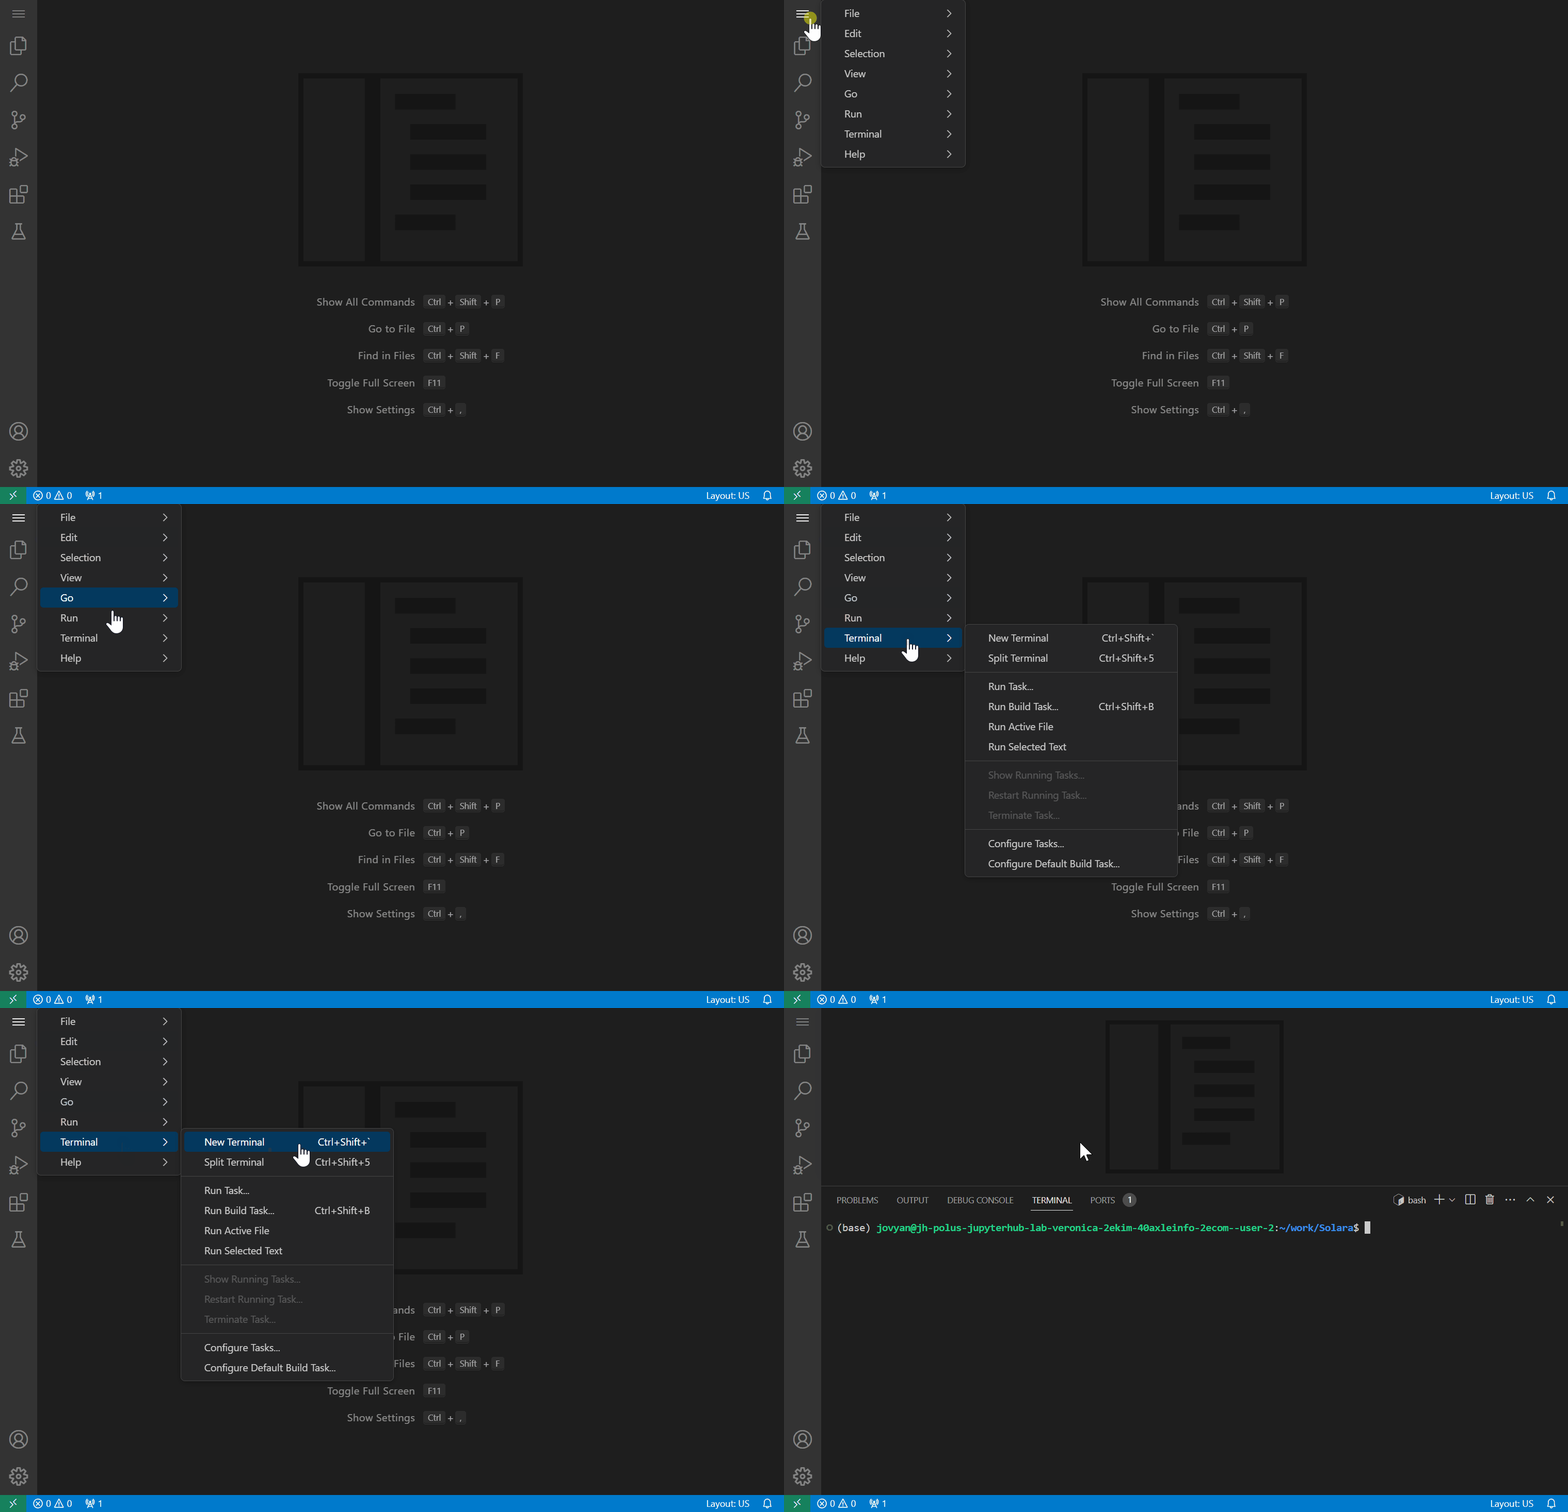
A gif showing how to open terminal in VS Code
If there is more than one parent directory in the workspace, a command
window will open at the top of VS code prompting the user to select
which directory to set as the terminal’s current path. This initial path
can be changed using standard shell commands (e.g.,
cd <path/to/desired/directory>).
Once the terminal panel loads at the bottom of VS Code, the selected
working path for the terminal will be shown before the $ symbol. If
there are two or more parent folders in the workspace, the parent folder
name will also be shown next to the terminal type (e.g., shown as bash
- work in image below). Multiple terminal windows can also be opened
using the same steps listed above, or simply by clicking on the +
button or + dropdown.
Multiple terminal windows will appear in a list on the right side of the terminal panel. Use the trashcan icon to delete unnecessary windows as needed.
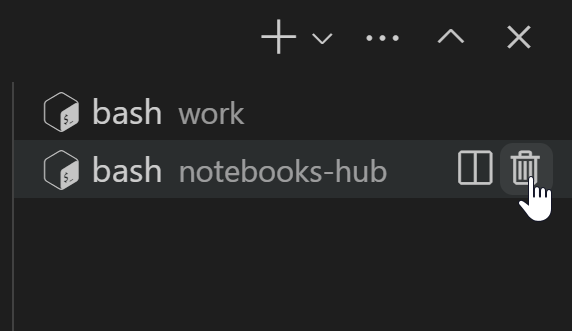
A screenshot of multiple terminals listed in panel in VS Code
Create a Virtual Environment (Recommended Method)
Although the default base environment is isolated for each IDE
instance on Notebooks Hub, you may also create a lightweight virtual
environment using
`venv <https://docs.python.org/3/library/venv.html>`__ to isolate
package installation.
After opening a terminal window, create a virtual environment by running
python -m venv <environment-name>. For example, the following code
will create a virtual environment named solara-env.
python -m venv solara-env
To activate the virtual environment, run
source ./<environment-name>/bin/activate. For solara-env, the
following code can be used.
source ./solara-env/bin/activate
Once the virtual environment is activated, the environment name (e.g.,
solara-env) will appear at the beginning of each terminal line as
seen in the following gif.

A gif of the terminal showing venv creation and activation
Solara can now be installed inside the virtual environment using
pip install solara.
pip install solara
If at any point the virtual environment needs to be exited, simply run
the deactivate command in the terminal.
Using Custom Conda Environments
When using custom conda environments, install solara using the
terminal. For more information on creating your own user-defined conda
environments, please refer to the the instructions
here.
Packages installed into your custom environments do not need to be
reinstalled with each new session.
Activate your custom conda environment using
conda activate <your-environment-name> and install Solara using
pip install solara.
Note: Solara can also be installed into the default base conda
environment, but note that installations inside base are temporary.
These will be cleared with each new user session (i.e., stopping then
restarting the server instance). The gif below shows installation into
the base environment.
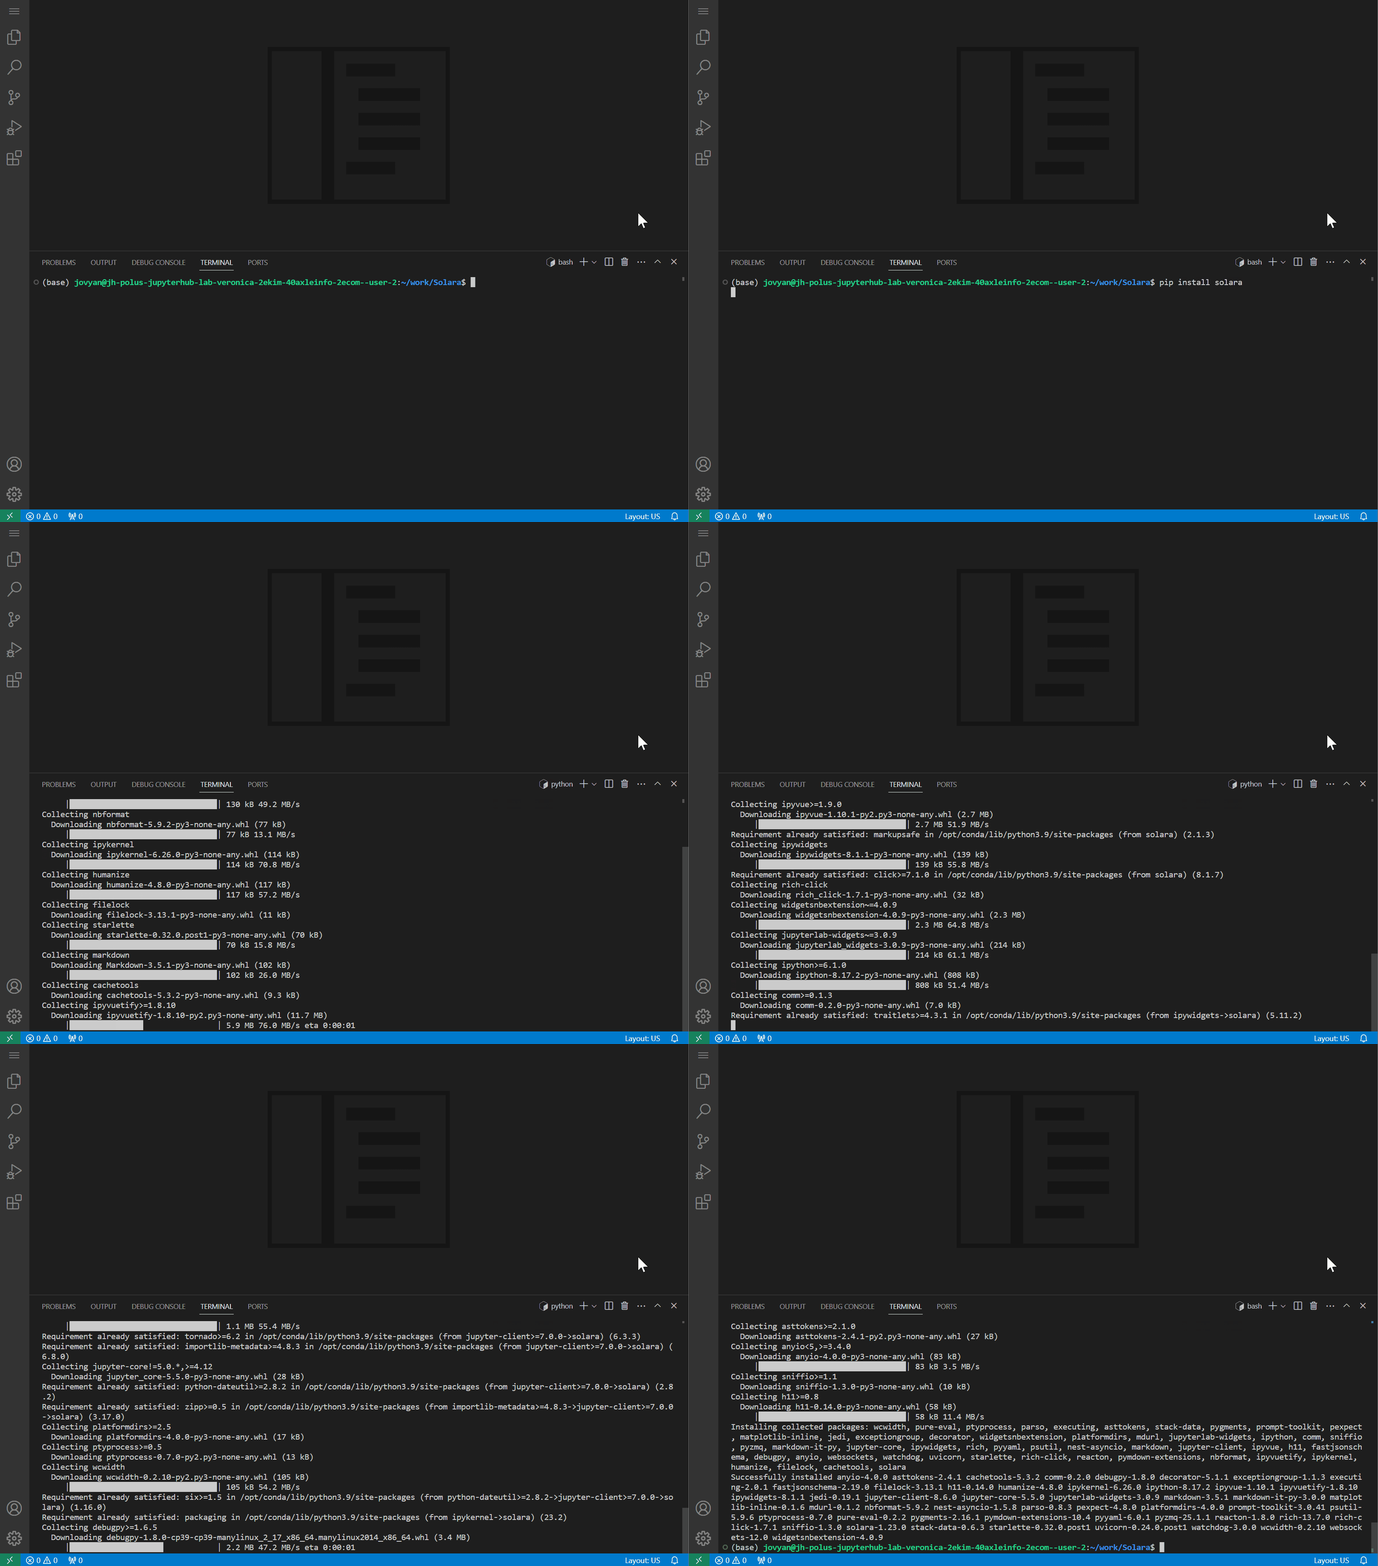
A gif showing pip installation of solara in VS Code
Using Built-In Conda Environments
When using built-in conda environments (e.g.,
python-data-science-0.1.8), installation will be temporary within a
contained server instance. However, this method is not recommended.
If you need to use a built-in environment and would like to install
packages, create a Jupyter notebook (.ipynb) and install any
missing, but necessary, packages inside a Jupyter cell.
To install solara, create a Jupyter notebook named app.ipynb and
use the first cell to run the following code. This will need to be
repeated each time the VS Code instance is reloaded through Notebooks
Hub.
%pip install solara
After running the cell containing the code shown above, restart the kernel. This can be completed by click the ↺ Restart button located towards the top of VS Code.

A screenshot pointing to the Restart button in VS Code
Next, run the following code cell to confirm that the solara package
is accessible.
%pip show solara
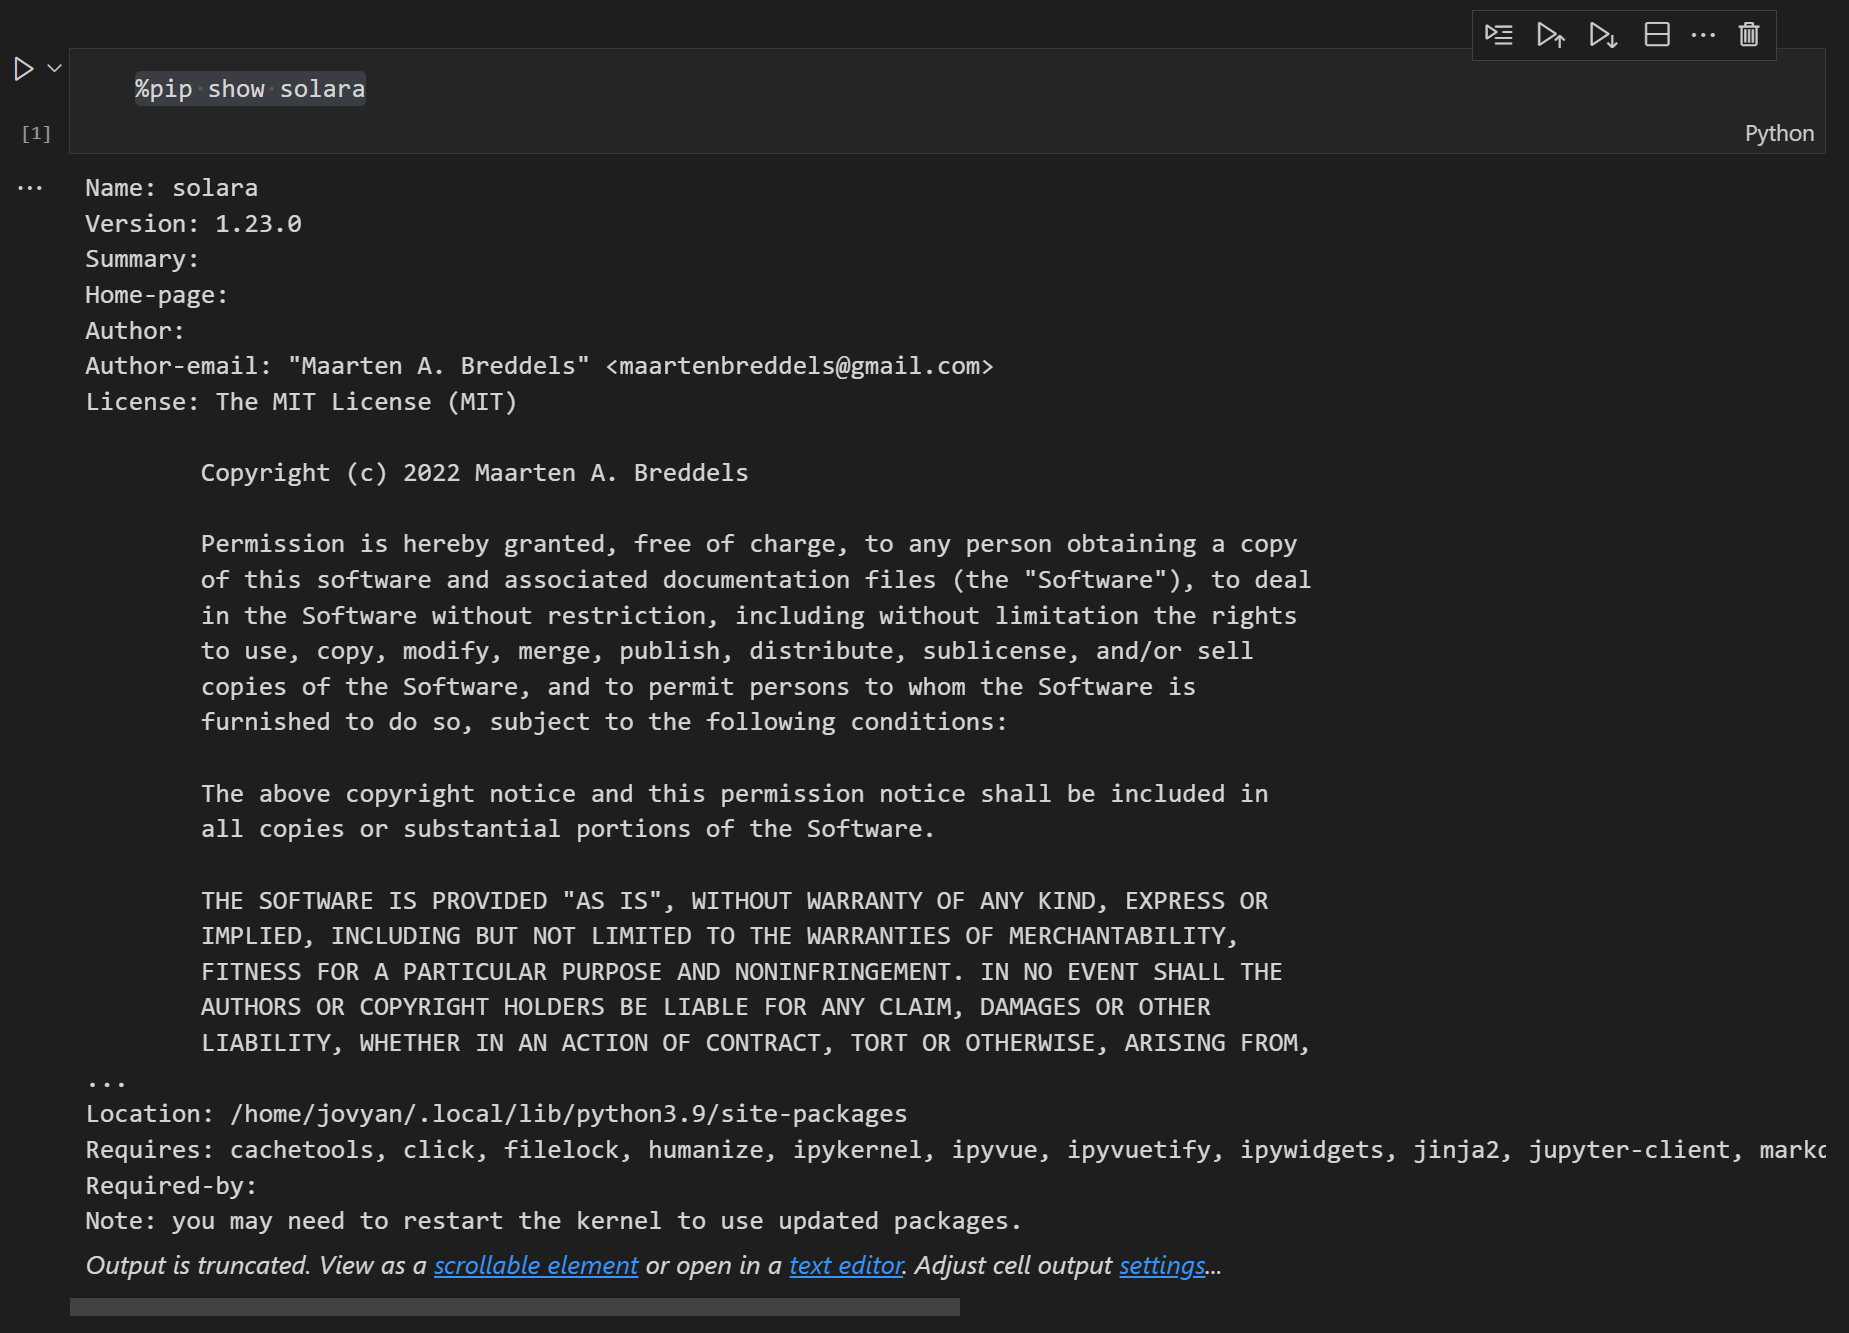
A screenshot showing the output of the code cell above
If the package is not accessible, the following error message will appear.

A screenshot showing error message with missing package name
After installation, restart the kernel. This can be completed by click the ↺ Restart button located towards the top of VS Code.

A screenshot pointing to the Restart button in VS Code
Alternative Installation Methods
In some situations, it may be preferable to install specific versions of Solara or in specific contexts. For information on alternative installation methods of Solara (e.g., unreleased versions, firewalled networks), please refer to the instructions here.
Creating a Solara App
Using Python Scripts
Create .py File
Create a new .py Python script file, commonly named app.py or
sol.py for simplicity. This can be renamed if desired. Two easy
options to create a new file using the VS Code interface are shown
below.
Option 1: Use Navigation Toolbar > Click on File > Click on New File
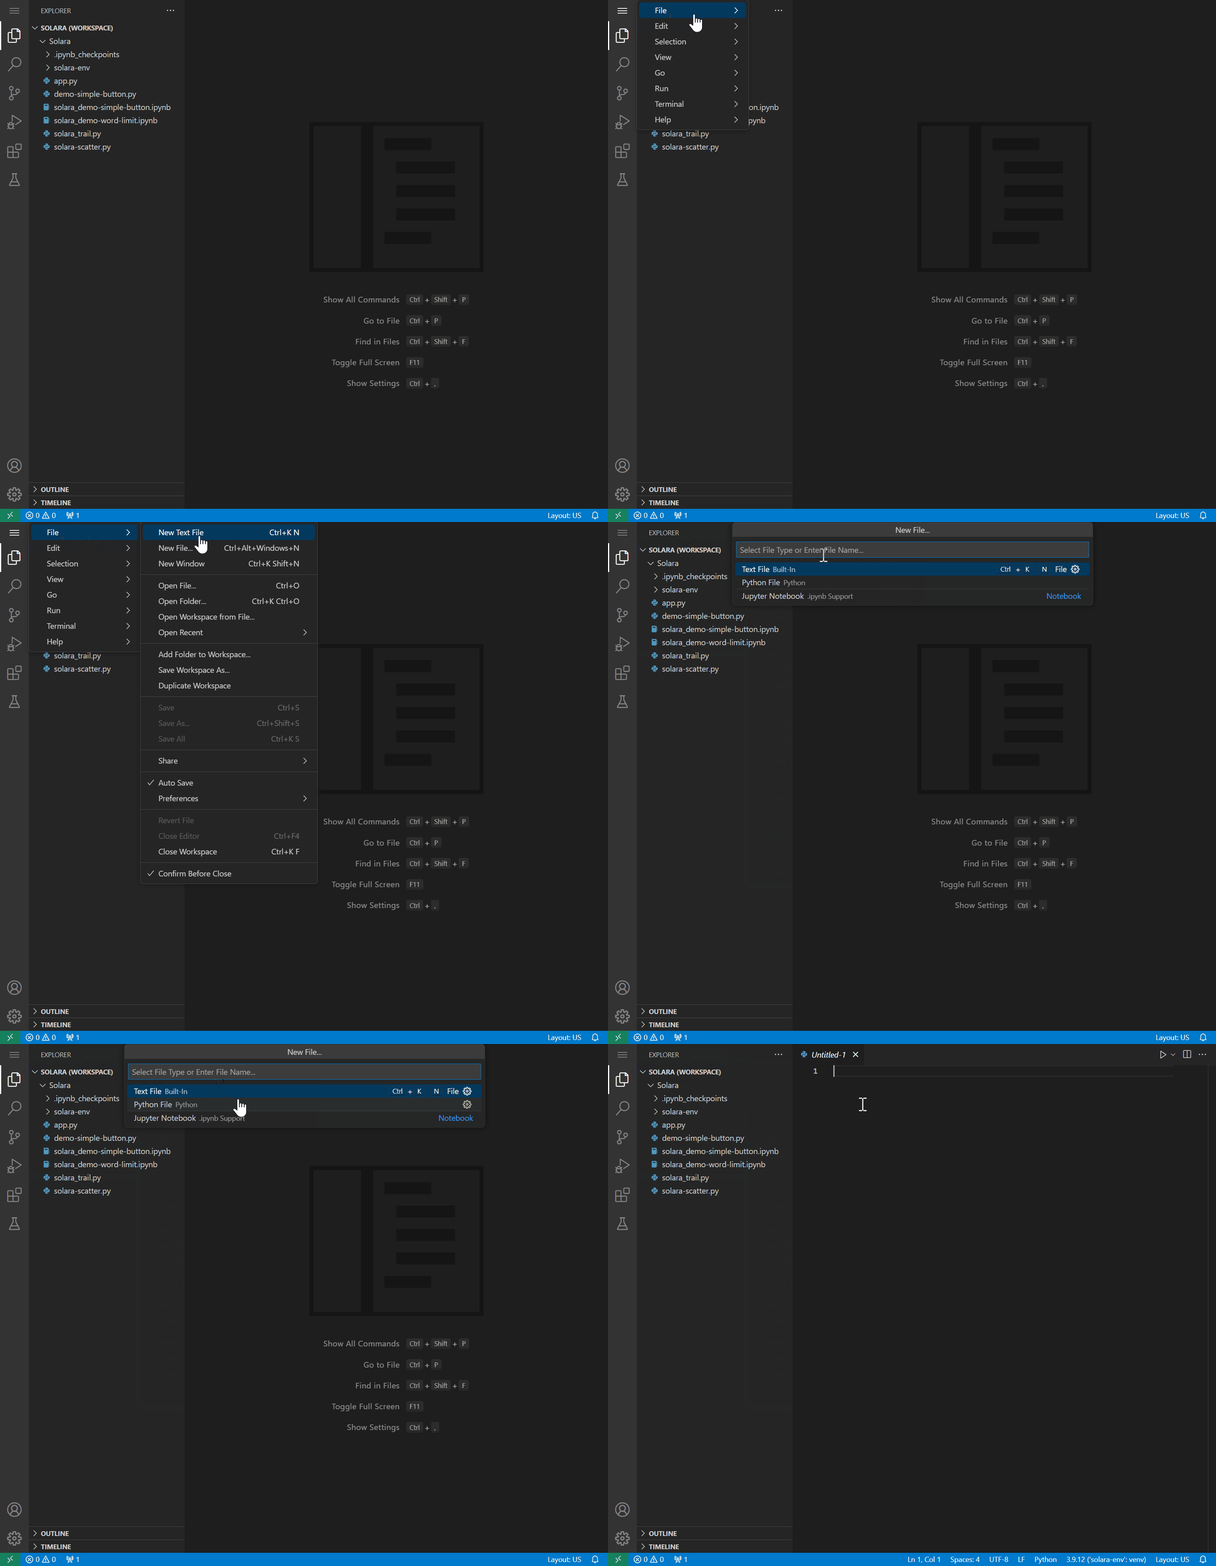
A gif showing method to create new file on VS code.
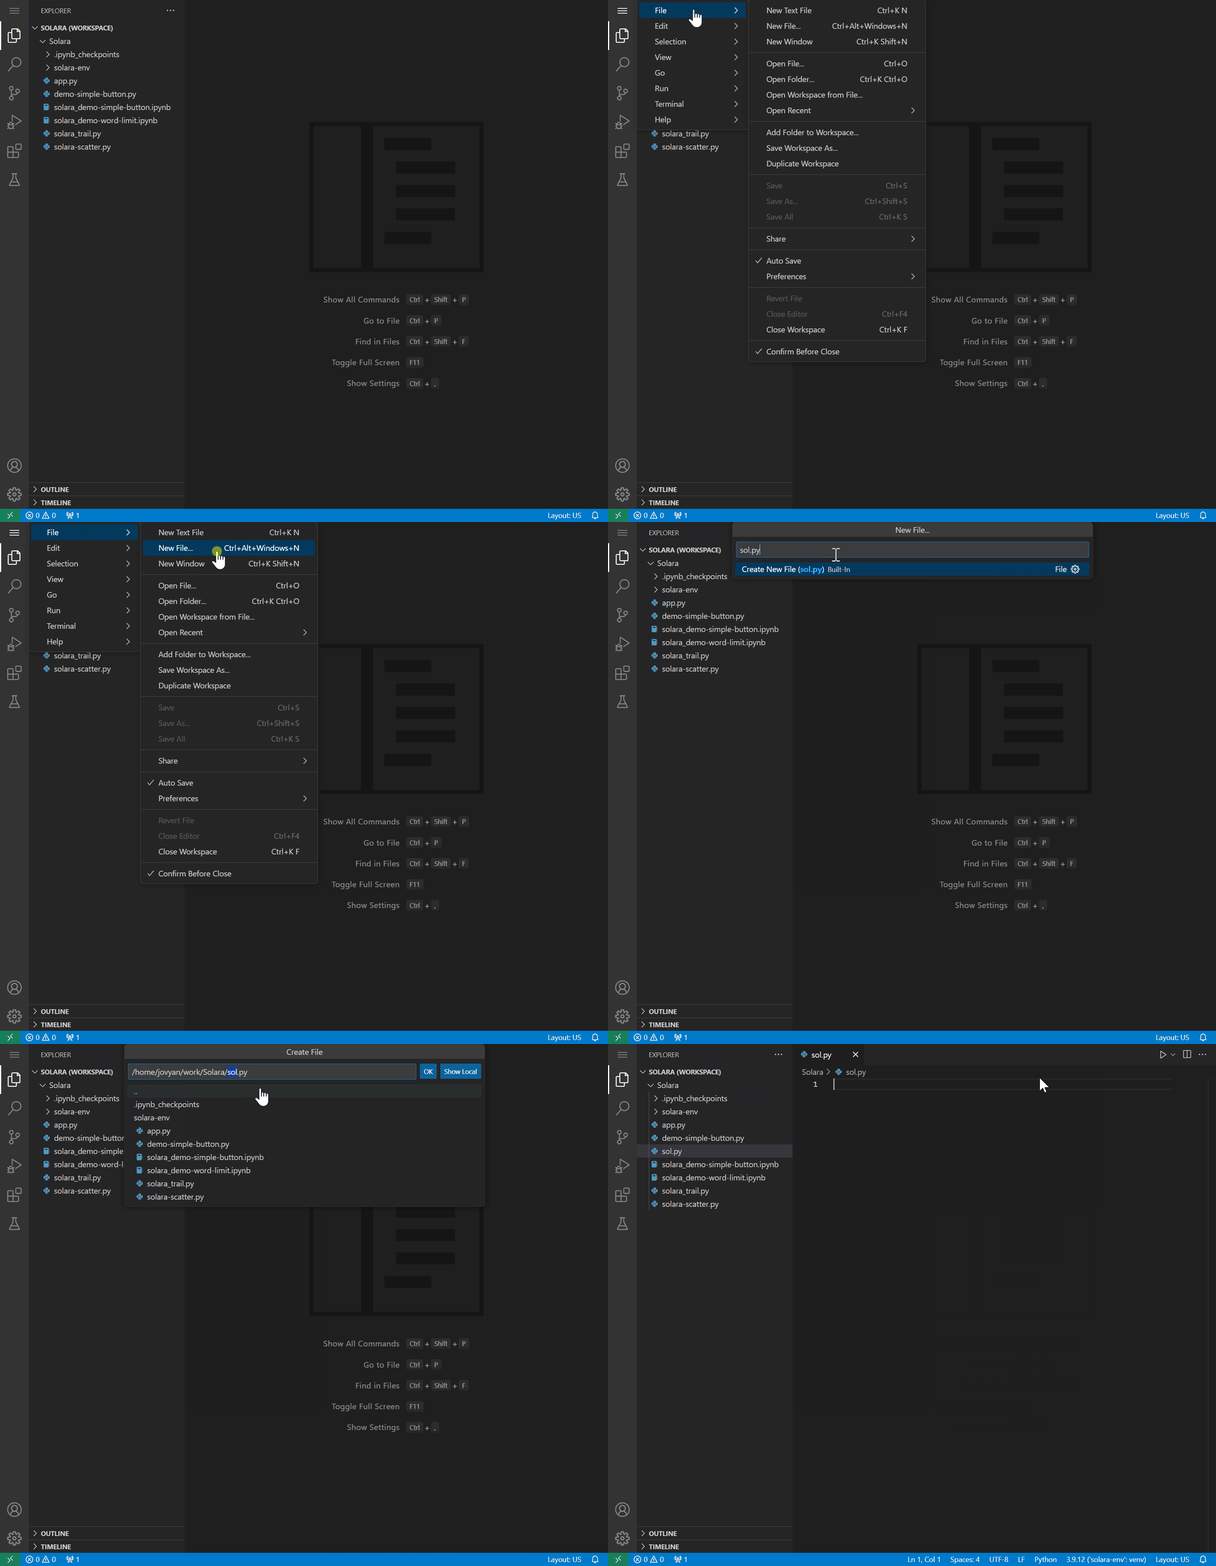
A gif showing method to create new file on VS code.
Option 2: In the File Explorer Panel, hover over your workspace name
and click on the new file button: ![]()
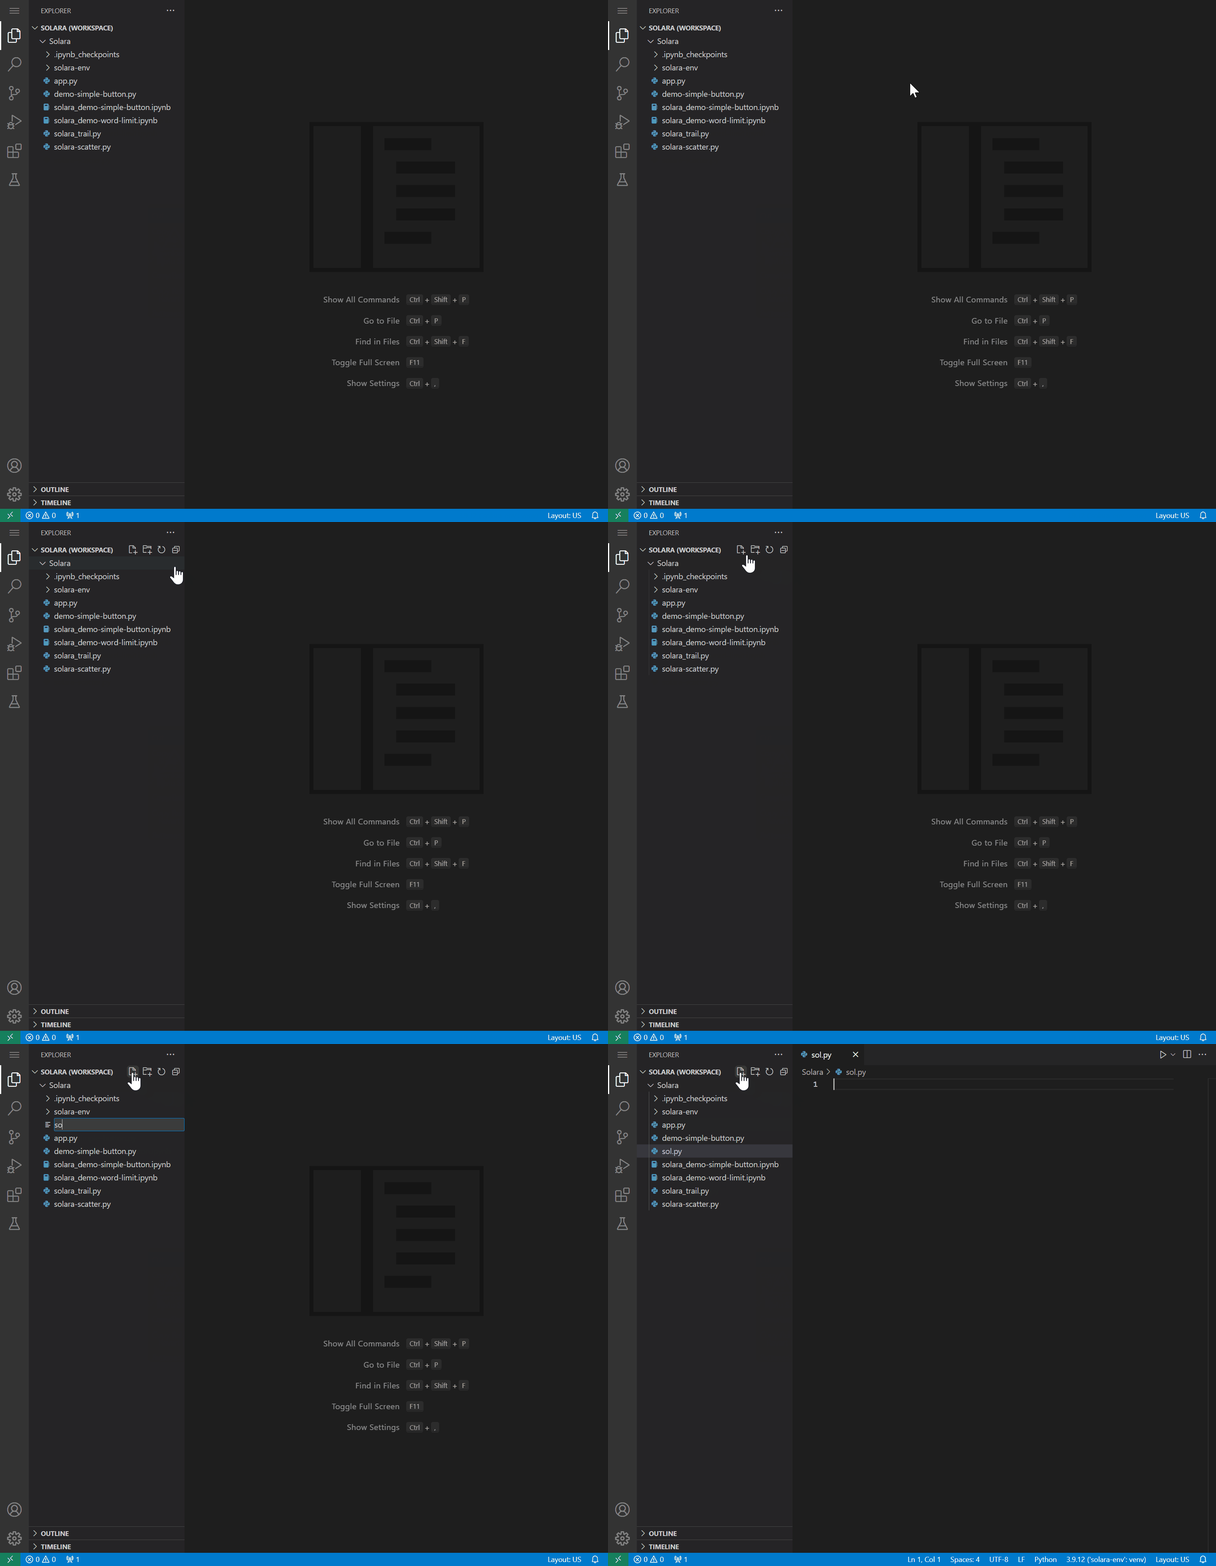
A gif showing method to create new file on VS code.
Using Jupyter Notebooks
Create .ipynb File
Create a new .ipynb Jupyter Notebook file, commonly named
app.ipynb or sol.ipynb for simplicity. This can be renamed if
desired. Two easy options to create a new file using the VS Code
interface are shown below.
Option 1: Use Navigation Toolbar > Click on File > Click on New File
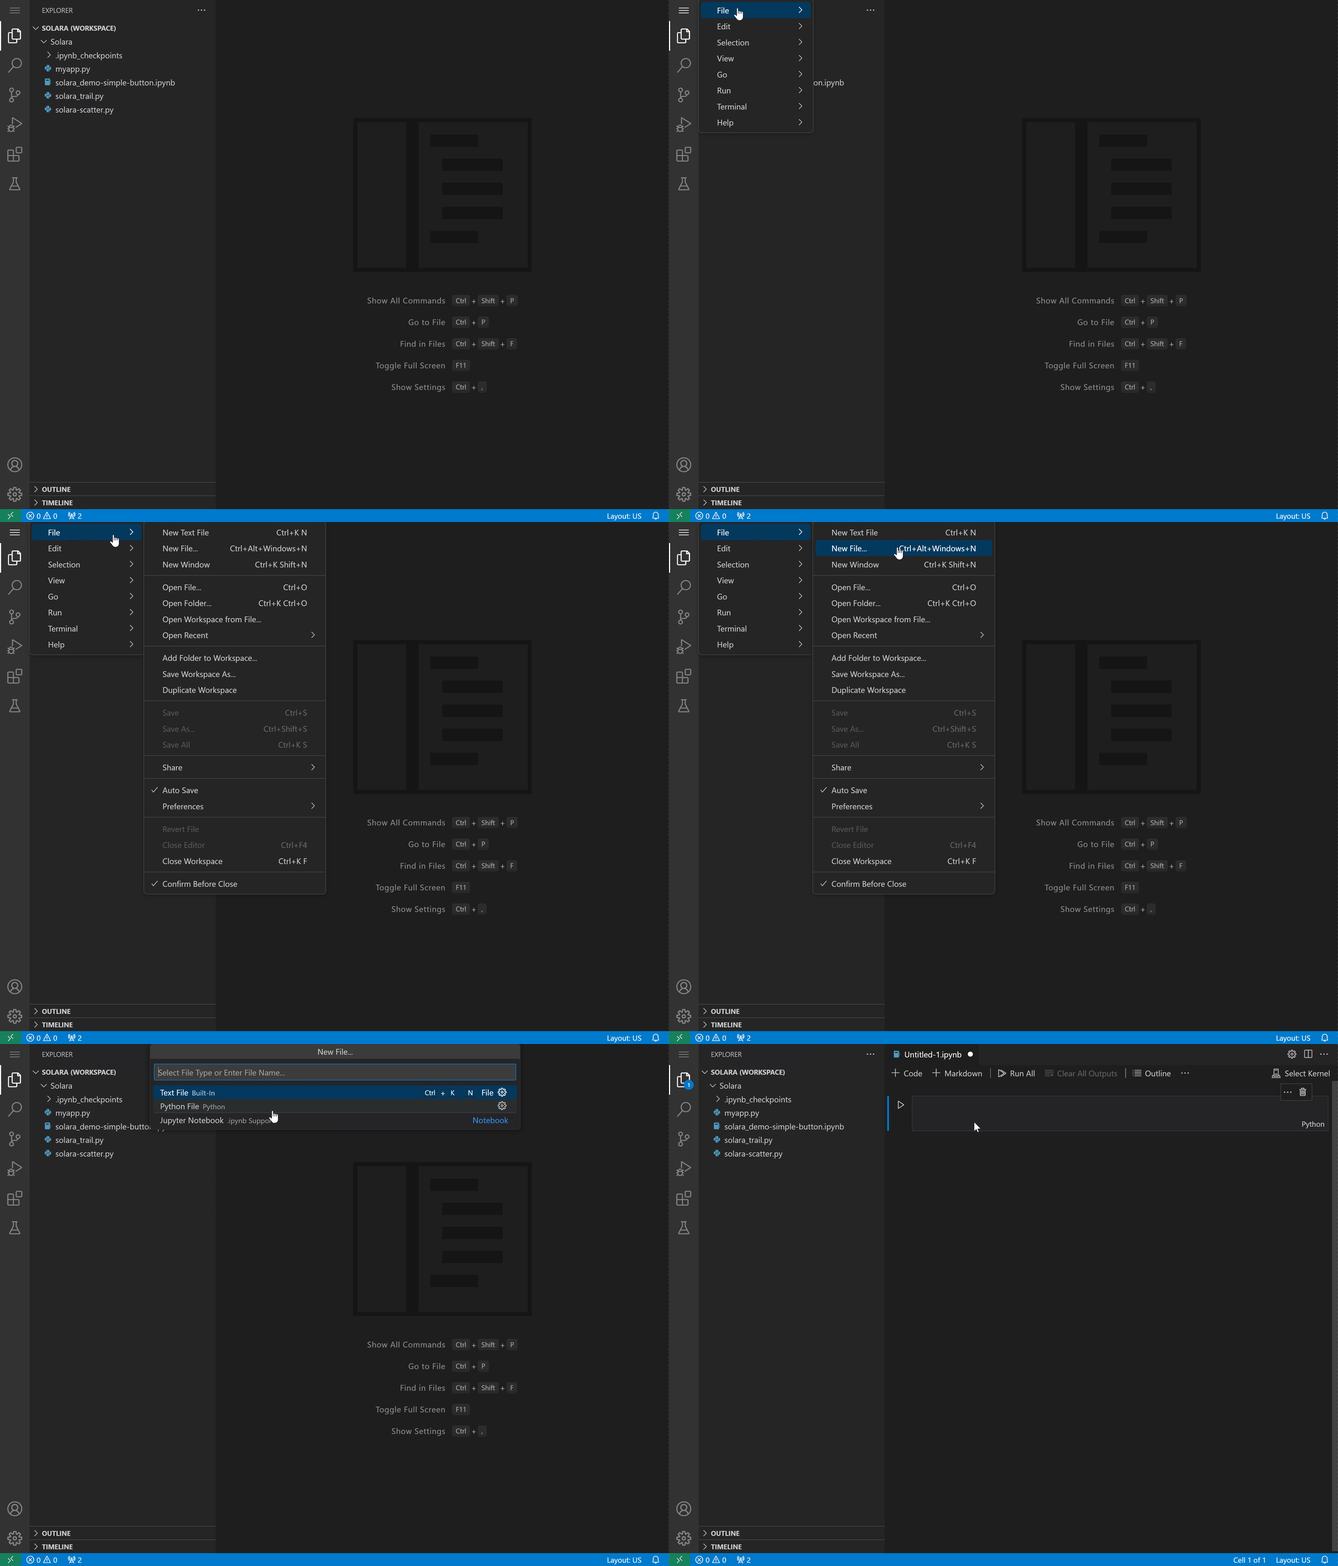
A gif showing method to create new file on VS code.
Option 2: In the File Explorer Panel, hover over your workspace name
and click on the new file button: ![]()
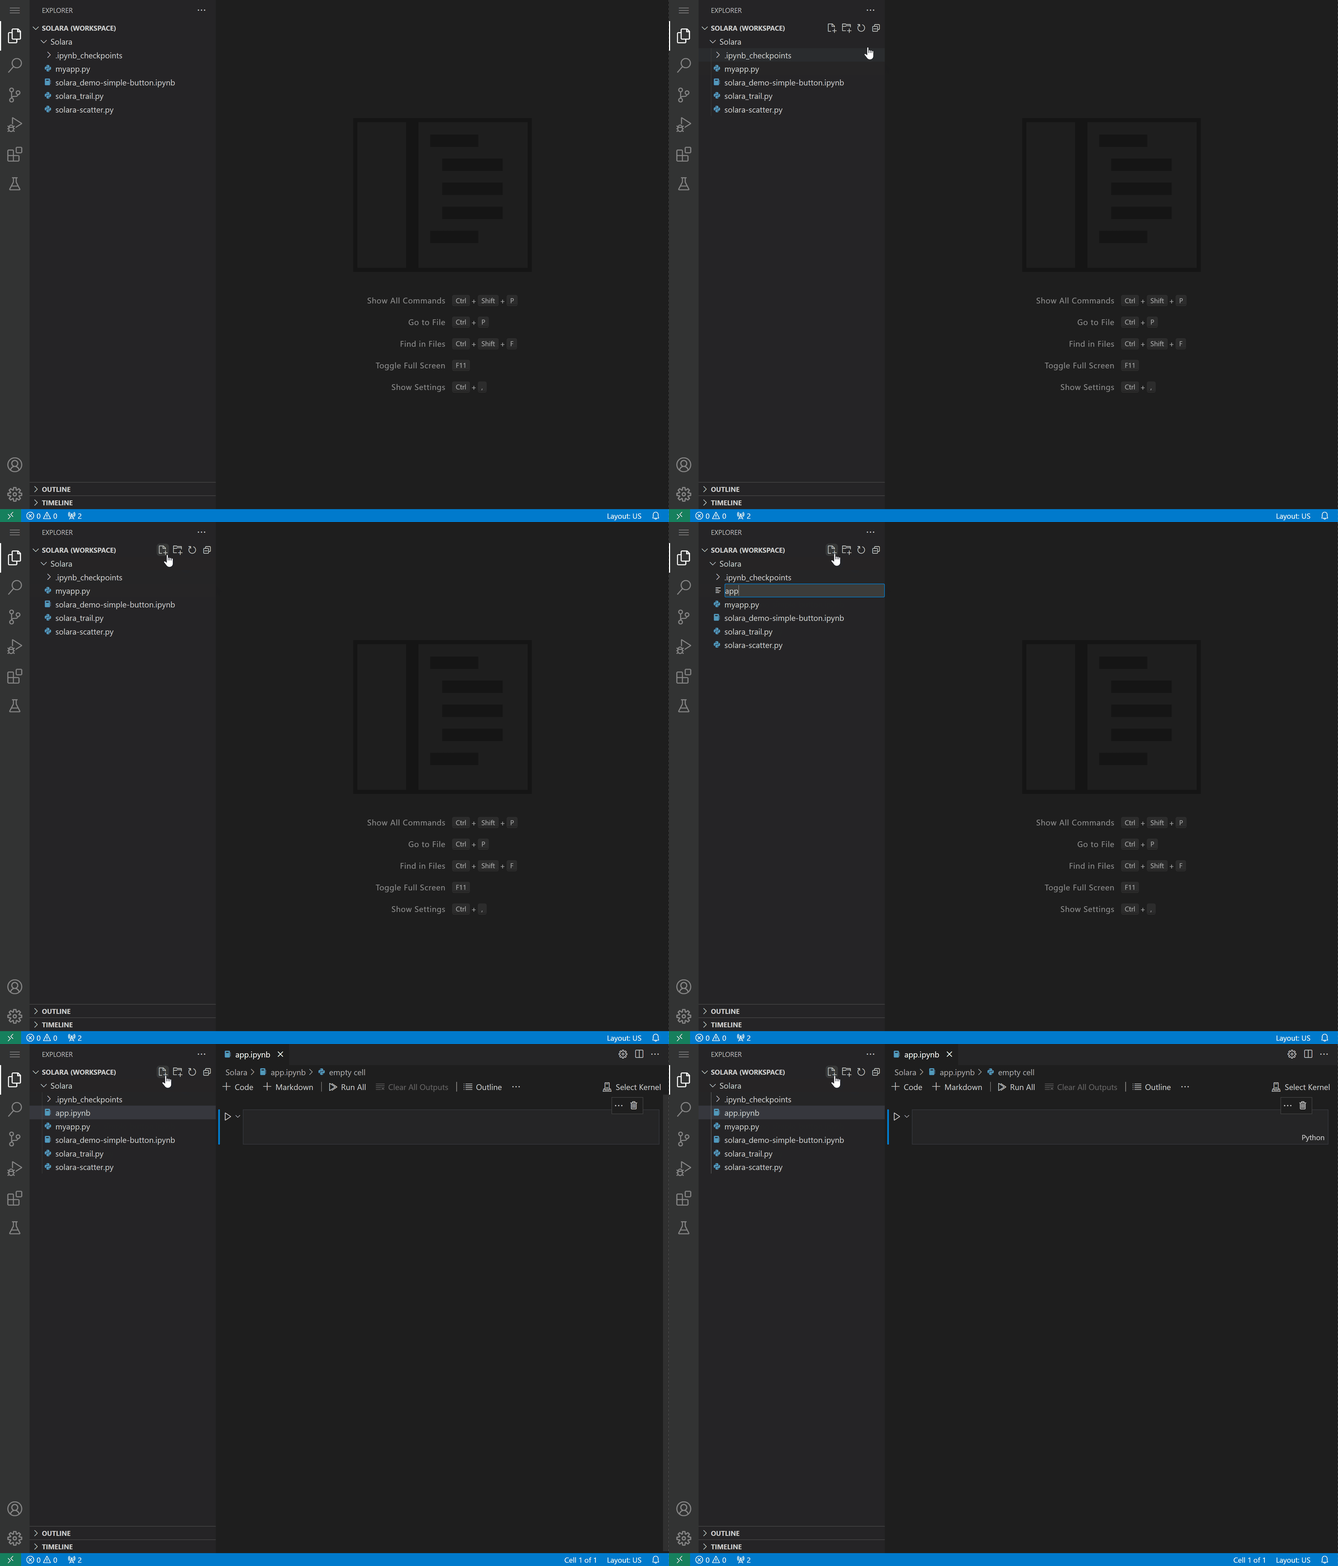
A gif showing method to create new file on VS code.
Select Notebook Kernel
On the top right corner, click on Select Kernel to select which
linked Python environment to use to run code inside the notebook. If a
virtual environment solara-env was created, this should be
selected as the kernel.

A gif showing notebook kernel selection inside VS Code
Occasionally, VS Code will not automatically suggest the Python
environment module selected when creating the VS Code instance. If so,
click Python Environments then select the desired Python environment
(e.g., python-data-science-0.1.8).

A screenshot of the VS Code kernel selection window
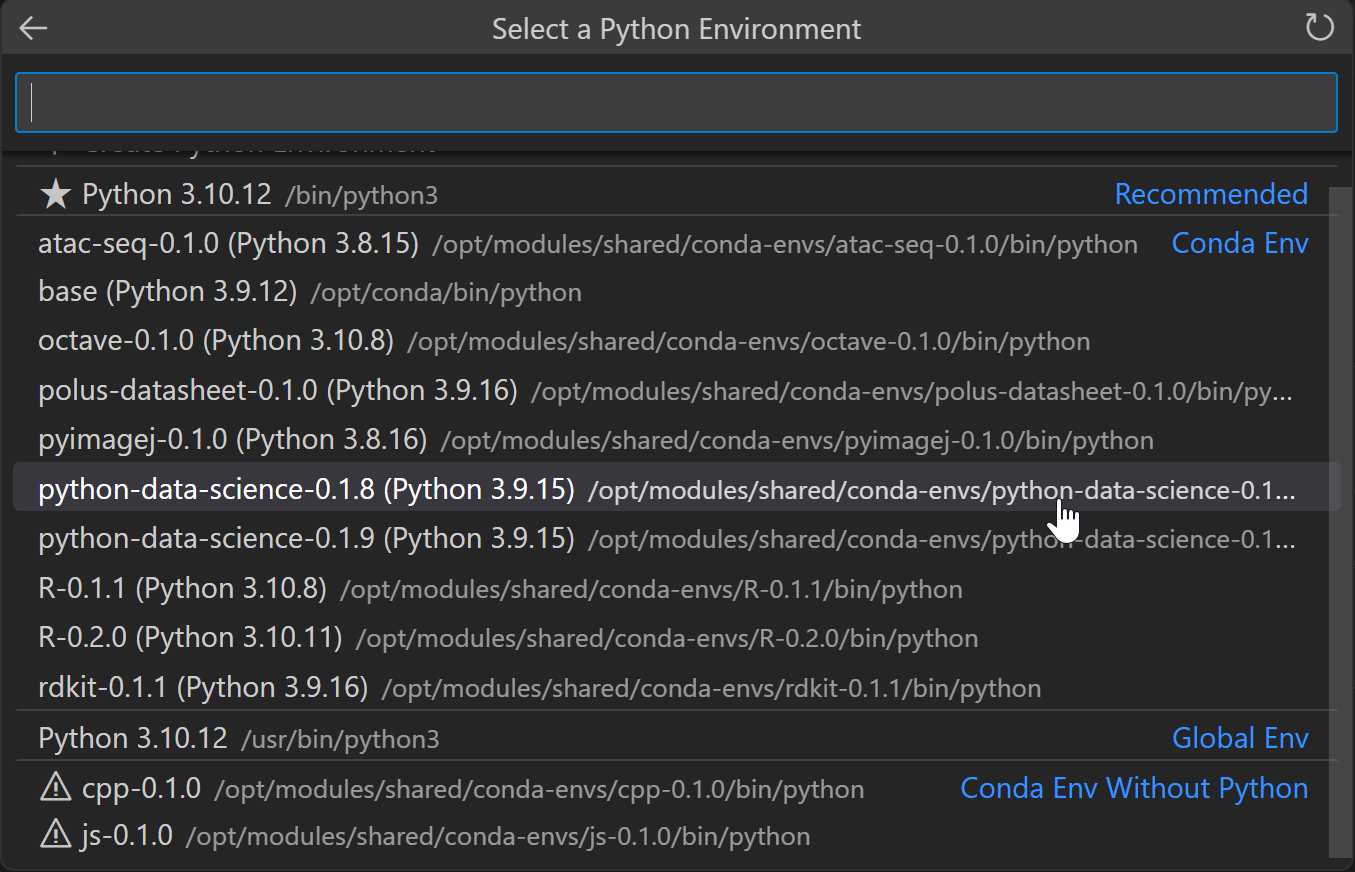
A screenshot of the VS Code kernel selection window
Reminder: If using %pip install solara in the first notebook
cell to install Solara, please remember to restart the kernel after
running this cell.
Write App Code
The following utilizes a simple example provided in Solara’s documentation to demonstrate the basic steps.
First, use import solara to call Solara into your script alongside
any other necessary dependencies.
import solara
Next, declare any reactive variables at the top level. In Solara web applications, reactive objects are primarily used to manage global states and are context-aware. This enables Solara apps to maintain separate values and independent states for each user session. Components using these variables will be re-executed when their values change.
For local or component-specific states, solara.use_state() is a more
appropriate function (see details
here). Additional details on
solara.reactive() are available
here.
clicks = solara.reactive(0)
Next, build components for your app. Users can create custom components
Next, add components to your app. Users can create custom components
without any special distinction from the built-in components provided by
the framework. To create a component, define a Python function decorated
with @solara.component. Single elements are taken as the component’s
main element. If multiple elements are created, they are automatically
wrapped in a Column component. See more information
here.
The code below will generate a button that, when clicked, will increase in the count displayed.
@solara.component
def Page():
    def increase_clicks():
        clicks.value += 1

    solara.Button(label=f"Clicked {clicks} times", on_click=increase_clicks)
Render App
Launch App From Python Script
In order to launch your app as a .py file, navigate to the terminal
window. Although Solara documentation notes that
solara run <appName>.py should launch the app (or even
notebook), the
VS Code instance on Notebooks Hub utilizes a different method.
Automated Extraction of Service Prefix ID
Create a new .py file inside your working directory. For simplicity,
it can be named prefix.py. Copy and paste the code shown below into
prefix.py.
# simple automated script for proper port forwarding of Solara app when launched inside Notebooks Hub VSCode instance

import os

# extract jupyterhub service prefix and modify for solara service prefix
jhsp = os.environ['JUPYTERHUB_SERVICE_PREFIX']
ssp = jhsp + 'proxy/8765'

print(ssp) # this will output the desired path to use
Navigate to your VS Code terminal window and ensure the terminal is
pointed to the proper working directory (e.g., ~/work/Solara). If
needed, this path can be changed using standard shell commands (e.g.,
cd <path/to/desired/directory>).
Use the following command to run the newly created prefix.py Python
script.
python prefix.py
Manual Extraction of Service Prefix ID
If you prefer to extract information manually, follow the steps provided below.
Inside your terminal window, run printenv JUPYTERHUB_SERVICE_PREFIX
to extract service prefix information. This should return a path
that includes your email and server instance IDs on Notebooks Hub. For
example, the output should look similar to
/user/email-id/server-ID/.
printenv JUPYTERHUB_SERVICE_PREFIX
Copy the output path and append proxy/8765 to the end. The path
should now look similar to /user/email-id/server-ID/proxy/8765.
email-ID and server-ID placeholders with your
extracted information.app.py with the appropriate filename of your Solara app.export SOLARA_SERVICE_PREFIX=/user/<email-id>/<server-ID>/proxy/8765
export SOLARA_APP=app.py
Lastly, run the following code to launch the Solara app from the terminal.
SOLARA_APP=$SOLARA_APP uvicorn --workers 1 --root-path $SOLARA_SERVICE_PREFIX --host 0.0.0.0 --port 8765 solara.server.starlette:app
Following the steps above should enable proper port forwarding and render the specified Solara application as seen in the gif below.
Display App Inside Jupyter Notebook
The following cell is necessary to render the Solara app inside Jupyter
notebooks. The display(Page()) line can be taken out when launching
solara as a web app, but it is necessary here inside the Jupyter
notebook.
The next cell should generate a live output when the cell is run. The button is clickable and will display a click count that increases in real time.
display(Page())

A gif demonstrating the live output of the clickable button
Quit App
In order to quit the running application, open the browser tab
containing the VS Code and use Ctrl+C in the terminal to stop the
app.
Additional Information
Port Forwarding
Applications are forwarded into different ports. A pop up notification will appear at the bottom right corner of VS Code. Click Open in Browser to open a new tab window showing the running application.

A screenshot of the port forwarding notification
If this notification does not appear or disappears after some time, navigate to PORTS in the terminal panel to see any running applications.

A screenshot of the PORT panel in VS Code
Additionally, a long list of items may accrue in the ports panel. These typically appear as the kernel is restarted when creating your Solara app inside Jupyter Notebooks. This is no cause for alarm and may be ignored.

A screenshot showing accrual of ports
Solara App “Anatomy”
Solara provides helpful overview of structure and content, referred to as Solara anatomy. The page provides the following image and may be helpful in explaining example code.

A descriptive image of Solara app anatomy
Reuse .py code inside .ipynb notebooks
One feature of Solara is the ability to reuse code. This makes it easy
to embed Solara app.py scripts inside Jupyter notebooks. This can be
incredibly helpful when wanting to compile multiple Solara apps into one
interactive notebook.
To do so, ensure the desired .py files are in the same directory as
your .ipynb file. The user can then call the .py files inside
notebook cells. All .py files to be called must have different file
names, and the .py extension must be dropped.
For example, the following code will call the sol.py app and import
the Solara component Page that was defined inside sol.py.
display() will then display the the component.
from sol import Page
display(Page())

A screenshot showing successful import of app module
If the .py extension is not dropped, the call will fail.

A screenshot showing failed import of app module
Differences Between Solara and Streamlit
Solara and Streamlit both enable easy building of web applications. Details on differences between each tool can be found inside Solara’s documentation here and from other sources on the web (for example, see here).
ipywidget ecosystem.