Creating an RShiny App
Please refer to the RStudio page for detailed instructions on launching an RStudio instance on Notebooks Hub.
Open RStudio
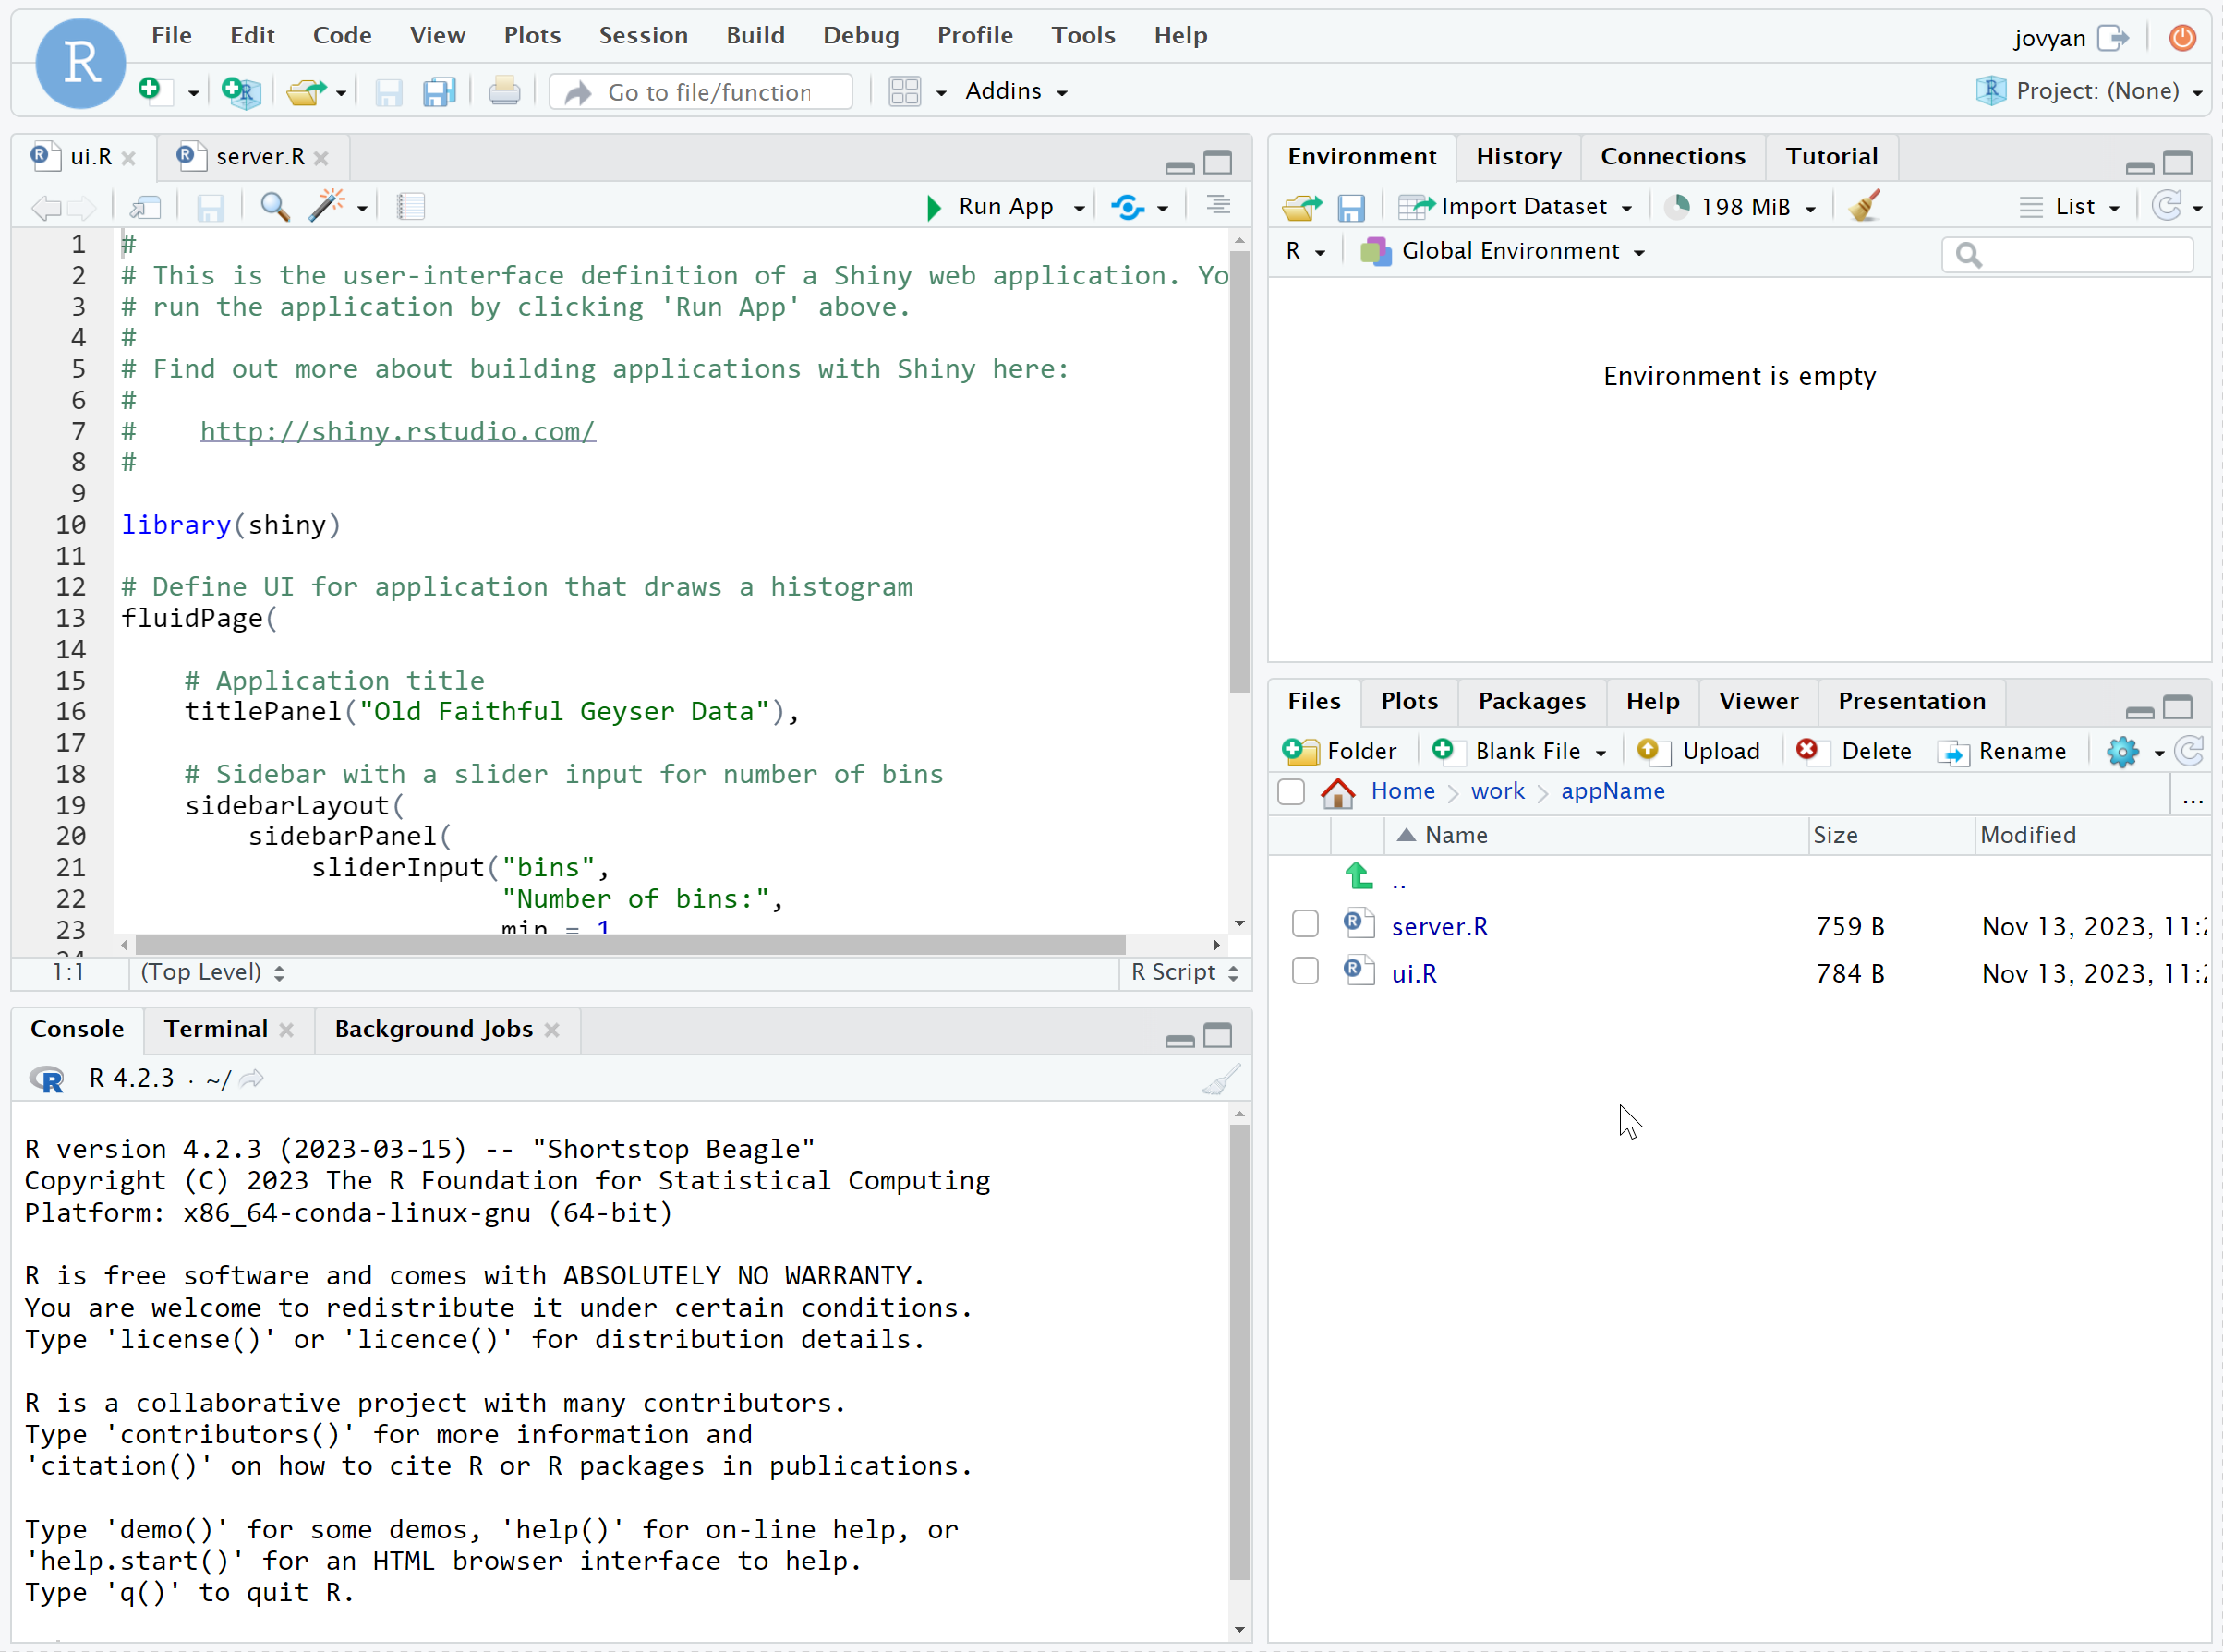
There are many ways to create a new file in RStudio. It is best practice to create new files inside R projects for isolated, self-contained working environments. See details here.

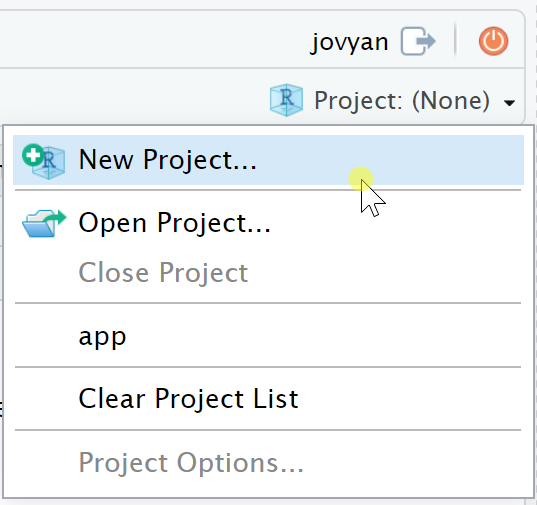
A Screenshot of the RStudio Control Panel
Create a New Shiny Project
First, create a new project directory. In the Navigation Toolbar, select the New Project icon on the left or use the Project Explorer dropdown on the right.
![]()
Follow the steps in the New Project Wizard.
Create project by selecting New Project.
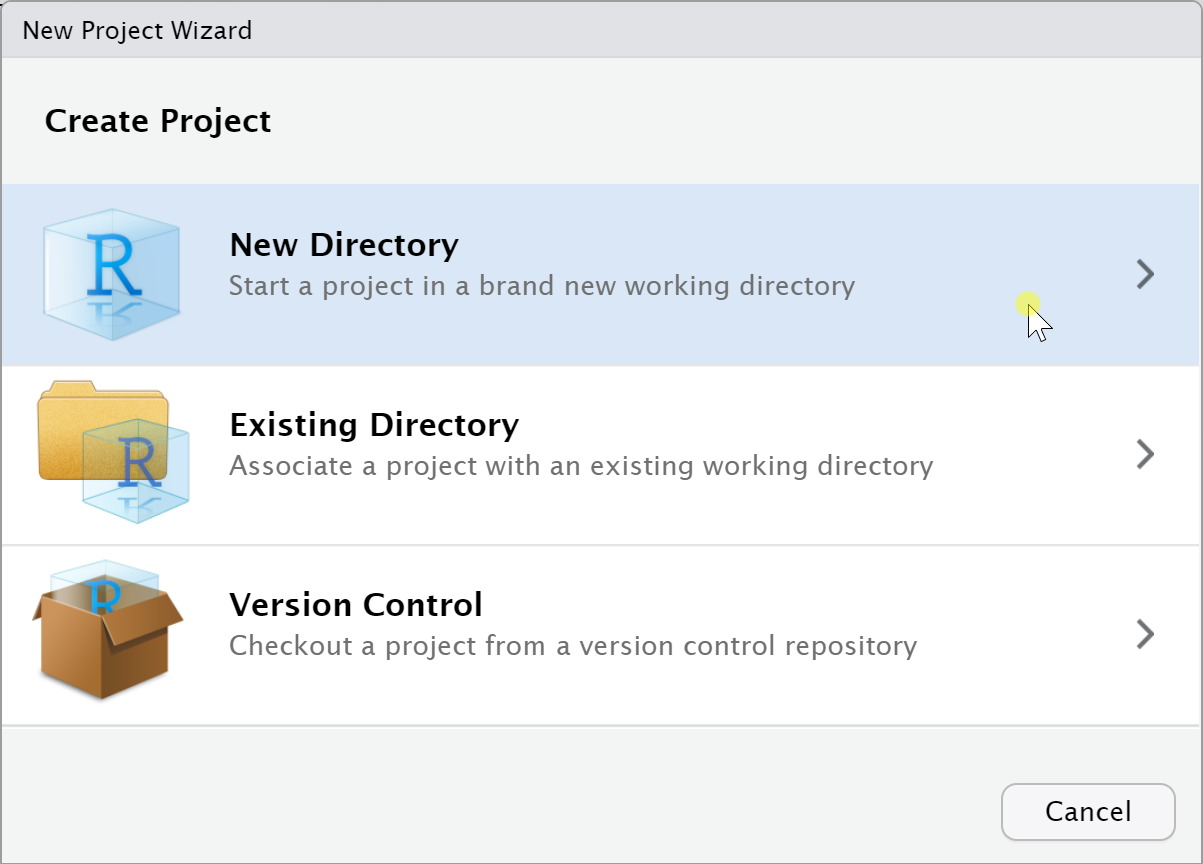
A Screenshot of the RStudio New Project Wizard
Select desired project type. In this case, choose Shiny Application.
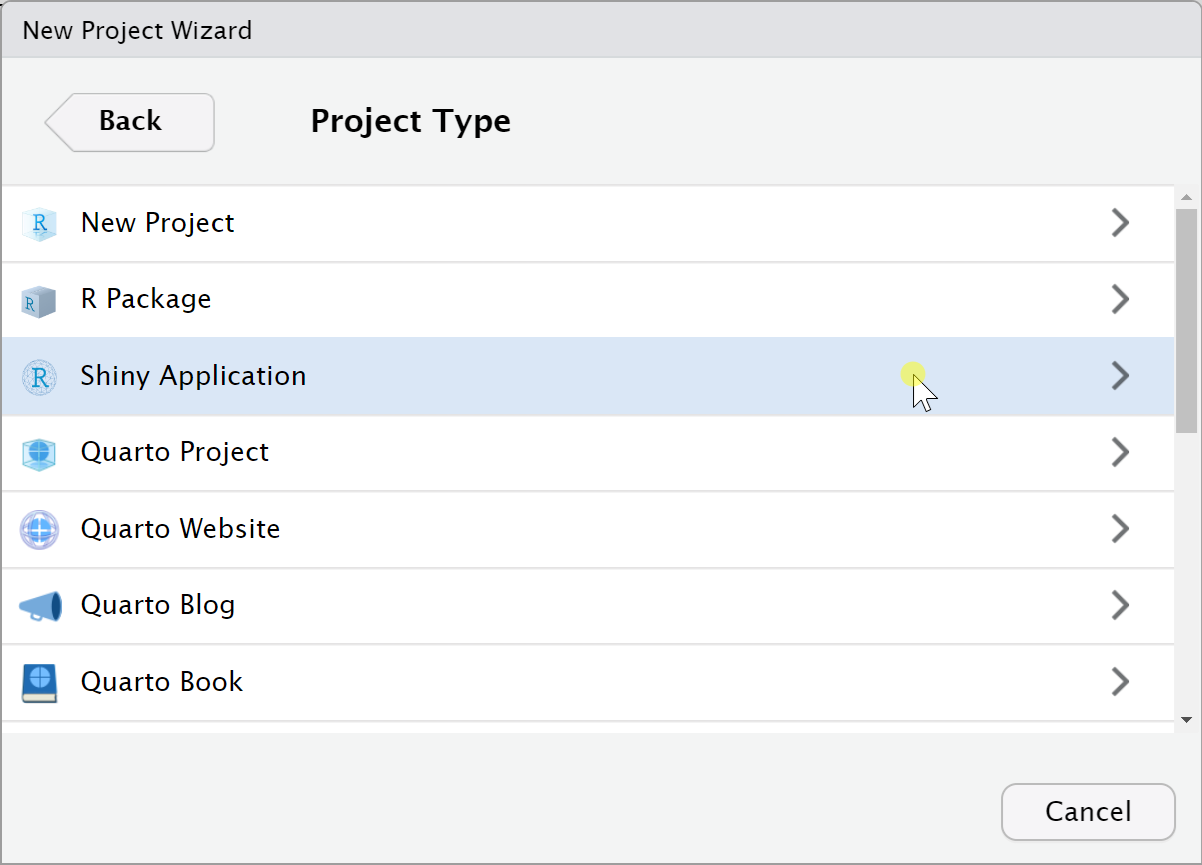
A Screenshot of the RStudio New Project Wizard
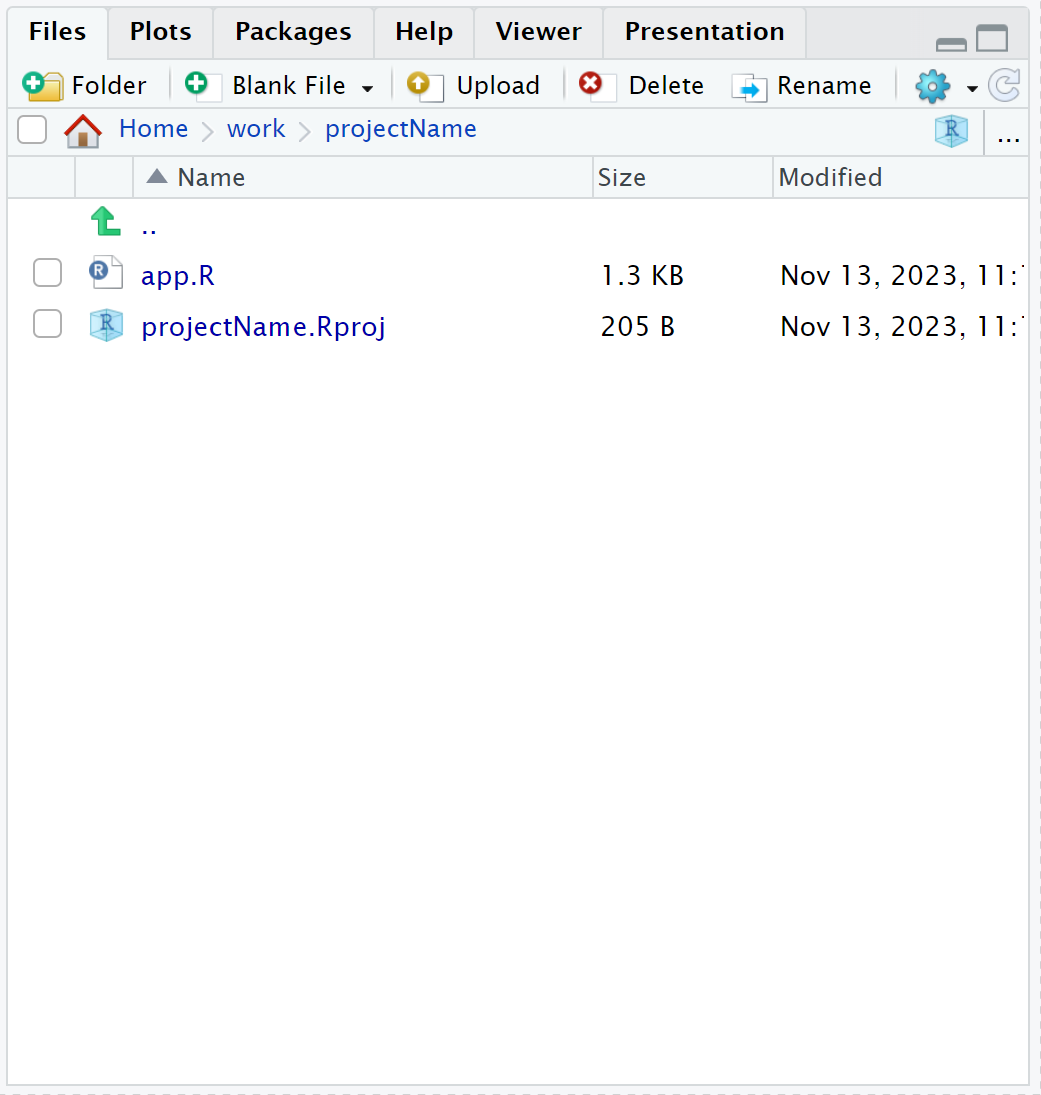
Name your project directory (e.g.,
projectName) and, if applicable, navigate to the desired parent directory (e.g.,~/work) in which to place your project. This will create a project folder (e.g.,projectName) containing two files: a Shiny app file (e.g.,app.R) and an R project file (e.g.,projectName.Rproj). Note: Files saved to your personal work directory will persist across user sessions.
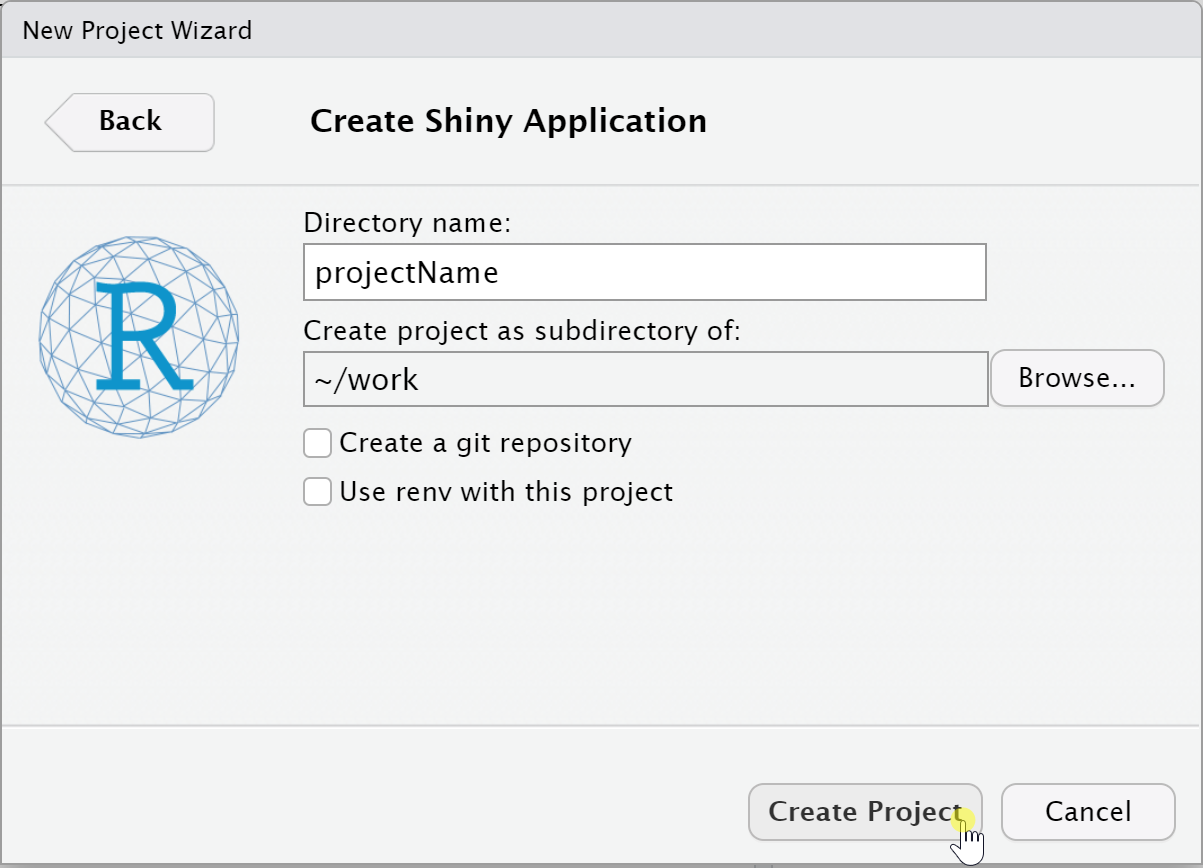
A Screenshot of the RStudio New Project Wizard
A Screenshot of the RStudio New Project Wizard
To close or switch projects, use the Project Explorer dropdown and select Close Project.
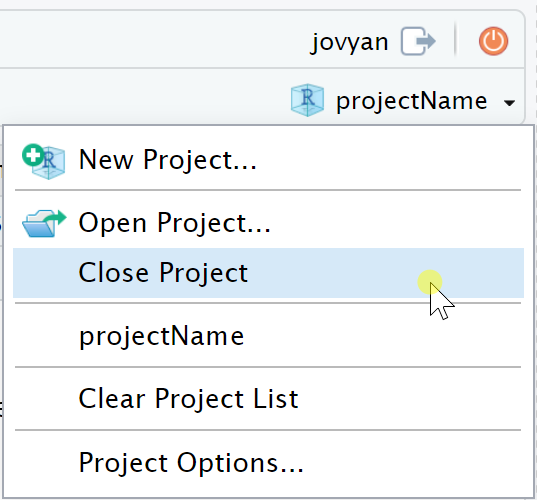
A screenshot of the RStudio project panel to close project
Create New Shiny File(s) - alternative method
Alternatively, new Shiny files can be created without the Project Wizard.
Select File > New File > Shiny Web App…. For a quicker method, click the New File icon and select Shiny Web App.
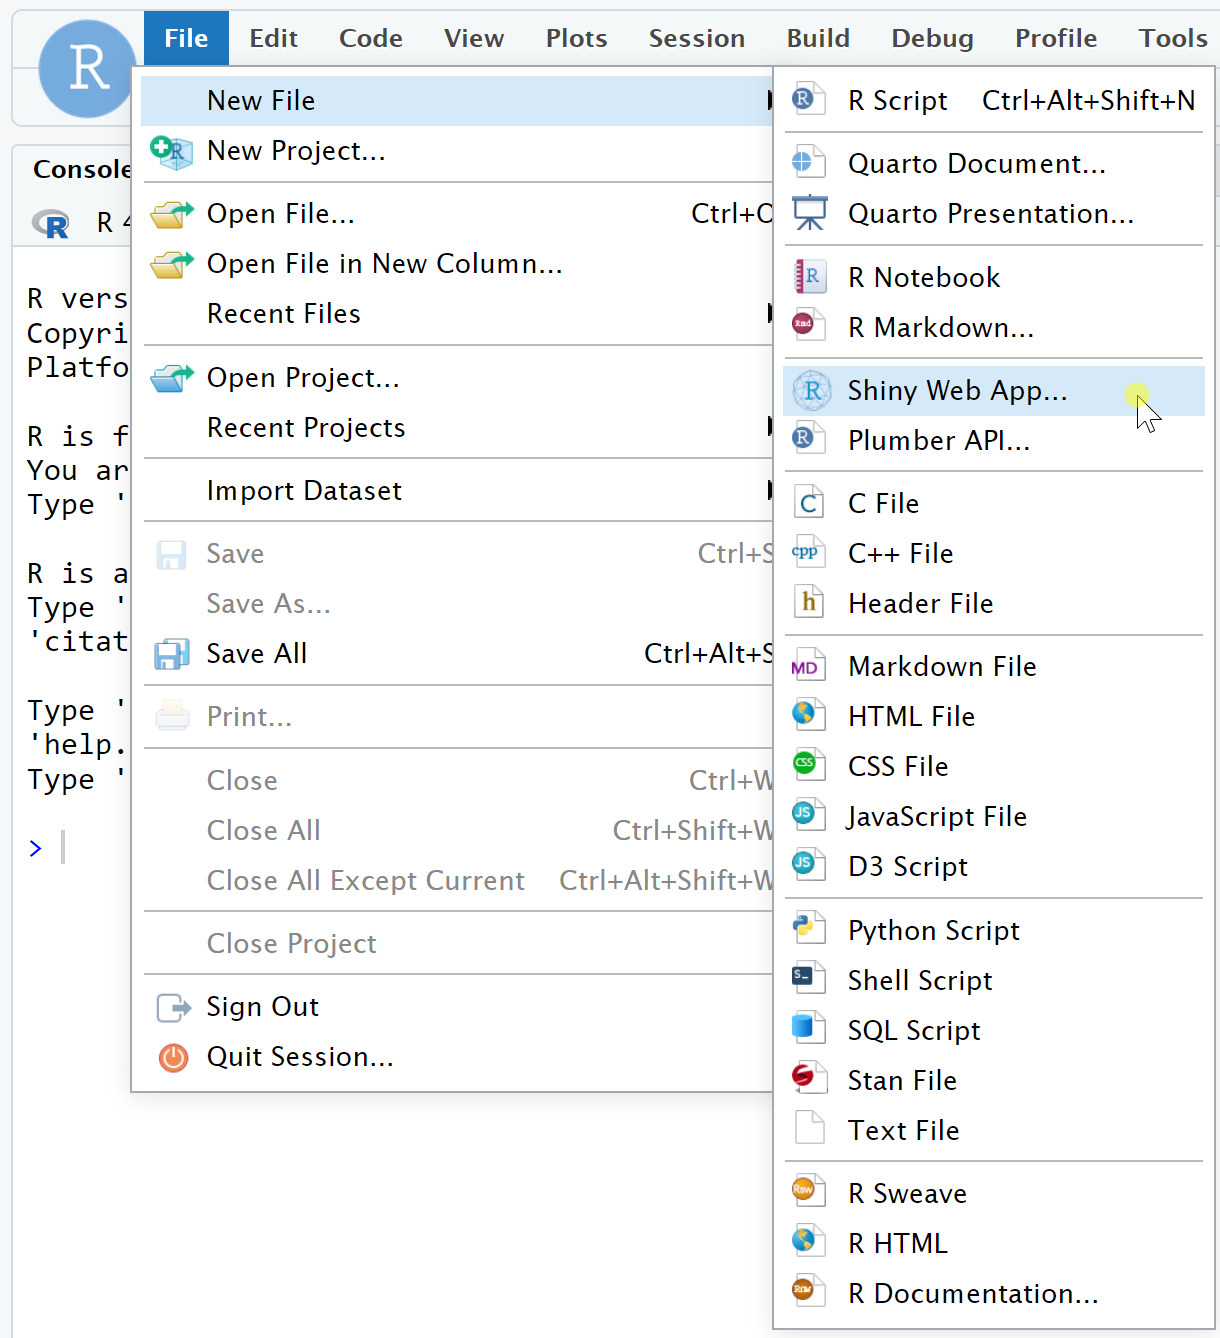
A screenshot of the RStudio new file panel
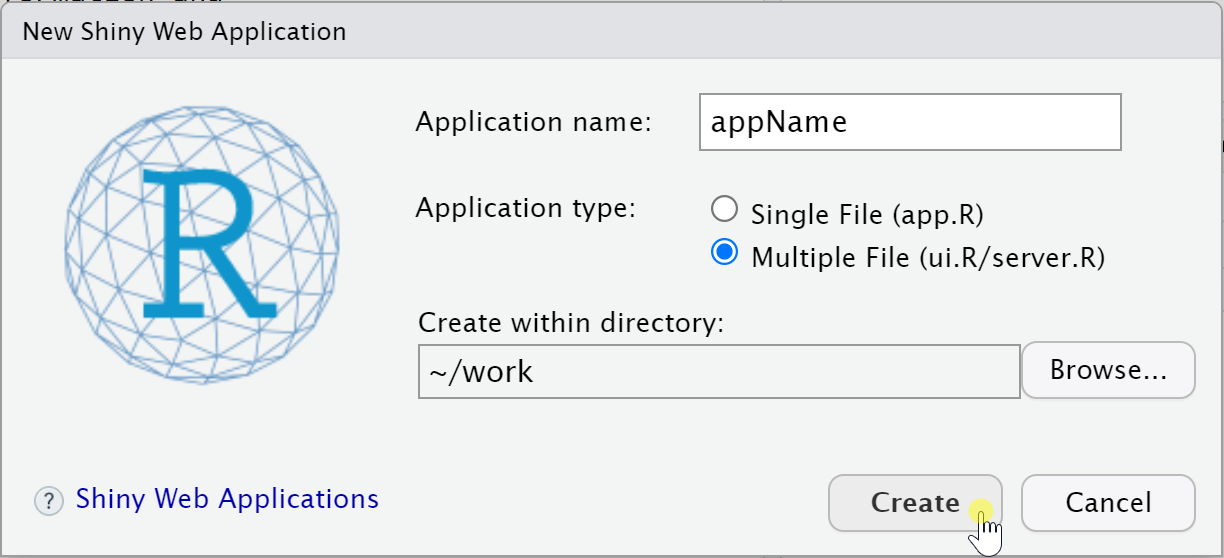
Name your application (e.g.,
appName). This will generate a folder inside the selected parent directory (e.g.,~/work), similar to creating a project directory noted above. Then, select whether to create a single or multiple file(s) for your application. Note: Files saved to your personal work directory will persist across user sessions.
Single File (app.R): This option will create a single
app.Rfile for your application that contains all necessary Shiny app components. This is a useful option when creating smaller applications.Multiple File (ui.R/server.R): This option will create two files,
ui.Randserver.R, for your application that separates Shiny app components. This is useful when creating more complex applications with lengthy code.
A screenshot of the RStudio new shiny app modal
A screenshot of the RStudio with split app files
Install Shiny Package for R
The built-in R modules within Notebooks Hub come pre-configured with the
necessary R packages installed, including shiny. In order to confirm
shiny is installed, run system.file(package='shiny') inside the
R Console. If the package is installed in the loaded environment (e.g.,
R-0.2.0), the command will output the path where the package is
located.
system.file(package='shiny')

A screenshot of the R Console confirming installed package
If the package does not exist, no path will be returned (i.e., "").
To install, run install.packages("shiny") inside the R console.
install.packages("shiny")
Shiny Demos
Shiny has 11 built-in examples for demonstration. PolusAI also provides simple demos in the examples repo.
Using the R Console:
Load the
shinypackage by runninglibrary(shiny).The following examples can be run individually by entering
runExample("<example>").
library(shiny)
runExample("01_hello")      # a histogram
runExample("02_text")       # tables and data frames
runExample("03_reactivity") # a reactive expression
runExample("04_mpg")        # global variables
runExample("05_sliders")    # slider bars
runExample("06_tabsets")    # tabbed panels
runExample("07_widgets")    # help text and submit buttons
runExample("08_html")       # Shiny app built from HTML
runExample("09_upload")     # file upload wizard
runExample("10_download")   # file download wizard
runExample("11_timer")      # an automated timer
When running a Shiny app, the R Console will show an IP address indicating that the app is active and a stop icon in the top right corner of the console.
The active Shiny app will launch in a new window.
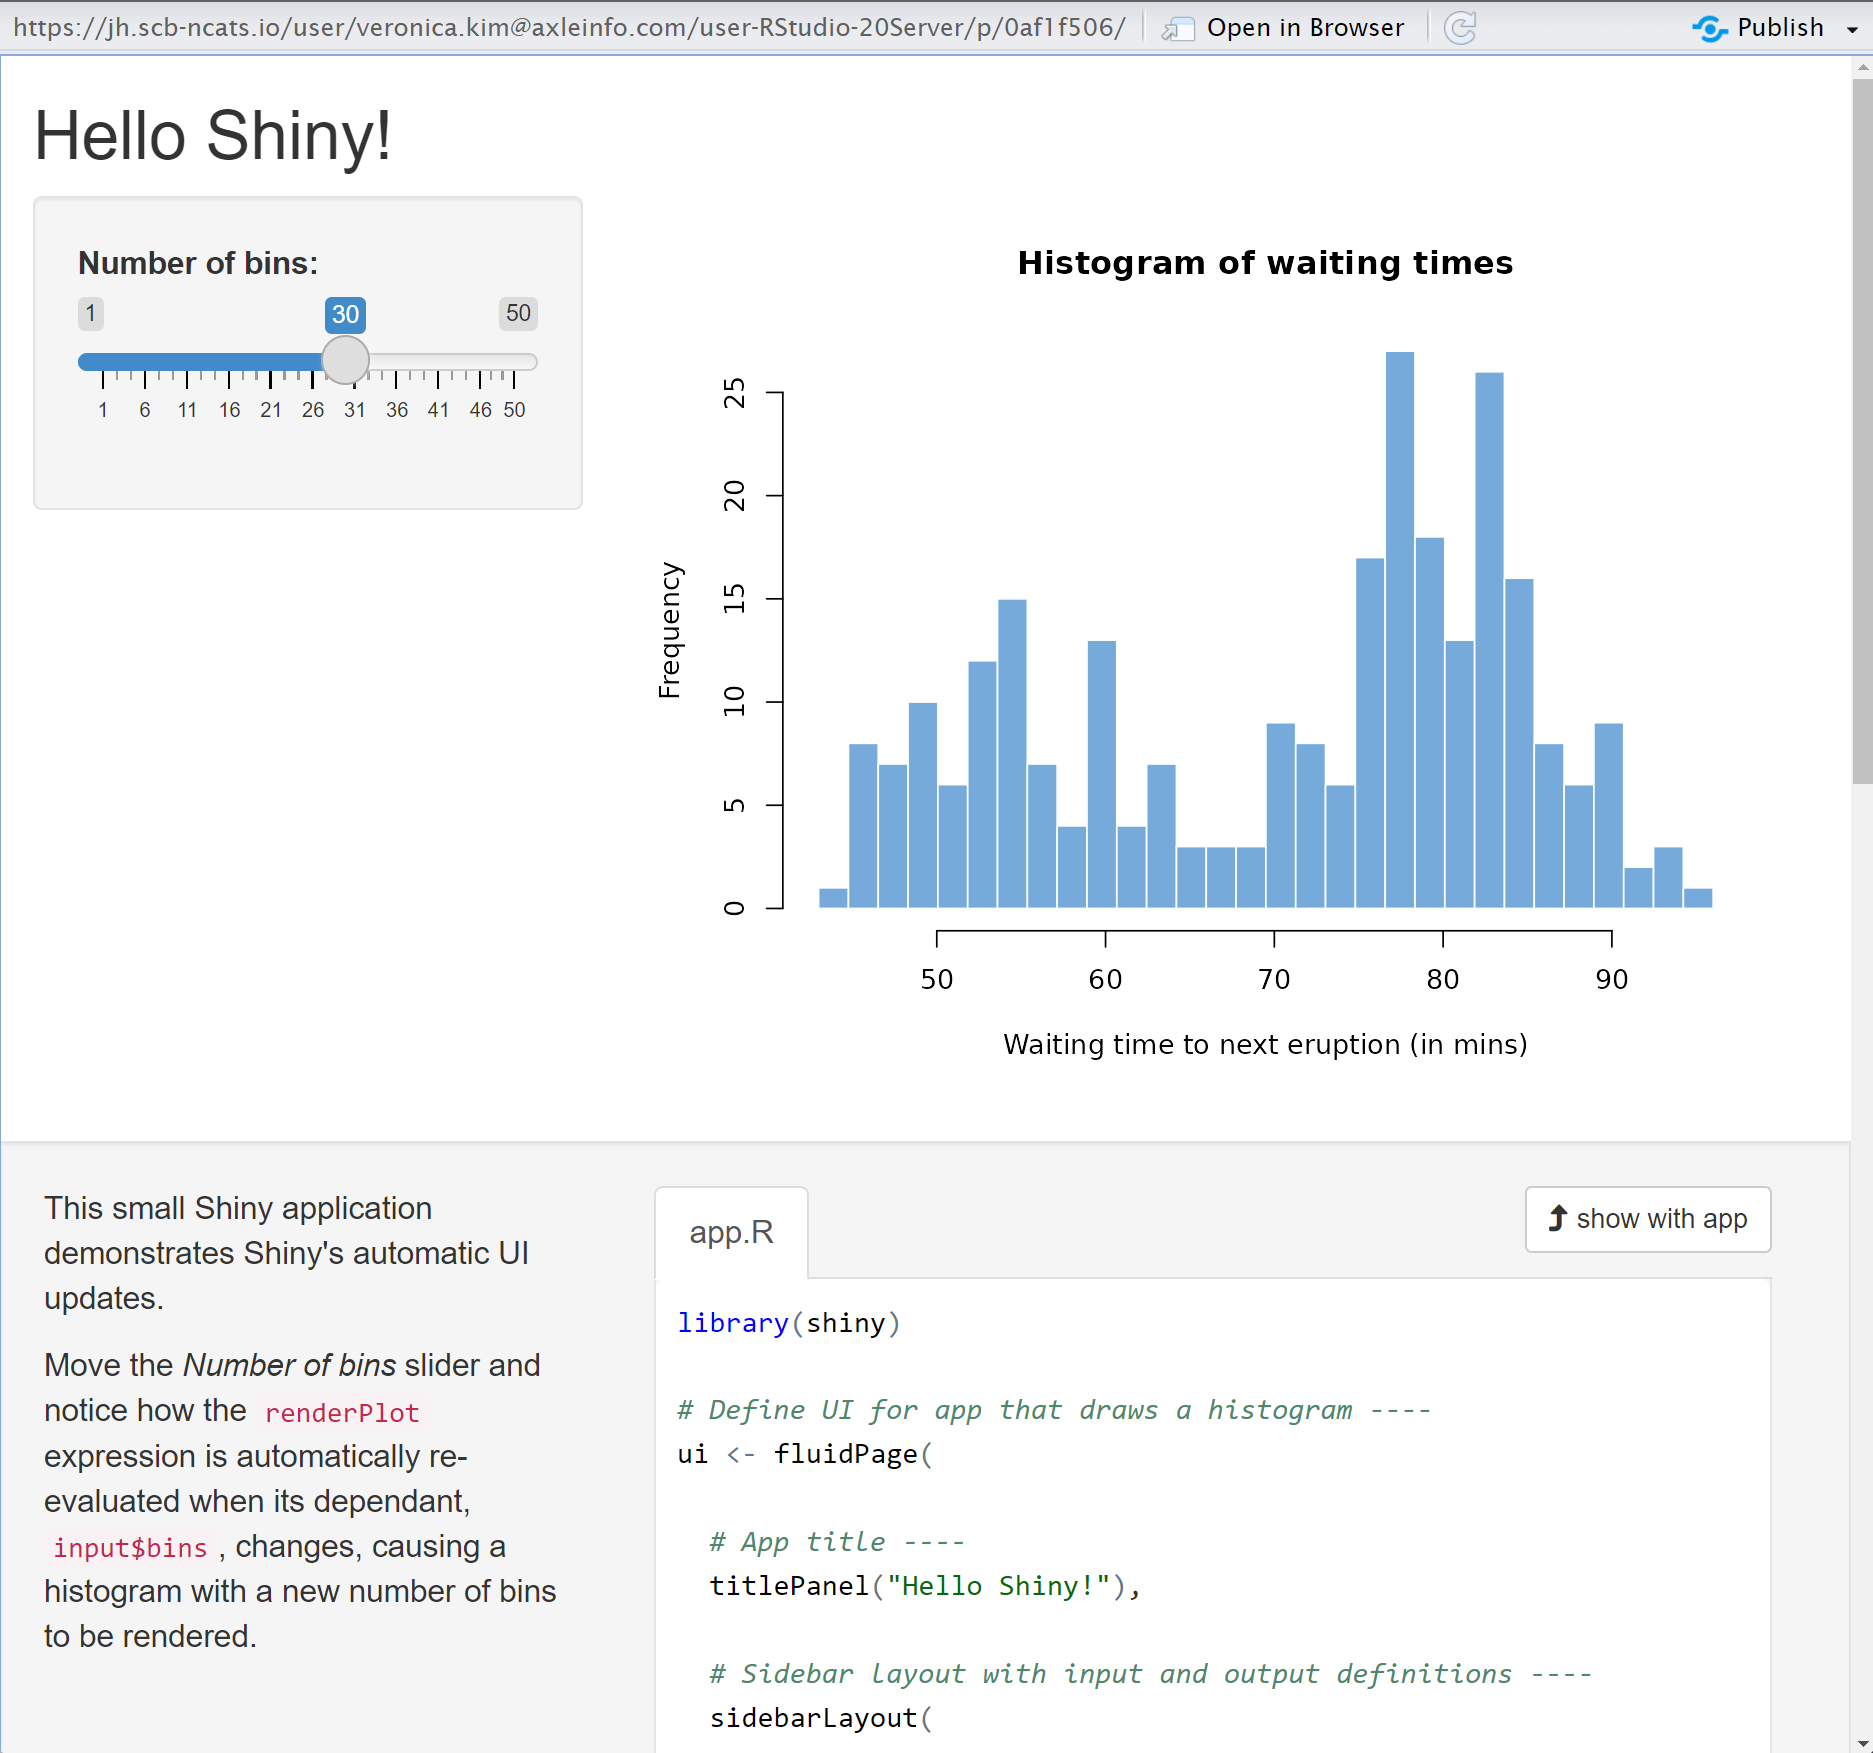
A screenshot of RShiny demo example 01_hello
Closing the app window should terminate the active run. This can be confirmed by checking the R console to see if the stop icon disappeared. If not, simply click the stop icon and the run will be terminated.
Shiny App Components
app.R
script:shinyApp function (i.e., shinyApp(ui, server))Often, these can be separated into individual ui.R and server.R
files, which is useful for apps with extensive code. Please visit
Posit’s Shiny
Basics
for helpful lessons to learn more.
library(shiny)

# Define UI ----
ui <- fluidPage(
  ...
)

# Define server logic ----
server <- function(input, output) {
  ...
}

# Run the app ----
shinyApp(ui = ui, server = server)
Run App
Apps can be run with runApp("dirName") if app.R lives in
directory dirName/.